Monthly Archives: August 2021

What is layer styles in Photoshop?

Home  »  Tutorials   »   What is layer styles in Photoshop?

What is layer styles in Photoshop?

By | June 1, 2017

Layer Styles are special effects that you can easily apply to separated layer in Photoshop in order to change the appearance of something in a very short time. They can be presented, editted or saved for later.

layer-style-1

Use available styles

layer-style-2

Photoshop supplies a great amount of layer styles. You can go to Window > Styles > Style Palette, choose a layer you want from Layer Palette and then pick any layer style you need.

layer-style-3

After applying a layer style, the effect can be seen, repaired, counteracted or reactivated in the Layer Palette. The applied effect will show up a circle with the letter “f” next to the layer name. To expand or fix the applied effect, click on the arrow next to “f”. You can also change style for layer quickly by double-clicking on the “f” icon then go to Layer Style Options and you can easily customize your Layer.

layer-style-4


Creat effects in own style

To create your own effects, you need to go to Layer > Layer Style > Blending Options or right click on the layer and choose Blending Options”. I will explain each part on Blending Options panel below:

layer-style-5A. Styles: The list of the available styles that Photoshop supply.

B. Effects: Types of effects that you can make for your layer. Just clicking on the name of each effect and adjust values  in C part until you pleased with your result.

C. Options/Settings: When the name of an effect is clicked, its options will be displayed right here.

D. Layer Style Preview: Let you see your result in advance.

Layer effects are built by these minor effects, they are:

  • Drop Shadow: Create a shadow below the layer.
  • Inner Shadow: Create a shadow inside the layer.
  • Outer Glow: Create a light border outside the layer.
  • Inner Glow: Create a light in front of the layer.
  • Bevel and Emboss: Make a strong impression by creating shadow effect for the Layer.
  • Satin: Make the layer more silky and glossy.
  • Color Overlay: Paint a solid color for the layer.
  • Gradient Overlay: Paint a gradient color for the layer.
  • Pattern Overlay: Fill the layer by pattern
  • Stroke: Create border for the layer.


What is a vector image in Photoshop

Home  »  Vector download   »   What is a vector image in Photoshop

What is a vector image in Photoshop

By | August 4, 2014

Bitmap image and vector image

What is vector image in Photoshop CS6. When we start studying Photoshop, we can make image with fixed width and heigh size. These images are created by pixel, so that these images are called bitmap image. But It’s very difficult to change image size. Because when we zoom original images to have bigger images then save. We’re easy to see these images will be blured.

Example, in this image. We see the images is broken and blured

bitmap image

Bitmap image

To solve this problem, We have to create image with vector by Photoshop Software or another sofware allow to create vector graphics. We call them vector image. Vector images allow you to resize them. But image’s quality is still good. Of couse, these images won’t be blured. Vector images are popular used for making Logo. In the internet, vector images are used with SVG format.

Bitmap image and vector image

Bitmap image and vector image

Vector images help us to build hi-resolution pictures with any size.

In next post, I will write : difference bitmap image and vector image; how to create and make vector images by Photoshop.

Thanks for your reading ! Hope you success !

Author: Admin PhotoshopTip

Hello, I’m Hanna Kim. I love Photoshop and like designing web with Photoshop. I will try to post more tutorials. Please press LIKE or G+ button if this article is useful.

What is a bitmap image in Photoshop

Home  »  PSD file   »   What is a bitmap image in Photoshop

What is a bitmap image in Photoshop

By | August 3, 2014

creating bitmap image in photoshop-cs6

What is a bitmap image in Photoshop CS6. When we launch Photoshop CS6, We can create an image with fixed width and height size. That file are saved with PSD or BMP file. By this way, you can make a bitmap image. Computers use binary to store data, in which only bits of 0 and 1 are used. A bitmap is a map of bits.

If you want to understand how a bitmap image displays. Frist, you should know the computer display screen. The display is made by “small square” called pixel. Either the pixel will be black or white corresponding 1 or 0. Each pixel in the bitmap might have 16, 24, or 48 bits of information associated with it.

pixel in photoshop cs6

Pixel in photoshop cs6

When you make a bitmap image by Photoshop. You have to fill information for your image

creating bitmap image in photoshop-cs6

Creating bitmap image in Photoshop CS6

Because bitmap images are created pixel by pixel, they can be easily edited. Photoshop software allows you to add, delete, or change the color of individual pixels. But When you want to resize bigger image, the image will be broken or blured. To slove this problem, You can build image by vector imgae. I’ll post an article about vector image in the next post.

Thanks for your reading !

Author: Admin PhotoshopTip

Hello, I’m Hanna Kim. I love Photoshop and like designing web with Photoshop. I will try to post more tutorials. Please press LIKE or G+ button if this article is useful.

The Most Basic Things You Musk Know Before Starting Designing

Home  »  Tutorials   »   The Most Basic Things You Musk Know Before Starting Designing

The Most Basic Things You Musk Know Before Starting Designing

By | October 5, 2017

Image searching to find inspiration

In today’s article, I will show you all the visual knowledge that I have gathered recently. I think it will be very helpful for your work and life. 

Search image – find inspiration

First, look for high-quality images for most types of projects. Not necessarily any project you also need the image, at least the image is also useful for you to find inspiration.
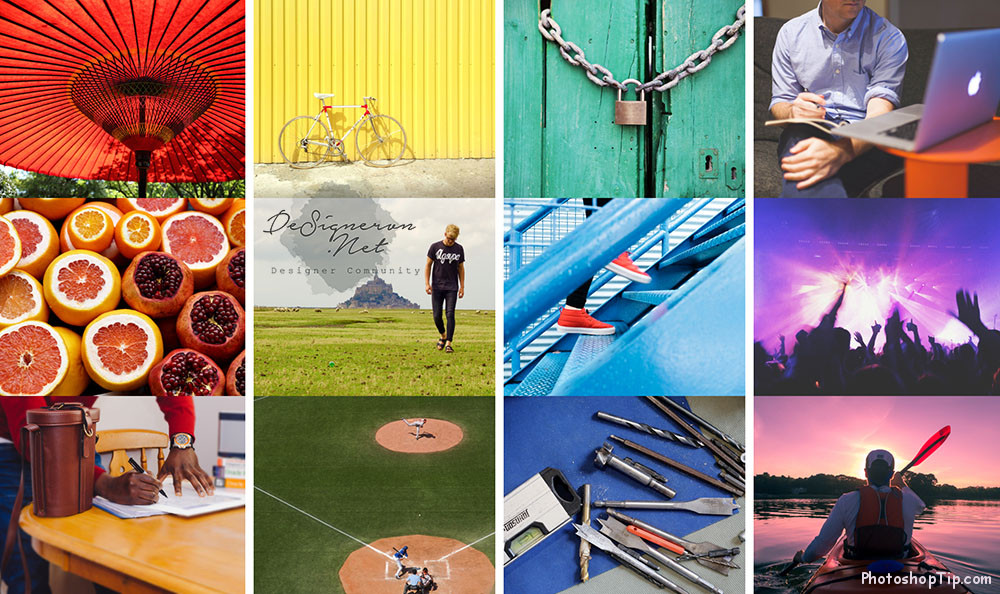
Image searching to find inspiration

Use Stock

If you have photography skills and have a camera, you can create your own photos to suit your own projects! If not, that is normal. There is a myriad of online resources that provide free stock images to help with your work. You can refer to 30 Free Stock Website for Designer.

most_common_images_stock_site

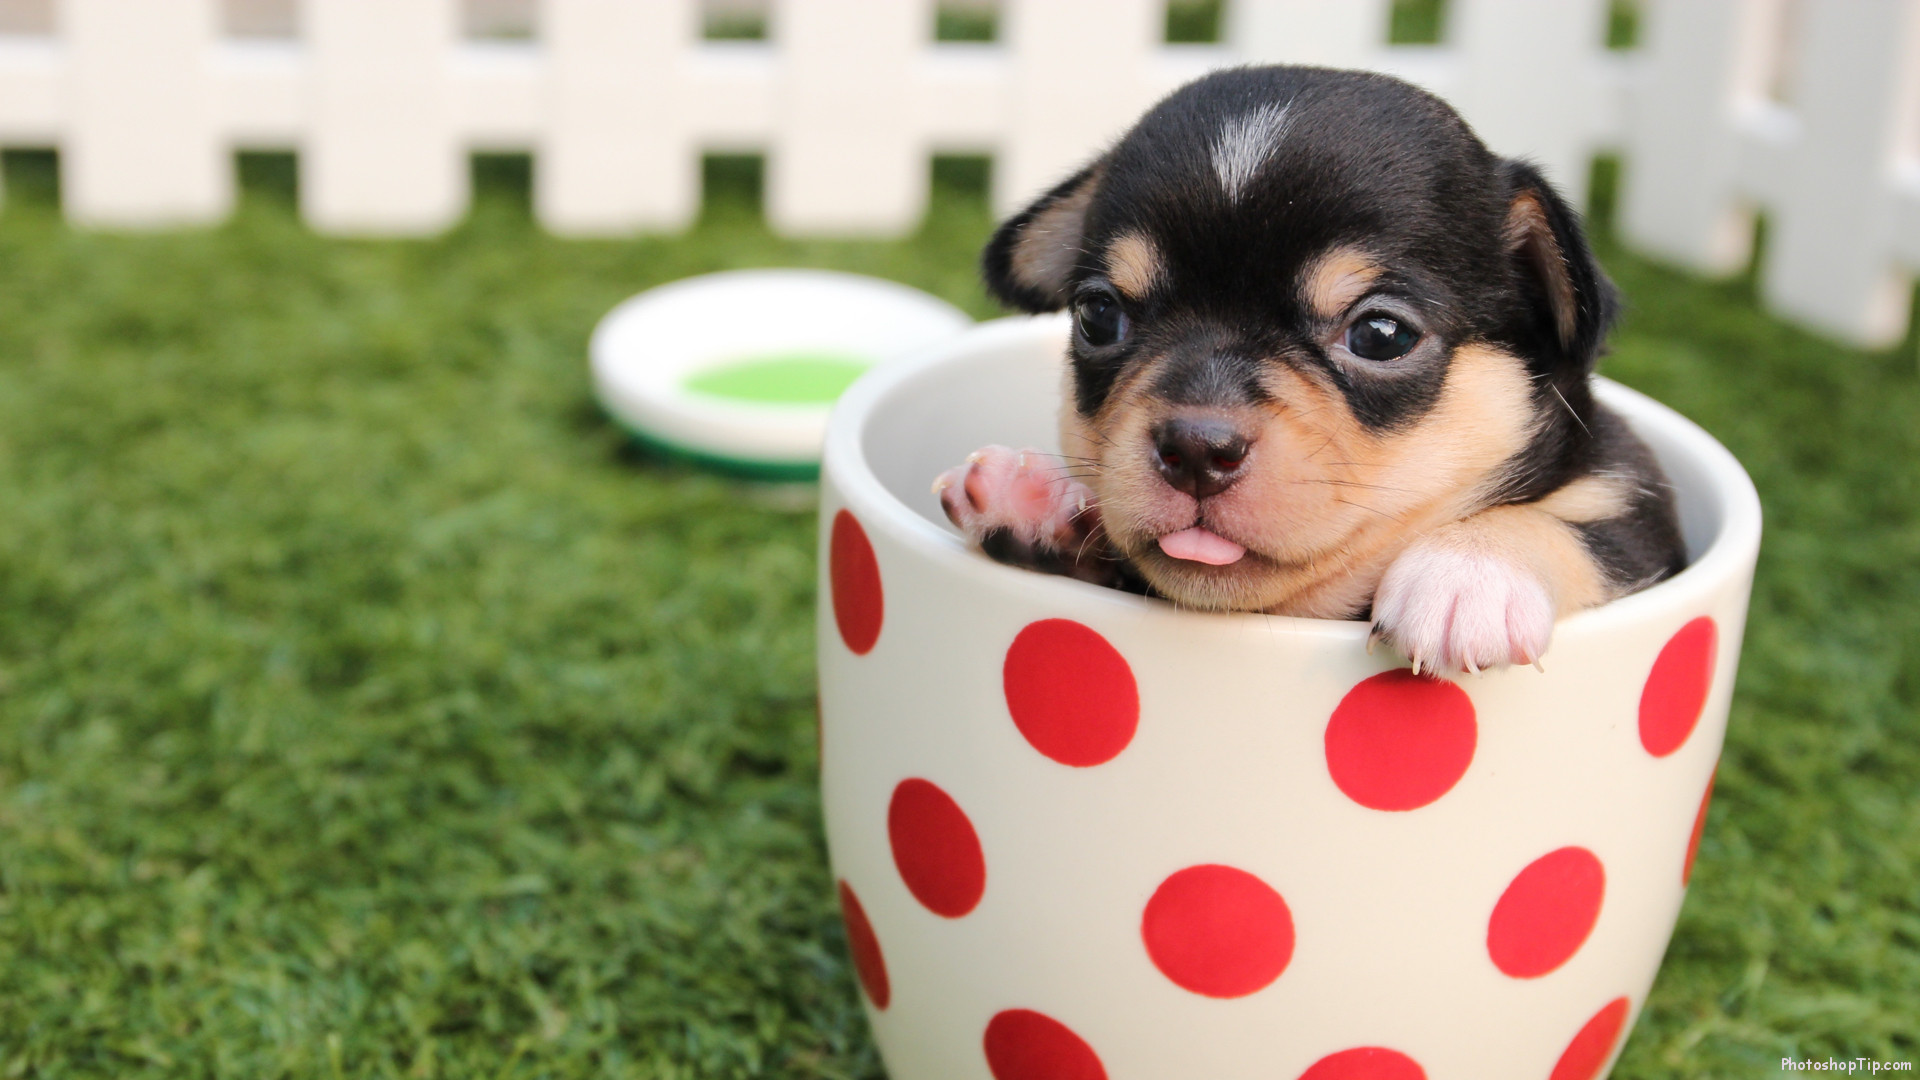
The truth is most people (including professionals) rely on free or low-cost images called Stock. Stock is perfect when you need something specific, such as a picture of a small dog in a cup of tea and you do not have the time or do not know how to create it yourself.

most_common_images_stock_site

Choose Stock Effectively

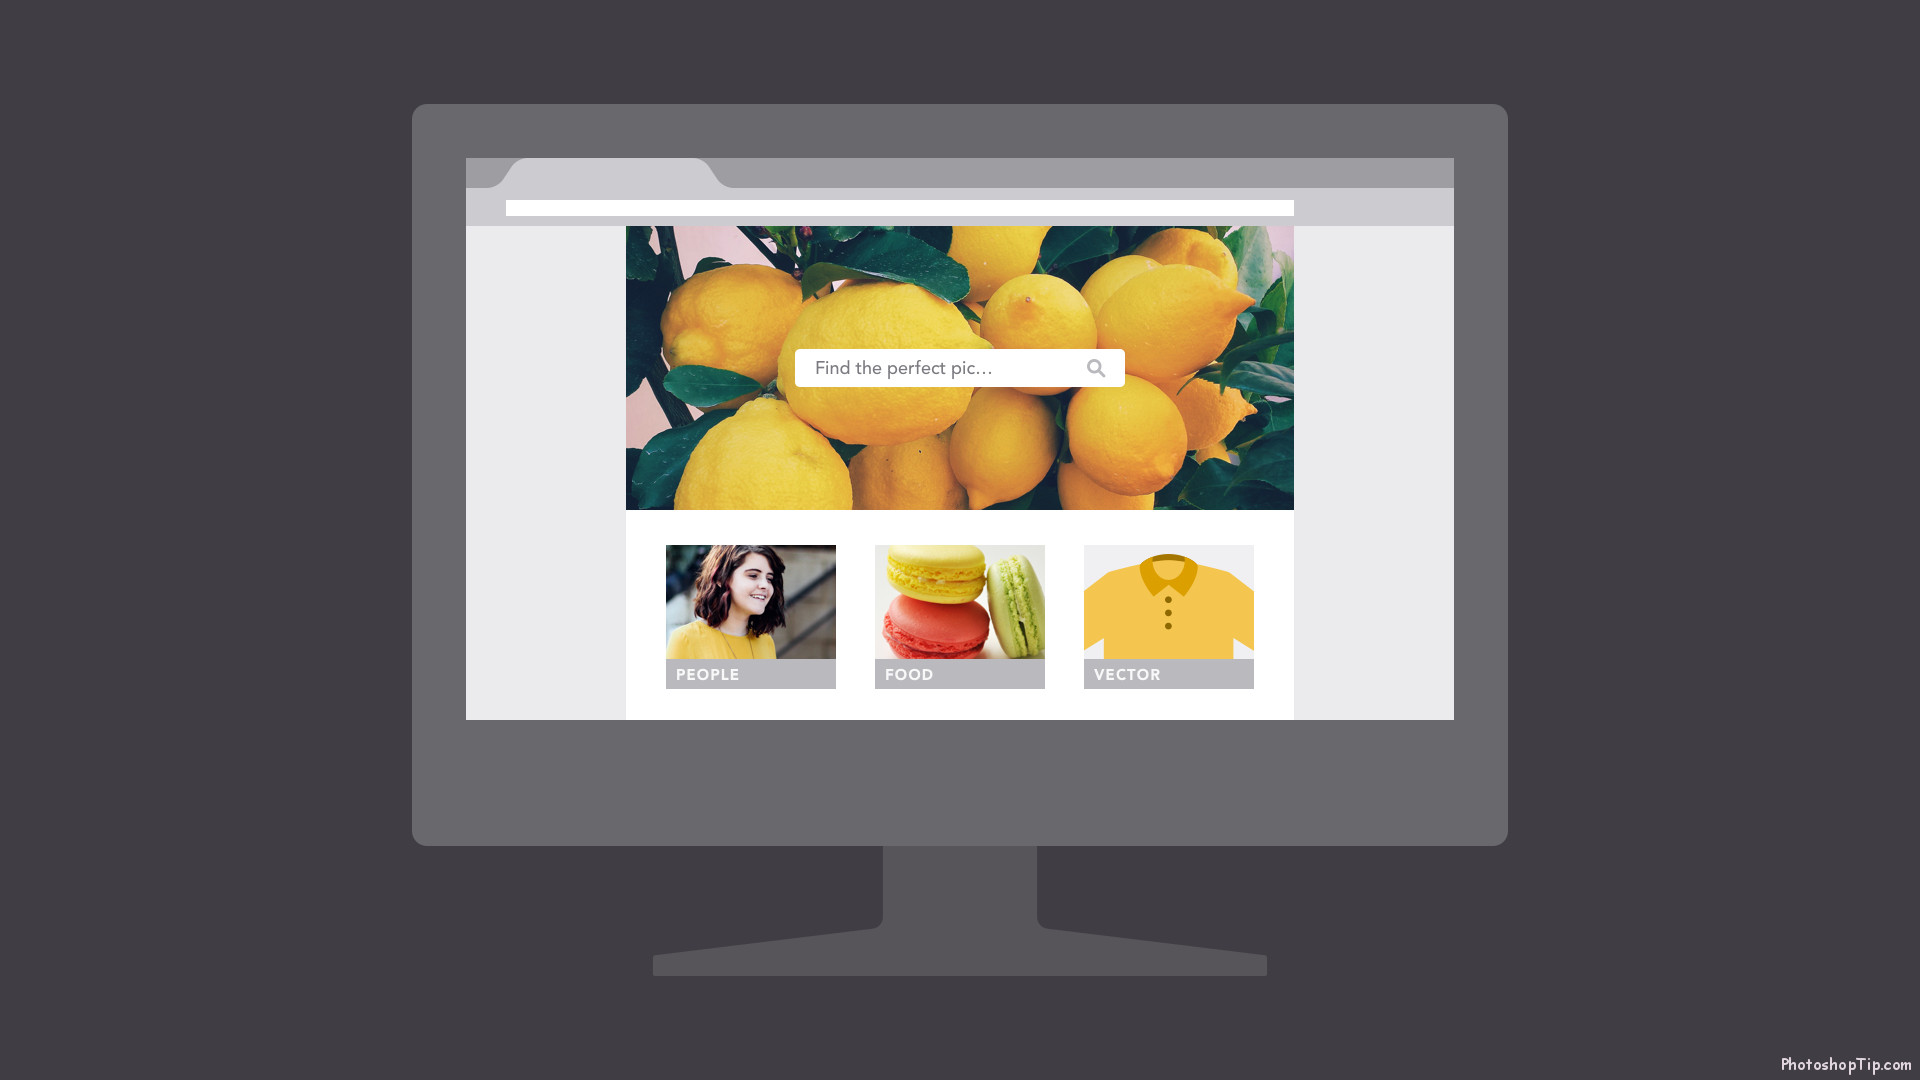
Most websites allow you to browse or search for their services. Search for results that are relevant to your project.

choose stock effectively

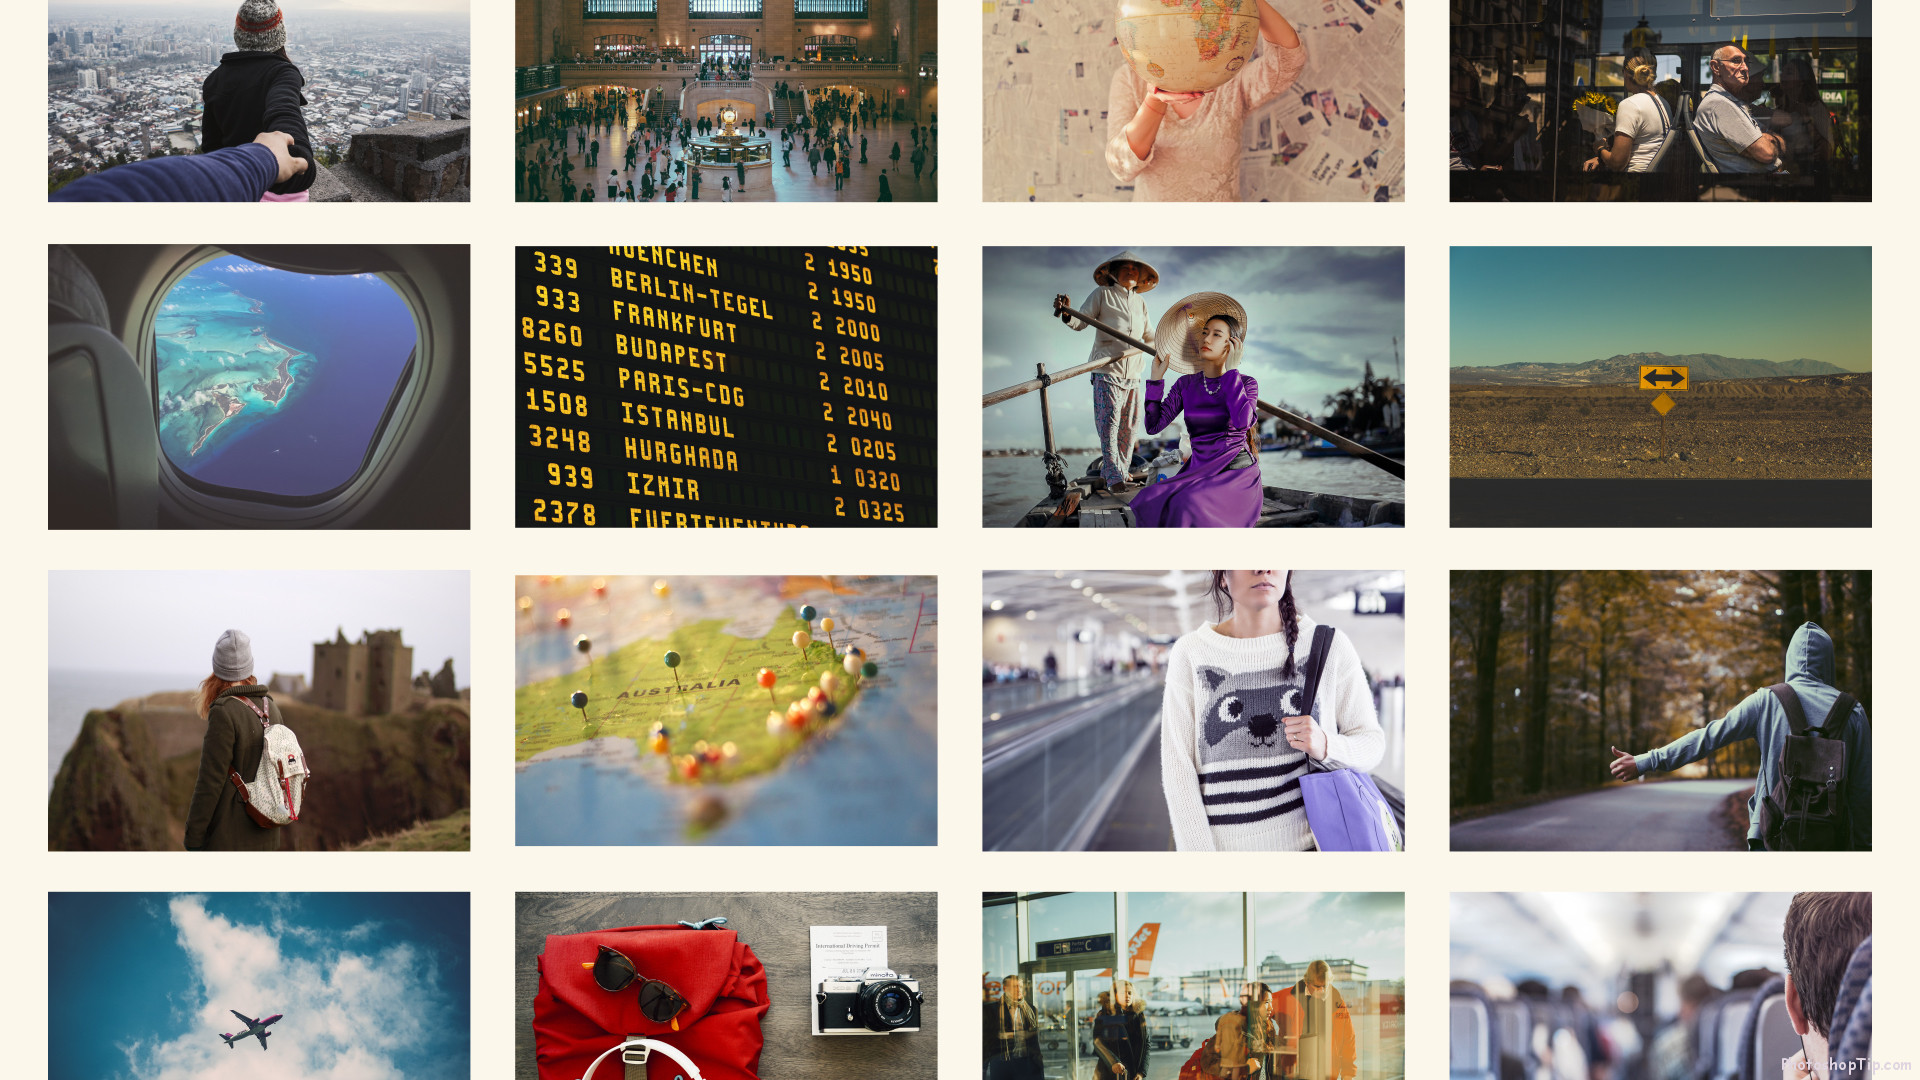
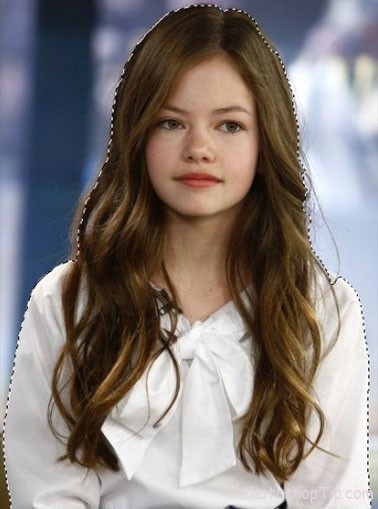
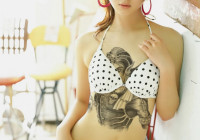
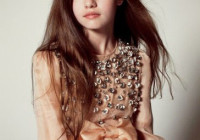
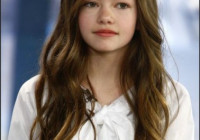
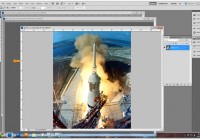
In this example, we searched “travel” and we can see many images about travel appear. Choose the images to feel real, there are differences but may include the story.

The right to use images

Almost every Stock image has a license to tell how it can be used. Some allow you to edit or change textures. But others are more limited and can have serious legal consequences if you not followed.

Before you use a Stock image, you need to make sure that you understand the license associated with it. If the license is not listed next to the image, check the Stock provider policy in the policies or FAQs section of the website.

Importance of quality

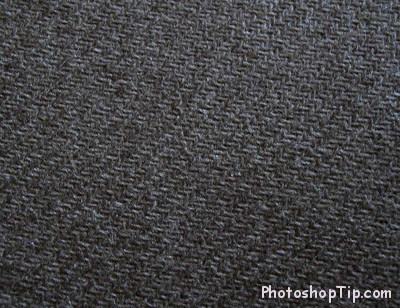
Of course, not just about content. There is also a technical aspect to the image, which can have a big impact on your design. If it is blurred or mistaken for your content.

Importance of quality when downloading stock

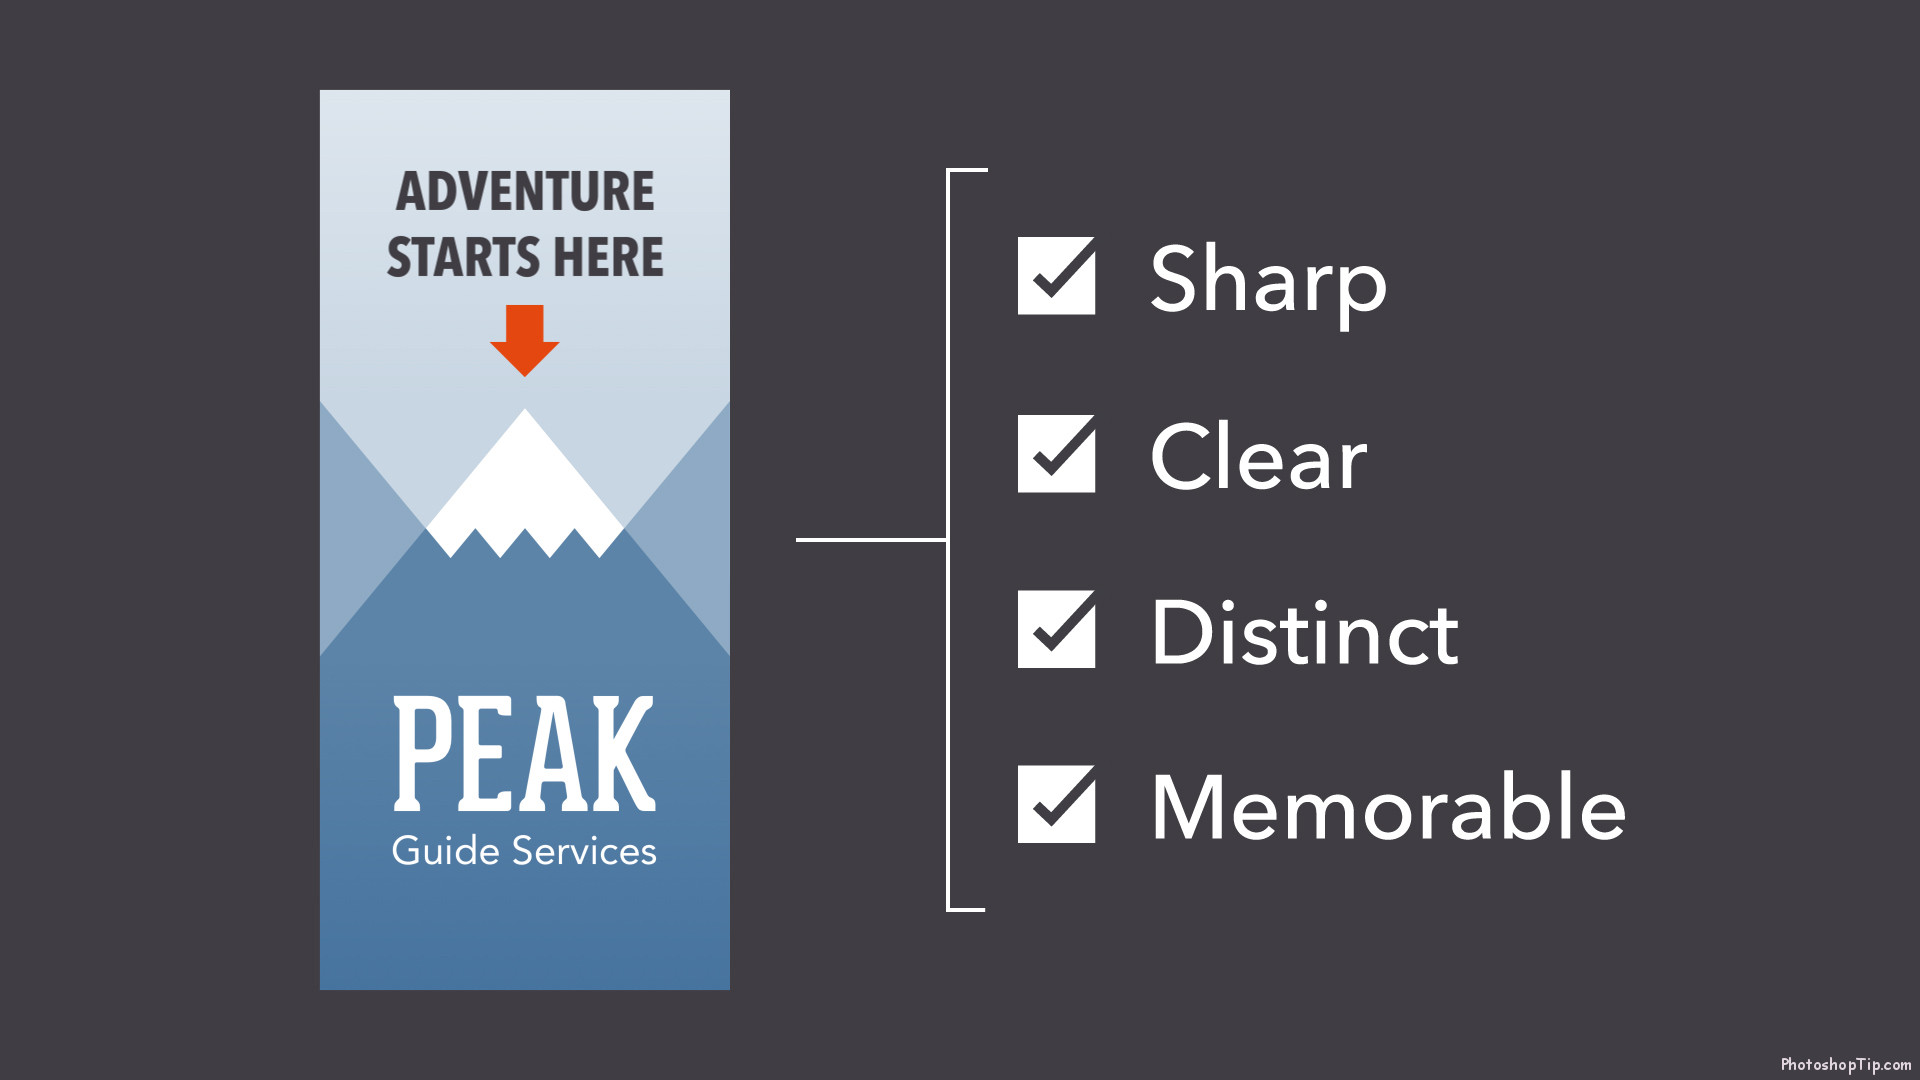
Find high quality images, sharp, clear and unmistakable. In general, the bigger the better, because the image resolution is large, easy to crop or reduce the size, depending on the needs of the project.

Importance of quality when downloading stock 1

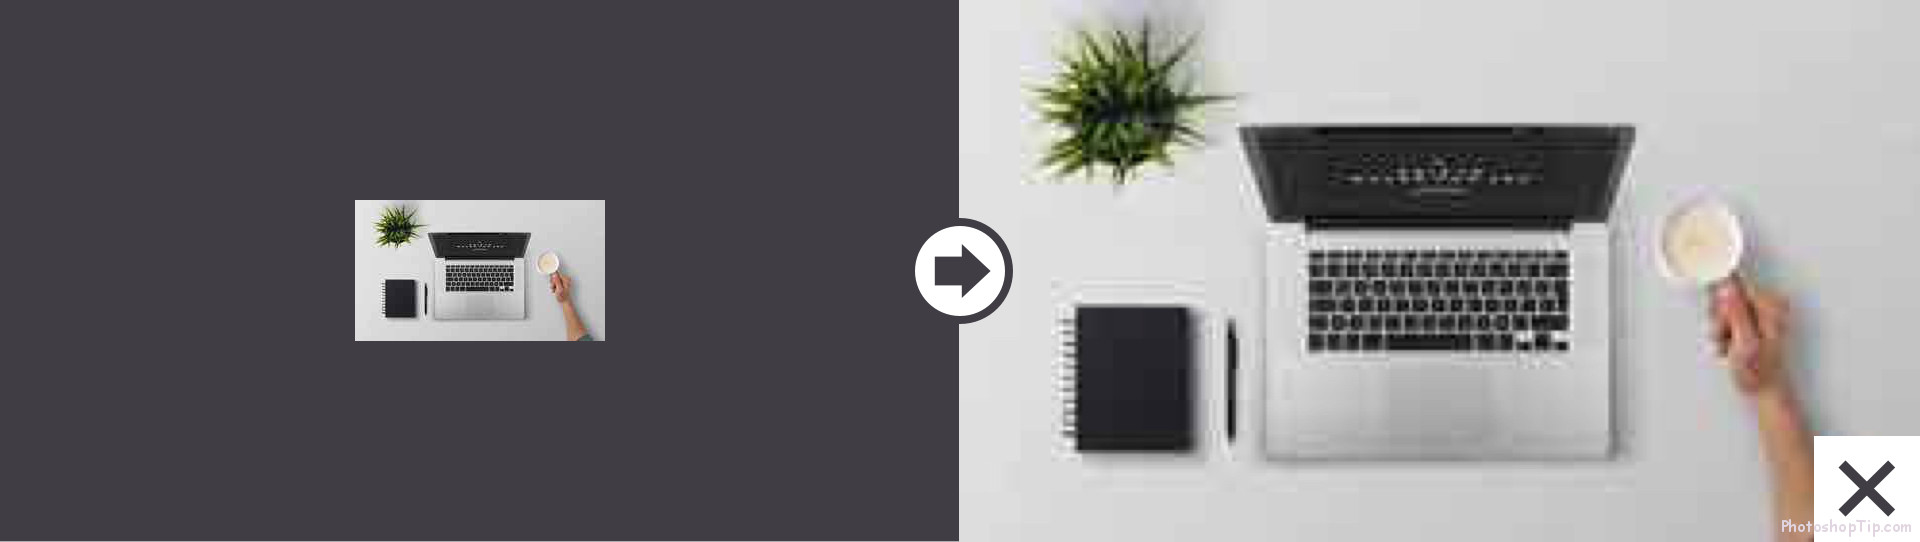
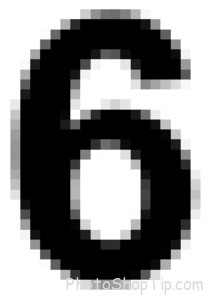
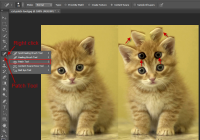
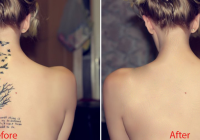
If you zoom in on a small image, making it larger than the original size, it will be significantly reduced in quality. Images will become blurred and/or distorted, as in the example below.

Importance of quality when downloading stock 2

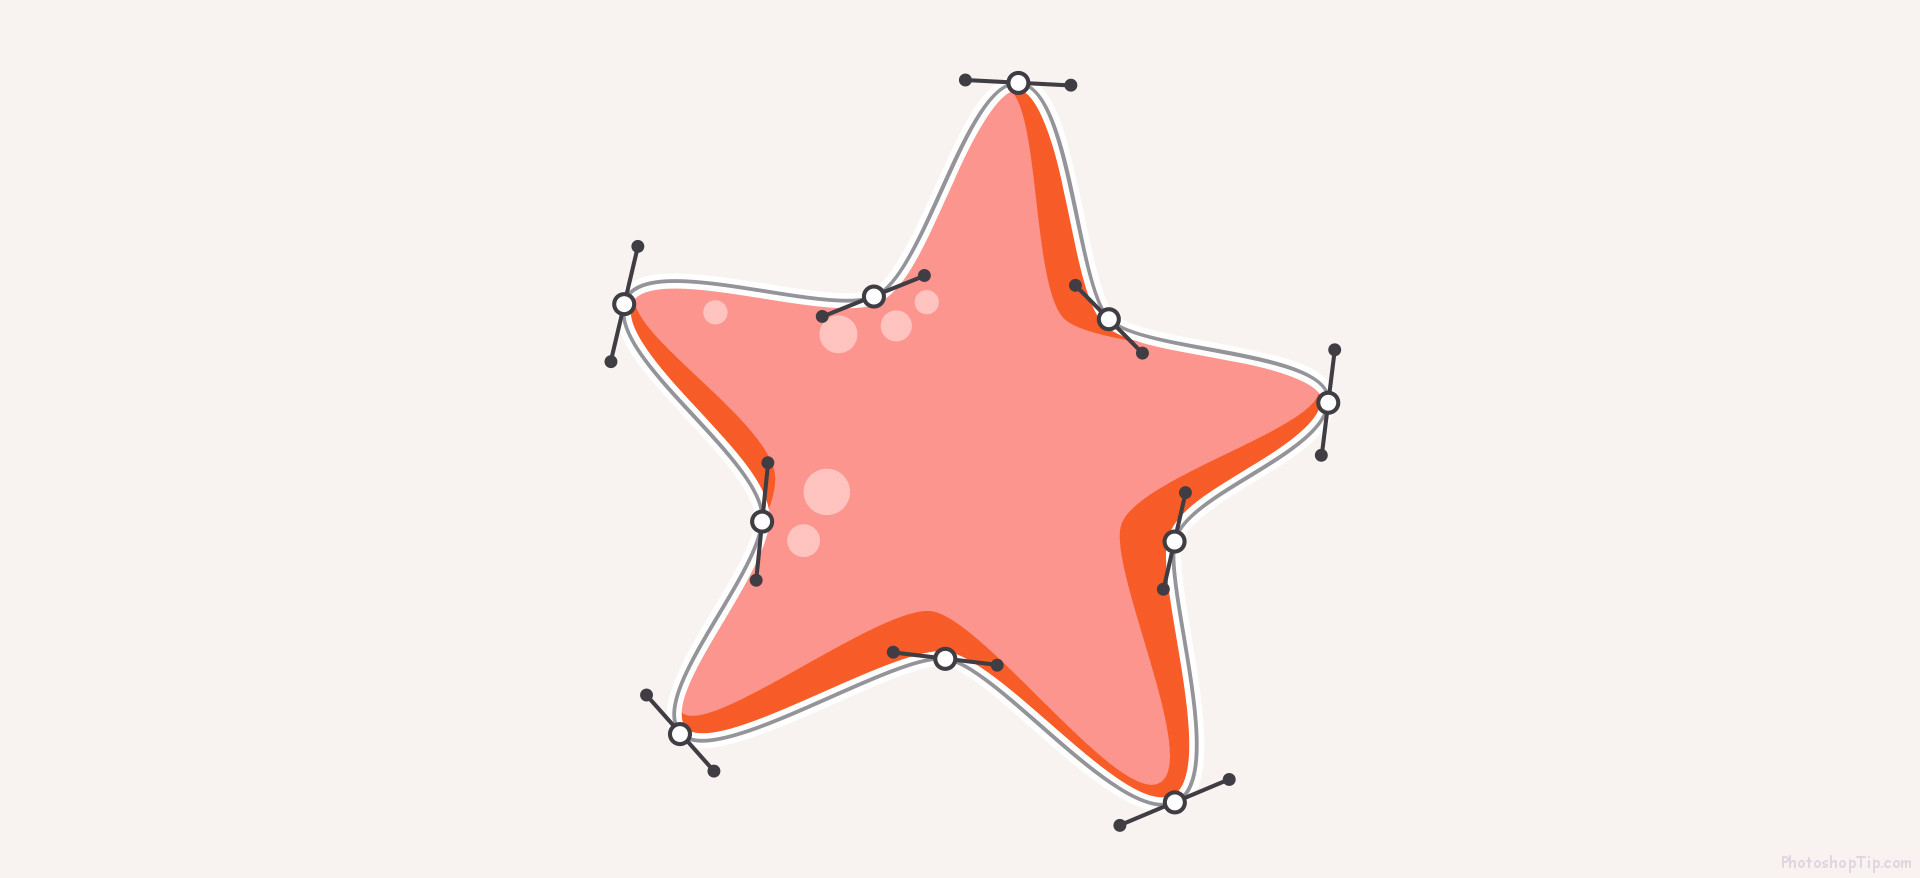
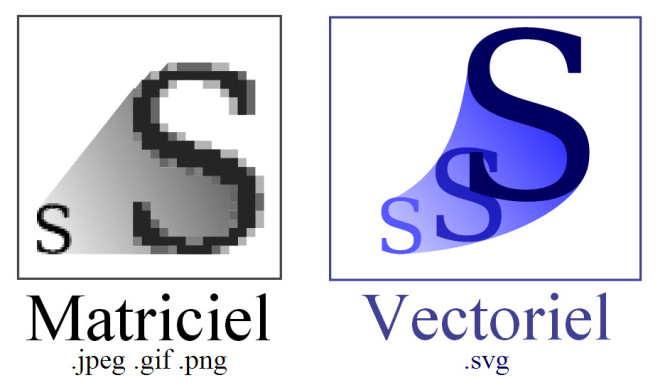
Differences between Vector and Raster

There is a small reason for losing quality when you zoom in. That is because they are made up of thousands (even millions) of tiny pixels. That image is called raster.

difference between raster and vector

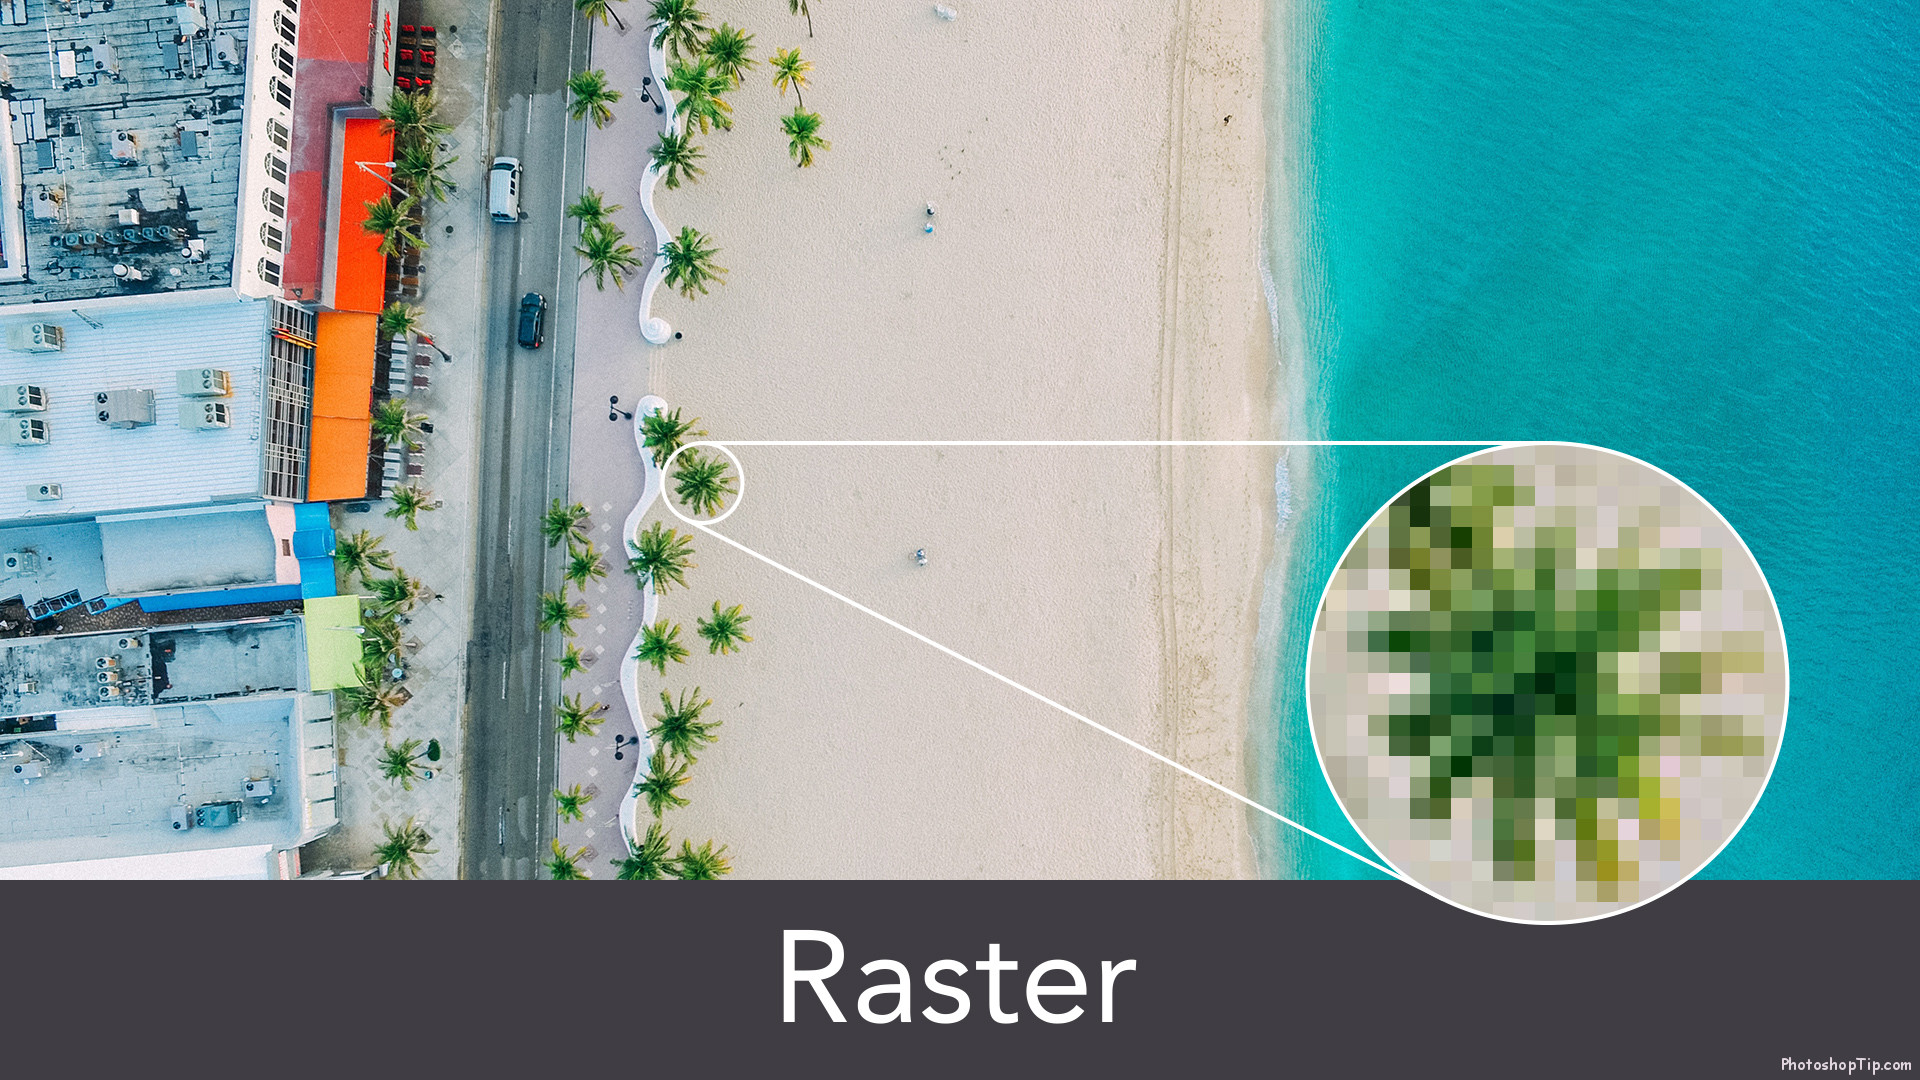
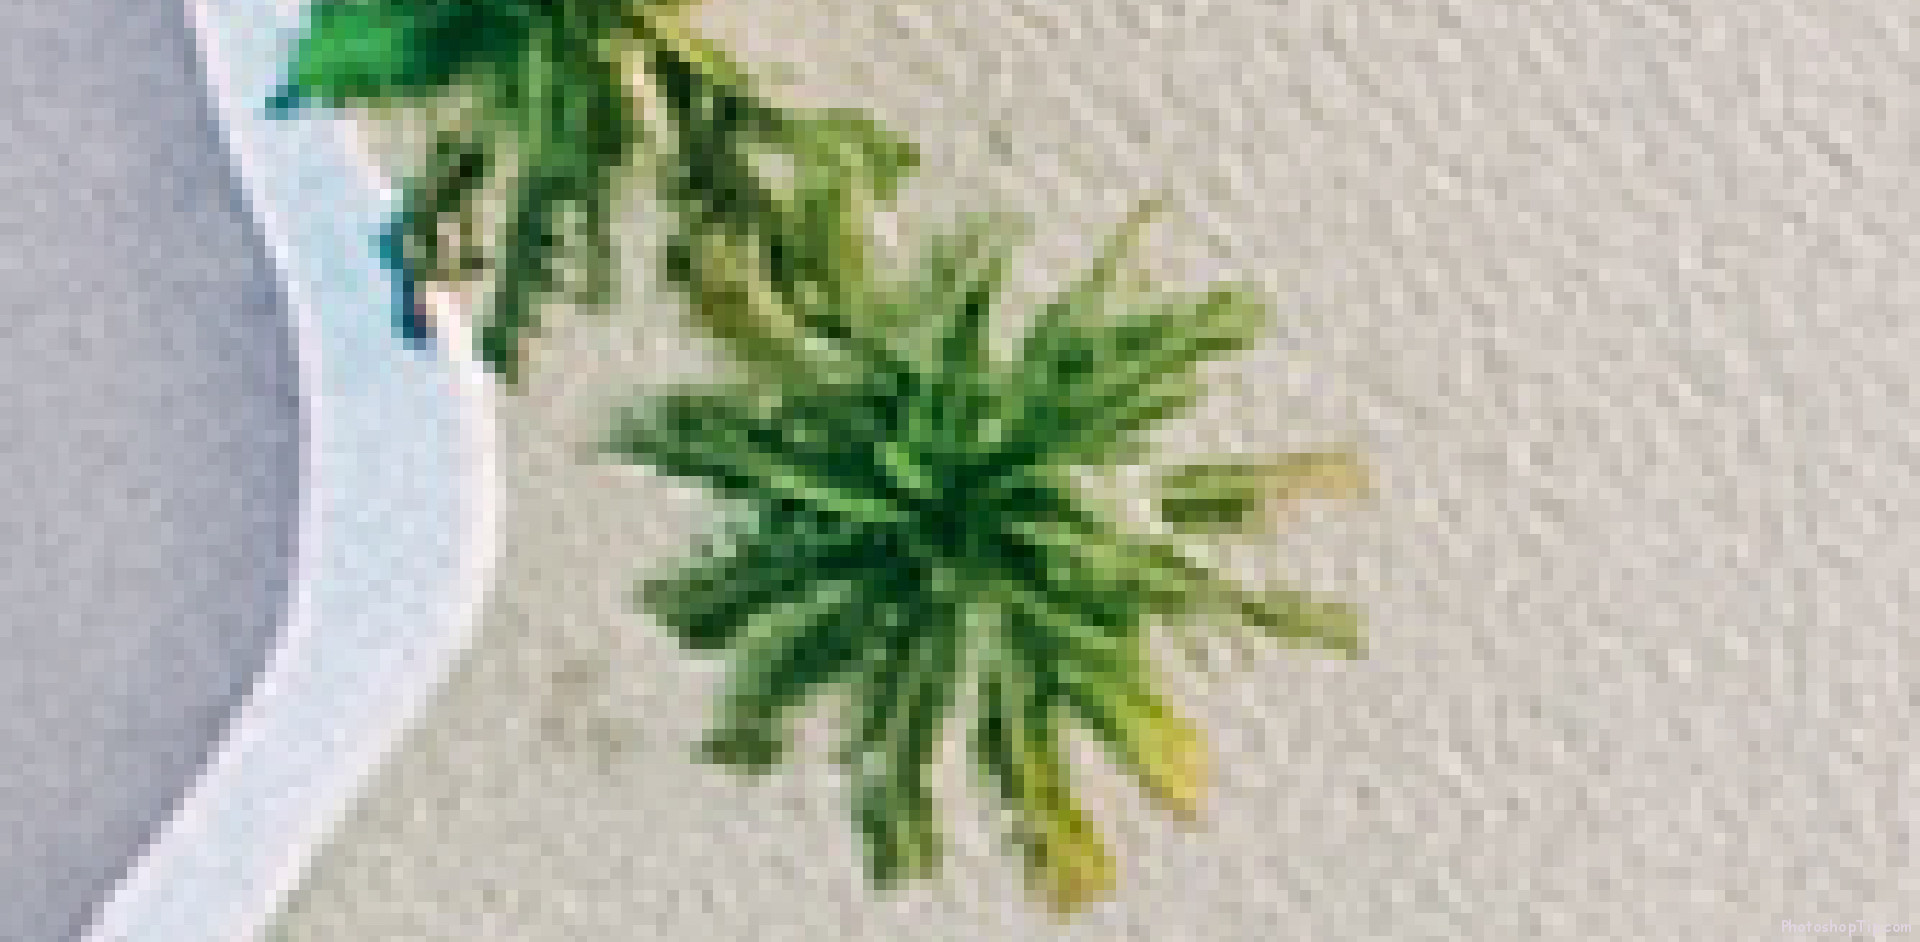
When you view a raster image at its original size or smaller, the pixels are not recognizable – it is simply because they are too small to see. They only become obvious when you zoom in or make larger images.

difference between raster and vector 1

The Vector graphics are quite different from the Raster. You can make any size change, big or small, without sacrificing quality. In the example below, the image has been enlarged, but no pixels.

difference between raster and vector 1

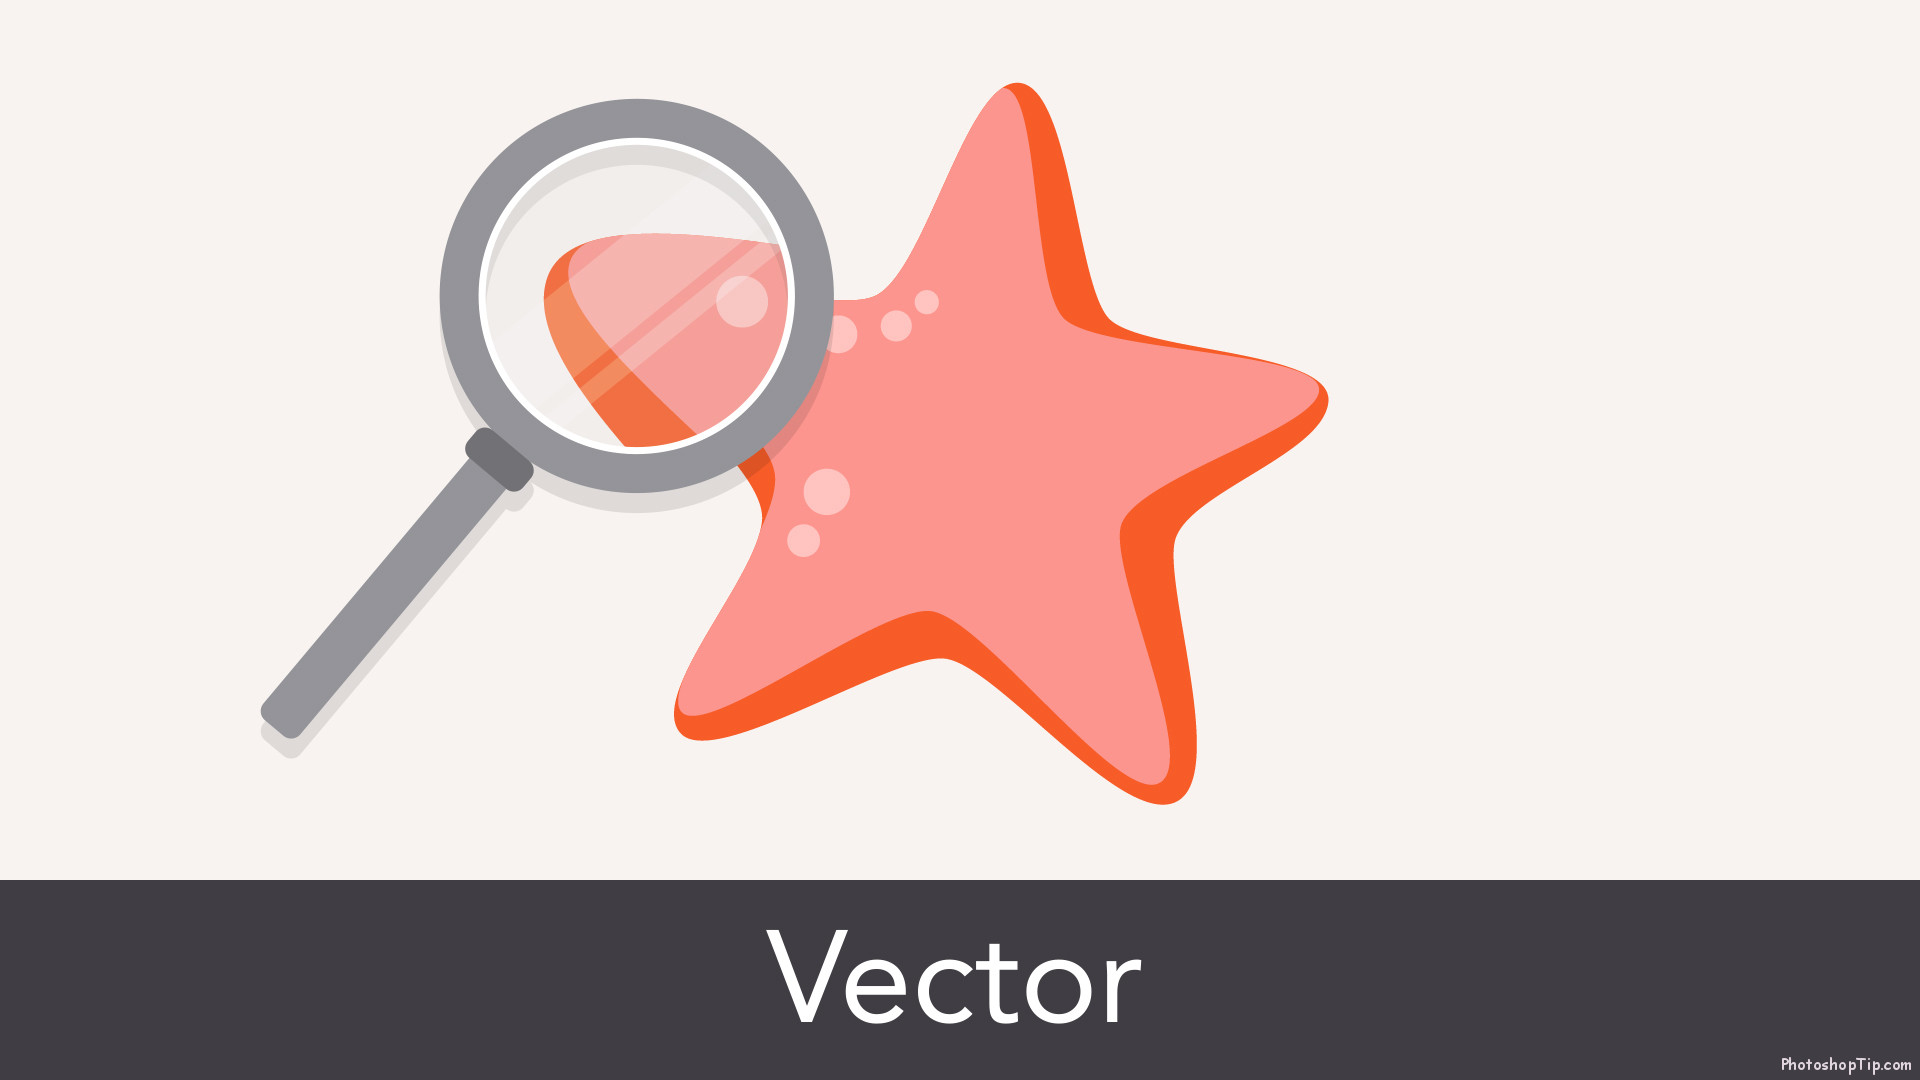
Vector images are made up of the core elements of geometry such as pixels, lines, curves, shapes, and polygons. Vector is made up of mathematical expressions.
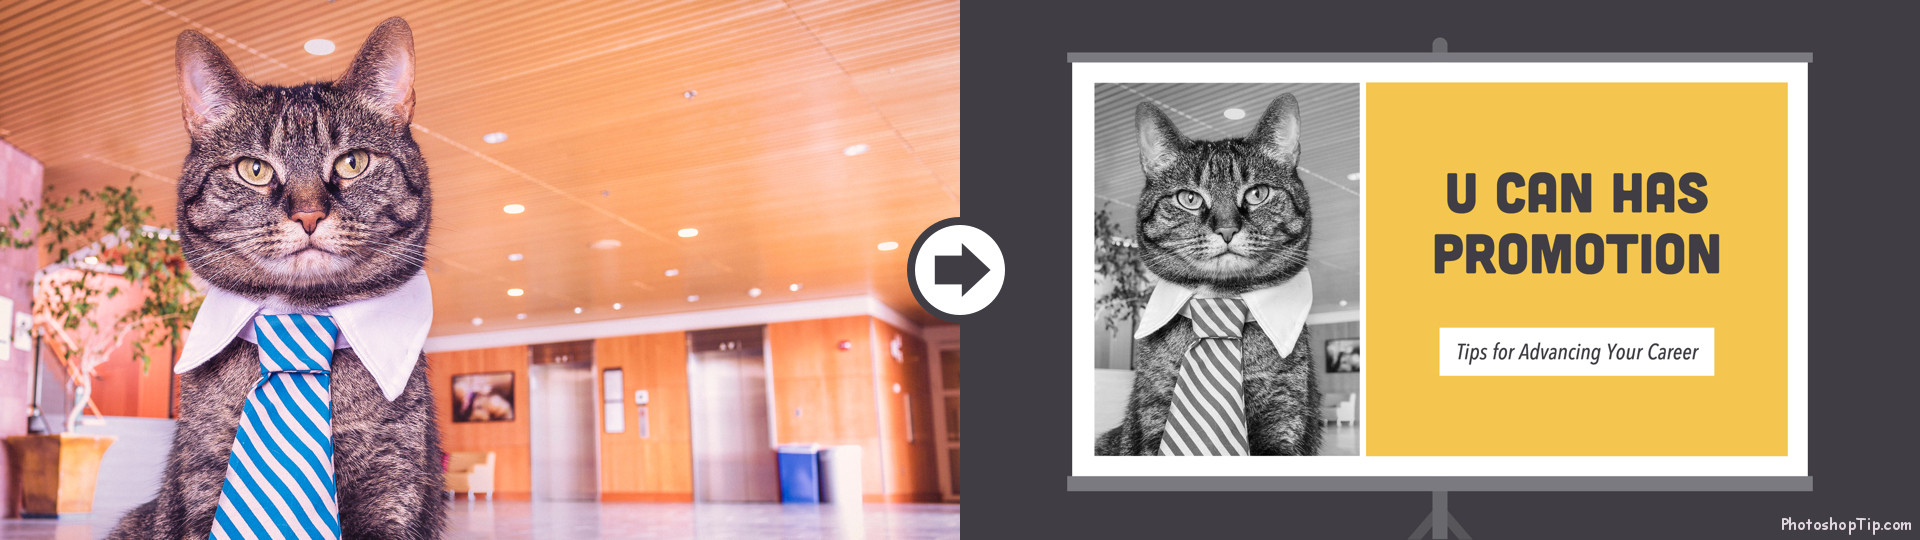
difference between raster and vector 3

Edit image

To better fit the purpose of your work you need to edit Stock images.
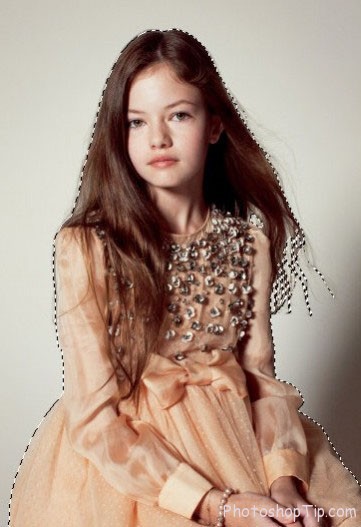
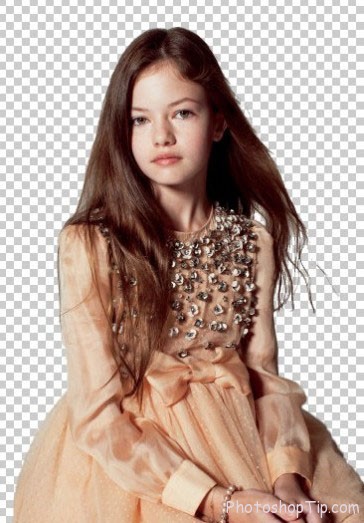
edit stock image

Crop image

The cropping can be used to change the size, shape or center of the image, making it useful in many different situations.

images_edit_crop1

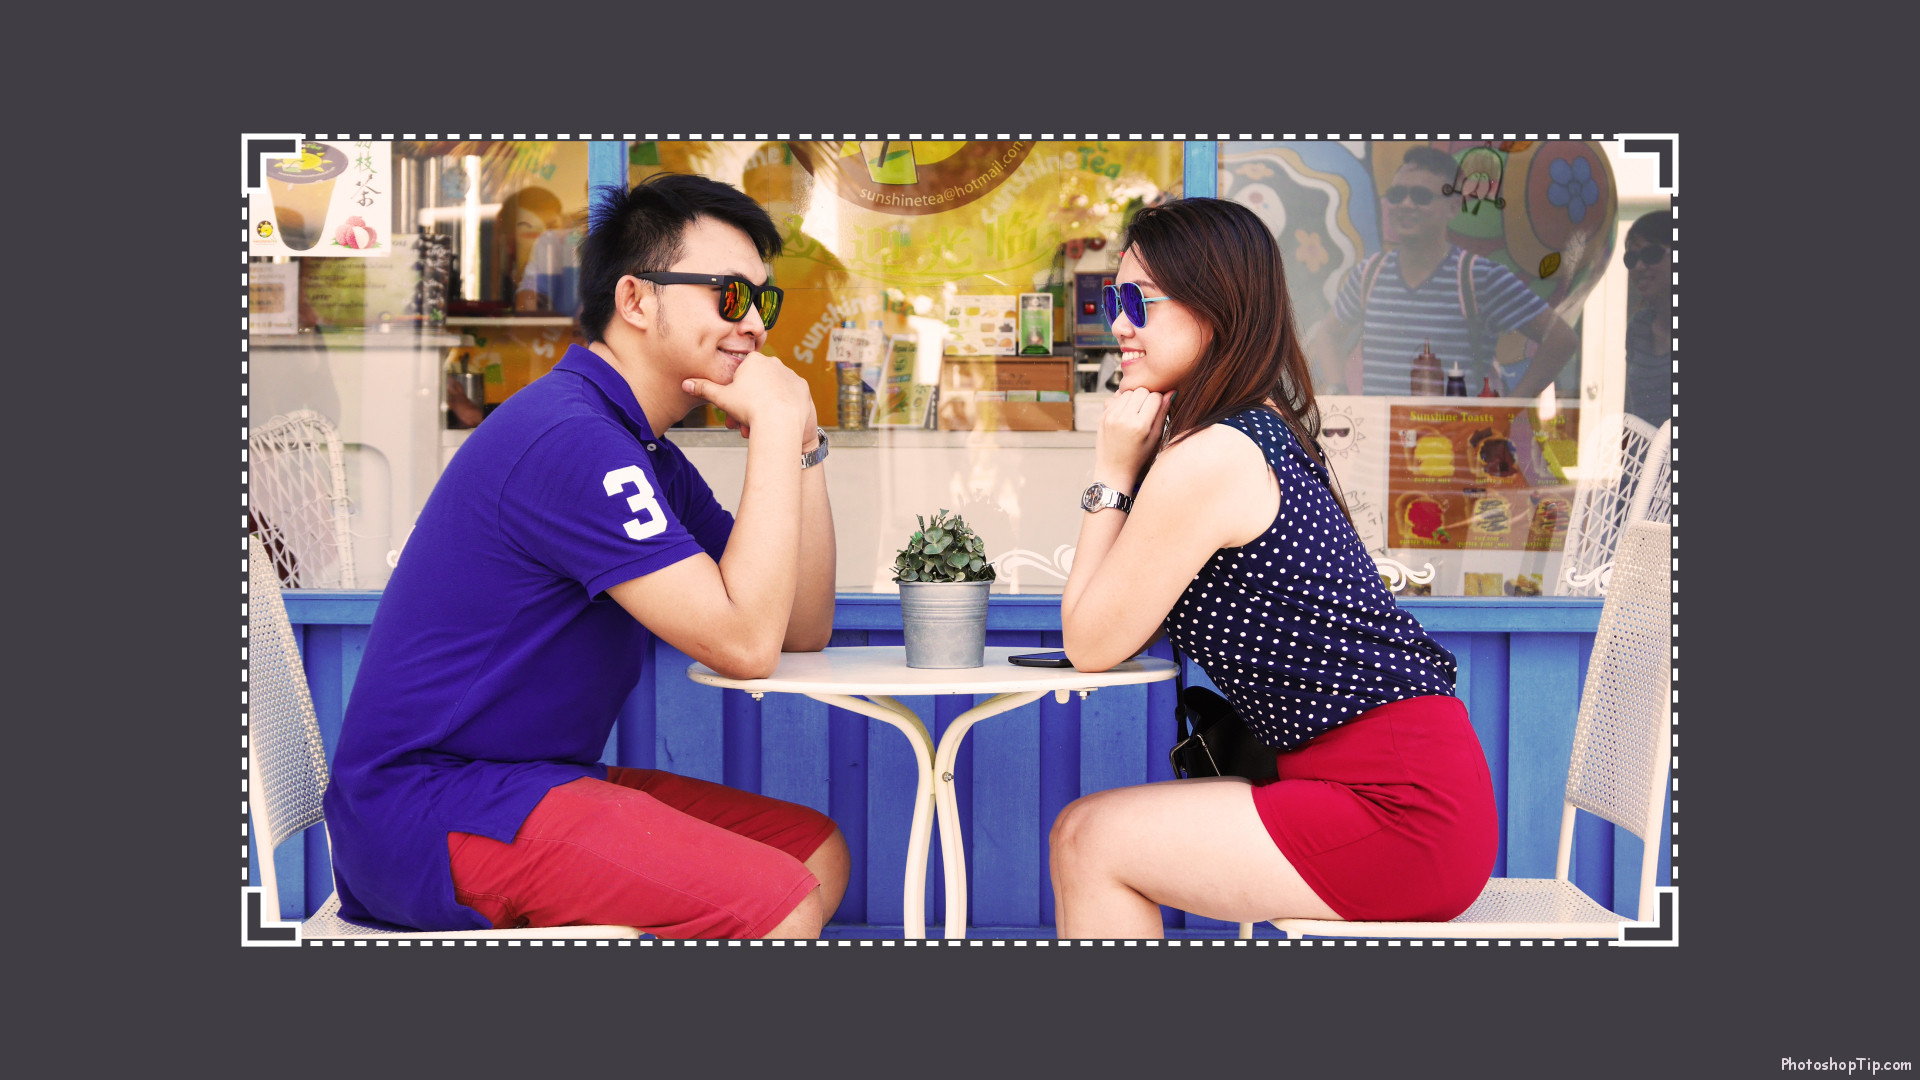
Try this feature if the image is incorrect, or if it has something you want to cut off.
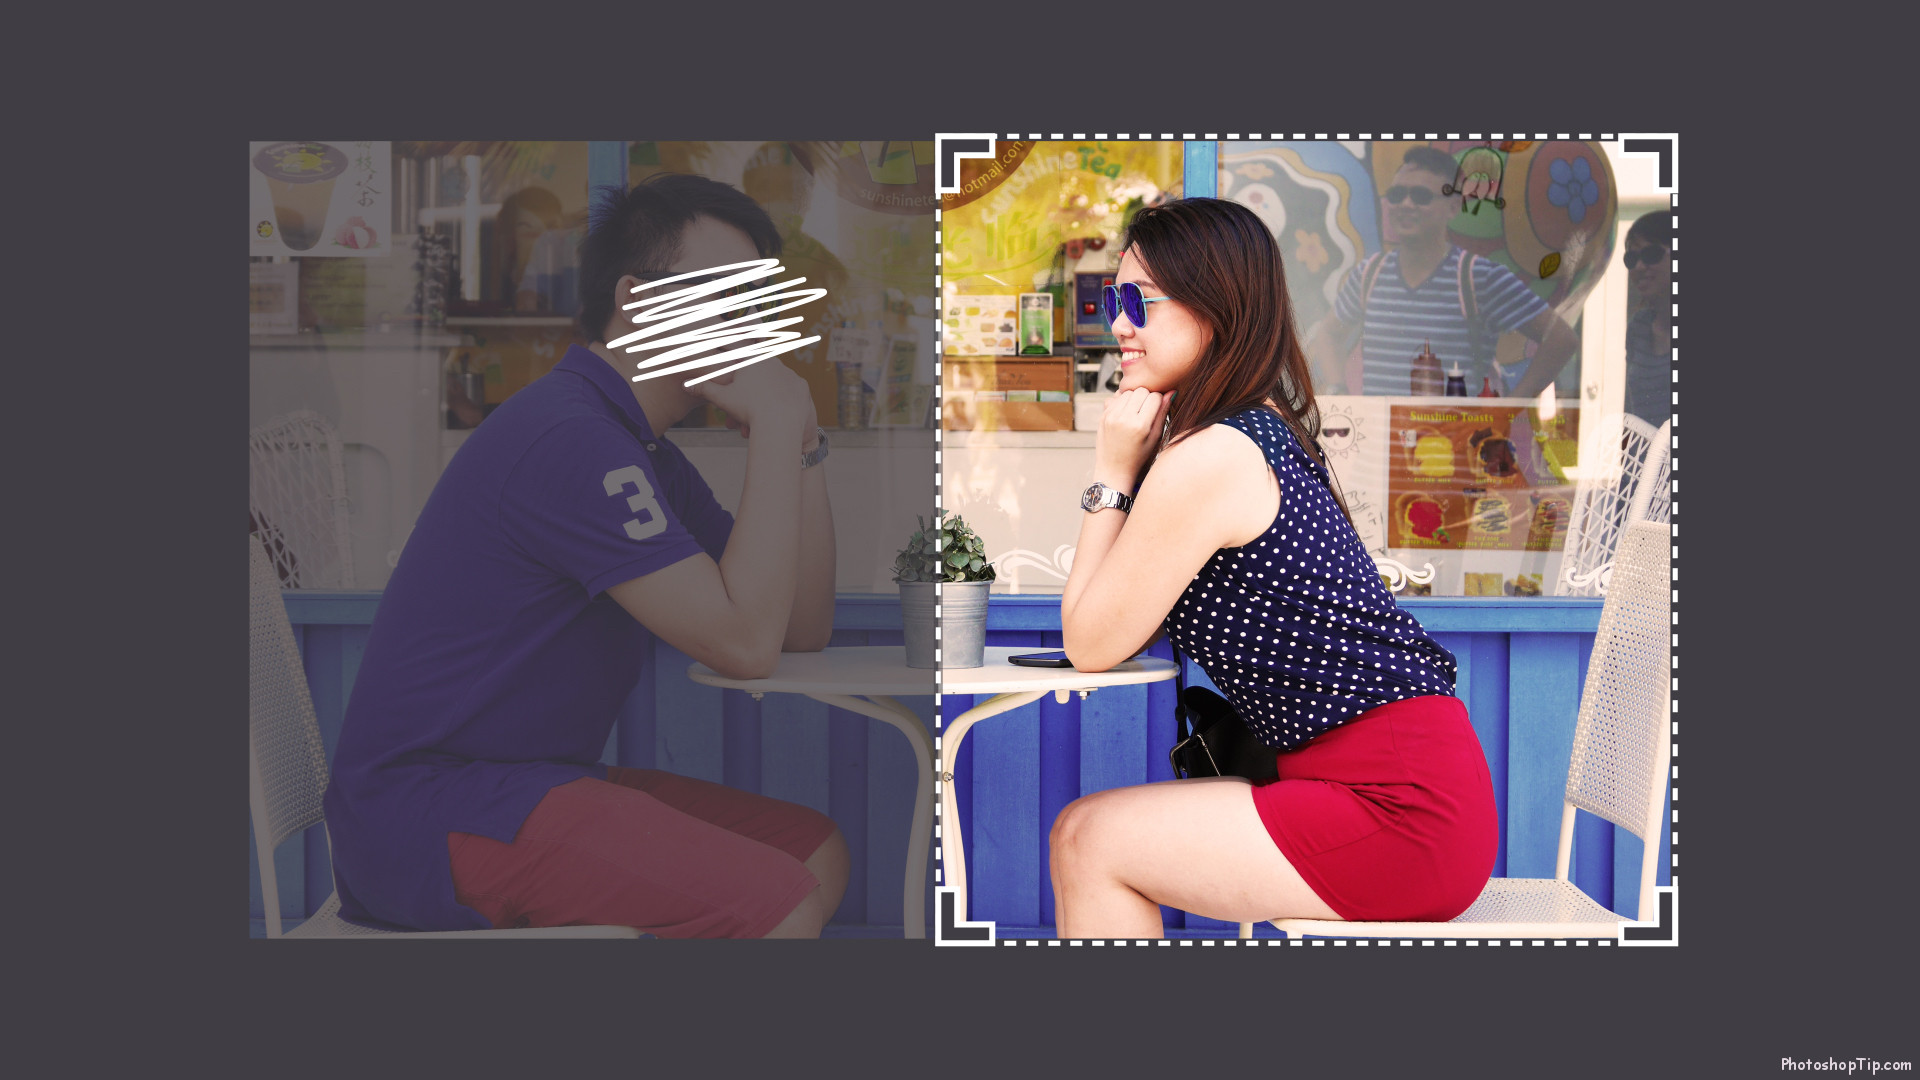
images_edit_crop2

Resize image

Resizing an image will ensure it fits perfectly for your project. Just remember that you can not make the image bigger than the original size without affecting the quality.

images_edit_resize1

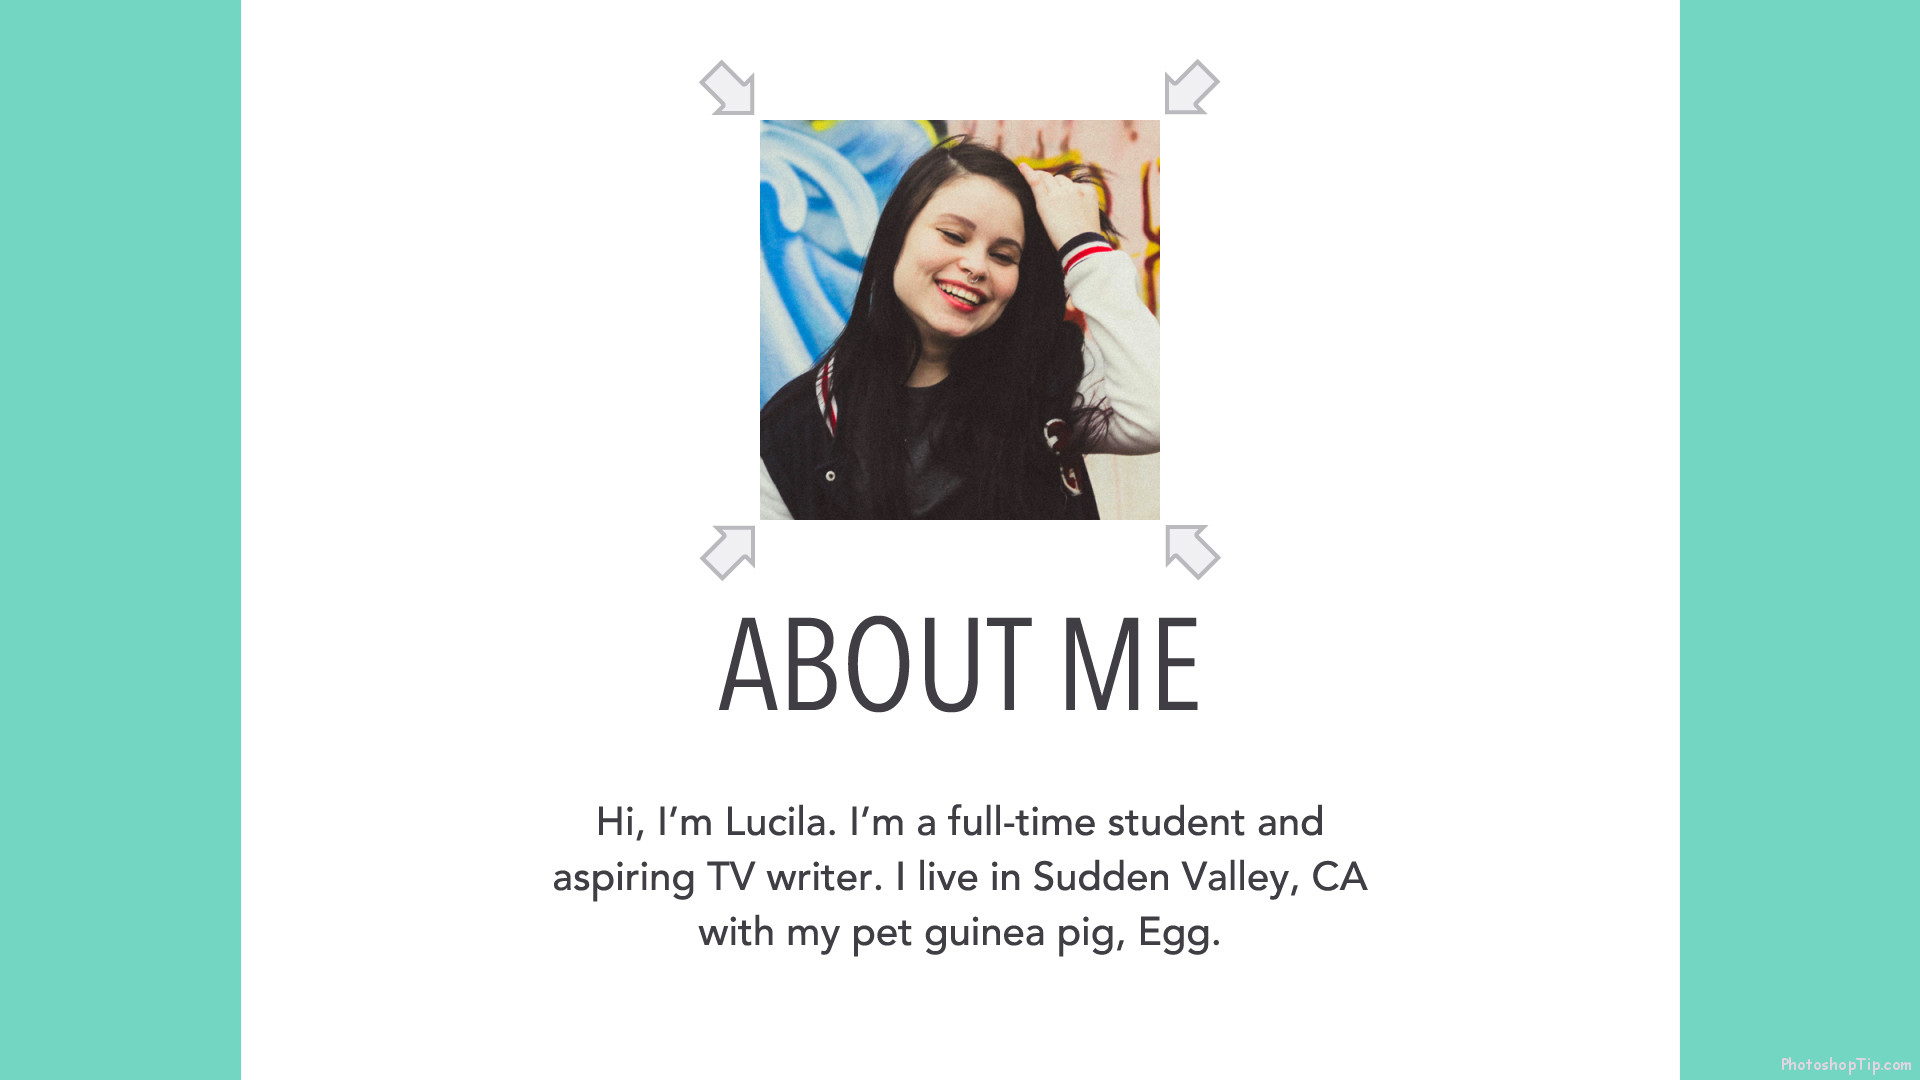
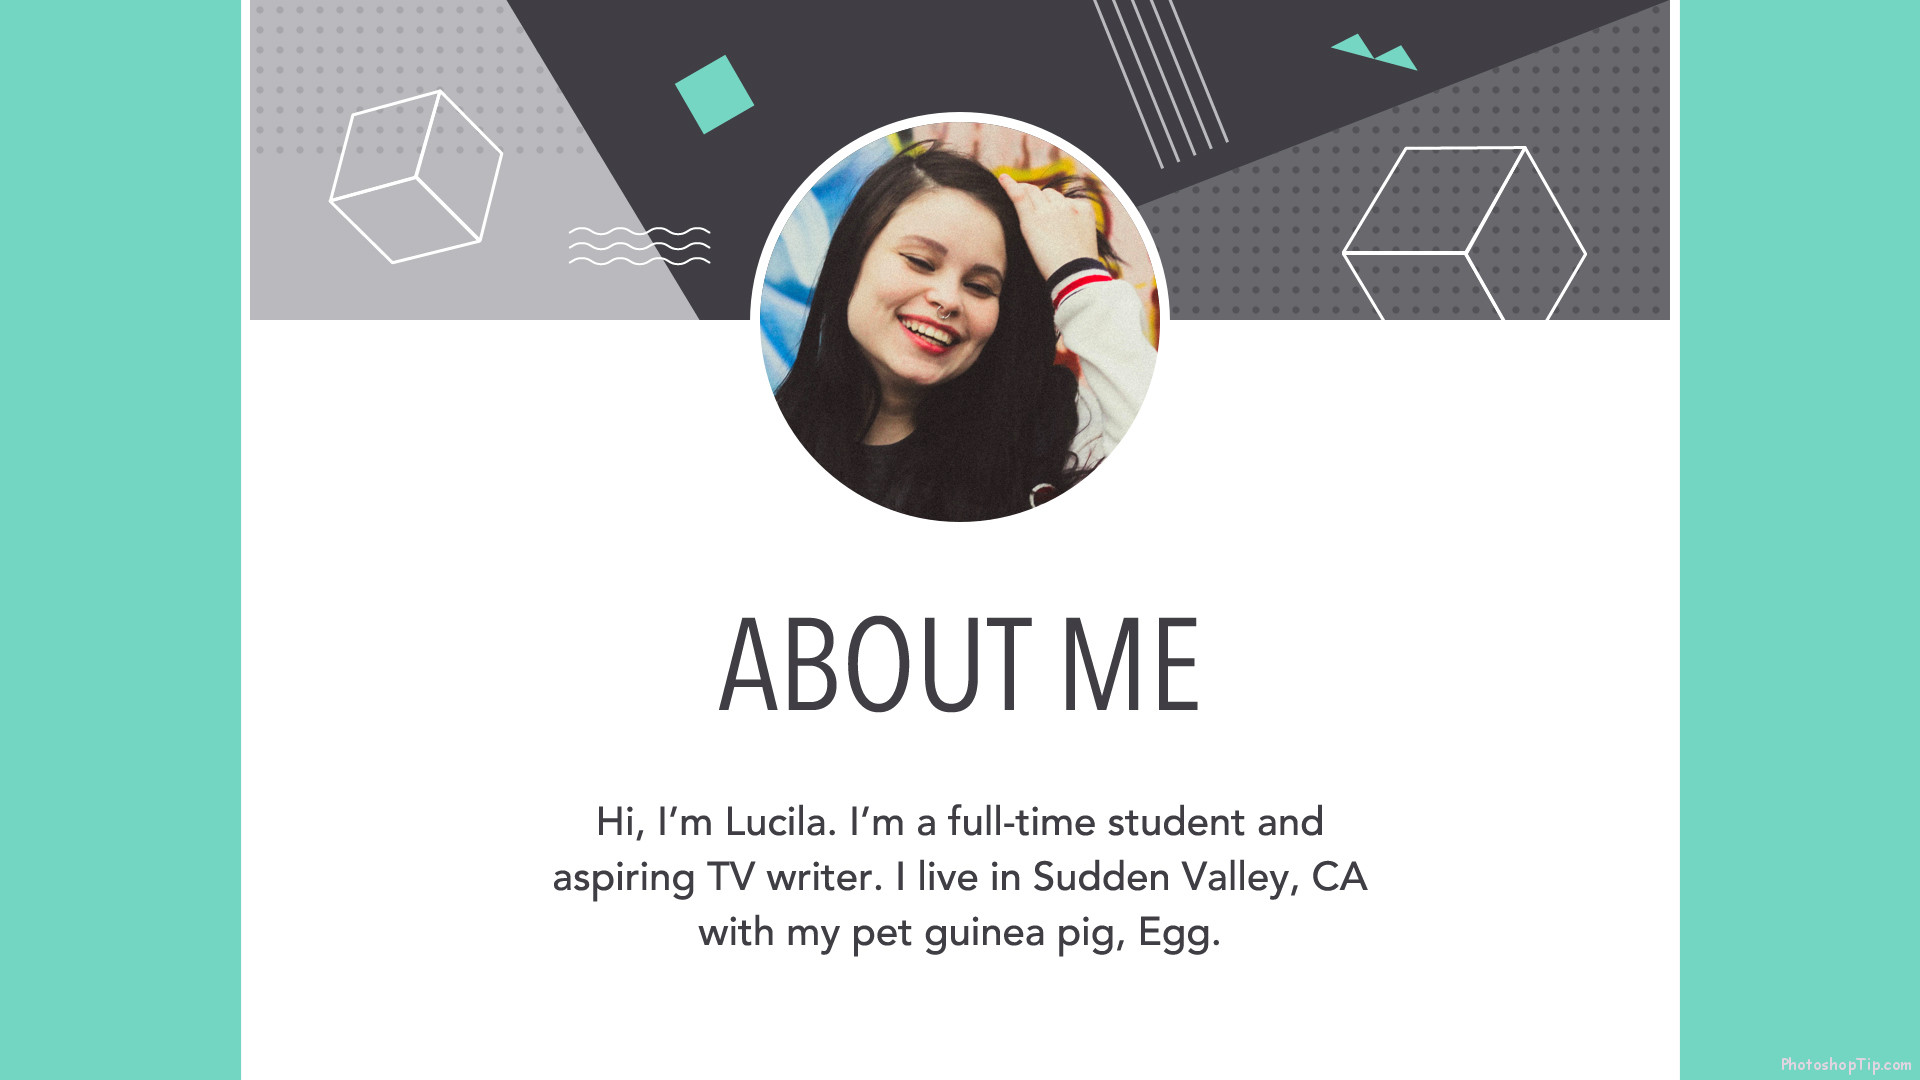
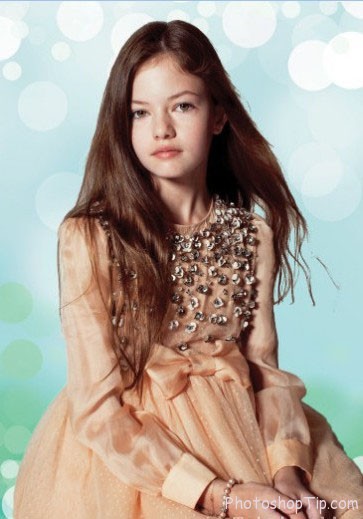
If your image is working on a large-scale project, it is best to choose another. You can also find a creative way to work with the image size you have. In the example below, we added a background image instead of a portrait.
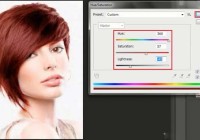
images_edit_resize2

Other adjustments

The adjustments allow you to enhance certain image quality, including brightness, contrast, saturation and color.

images_edit_other_adjustment

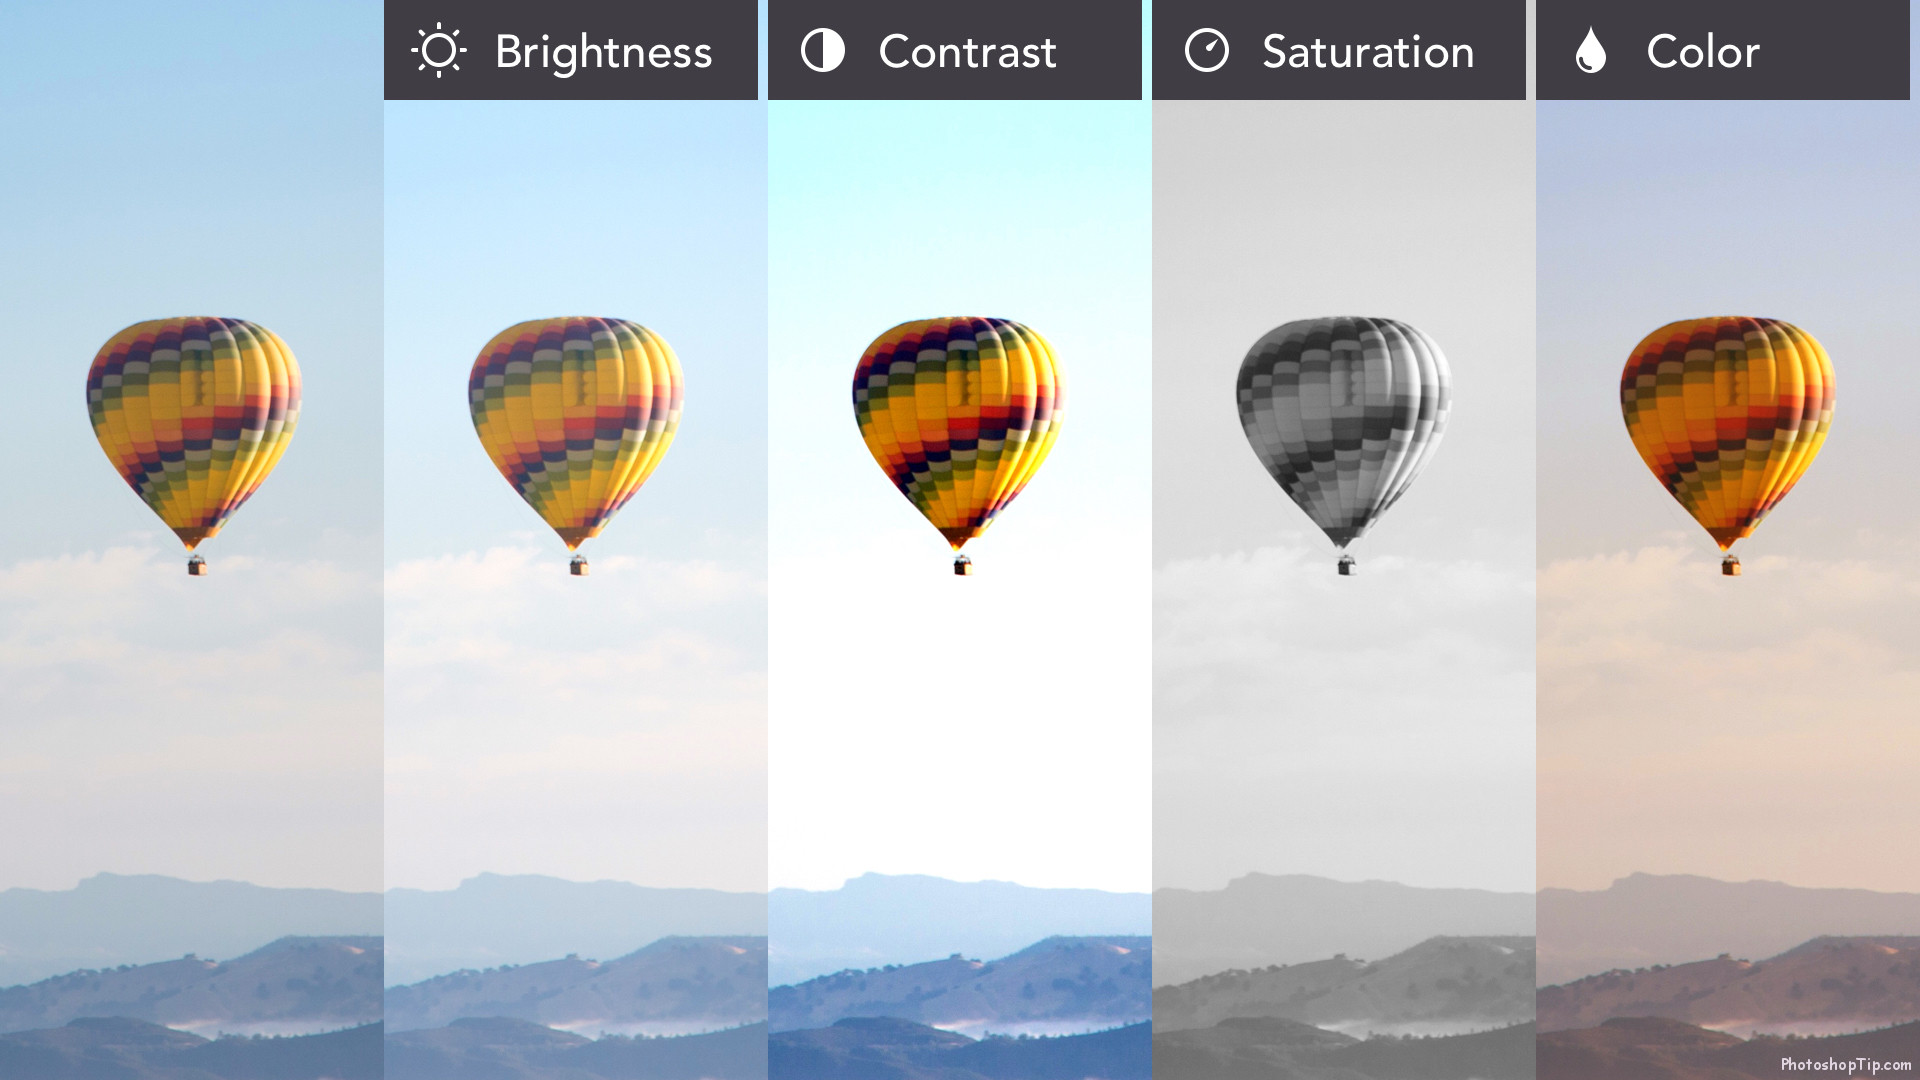
If your favorite show offers filters, you can dramatically change your image with very little time and effort.

images_edit_other_adjustment

Make perfect arrangement

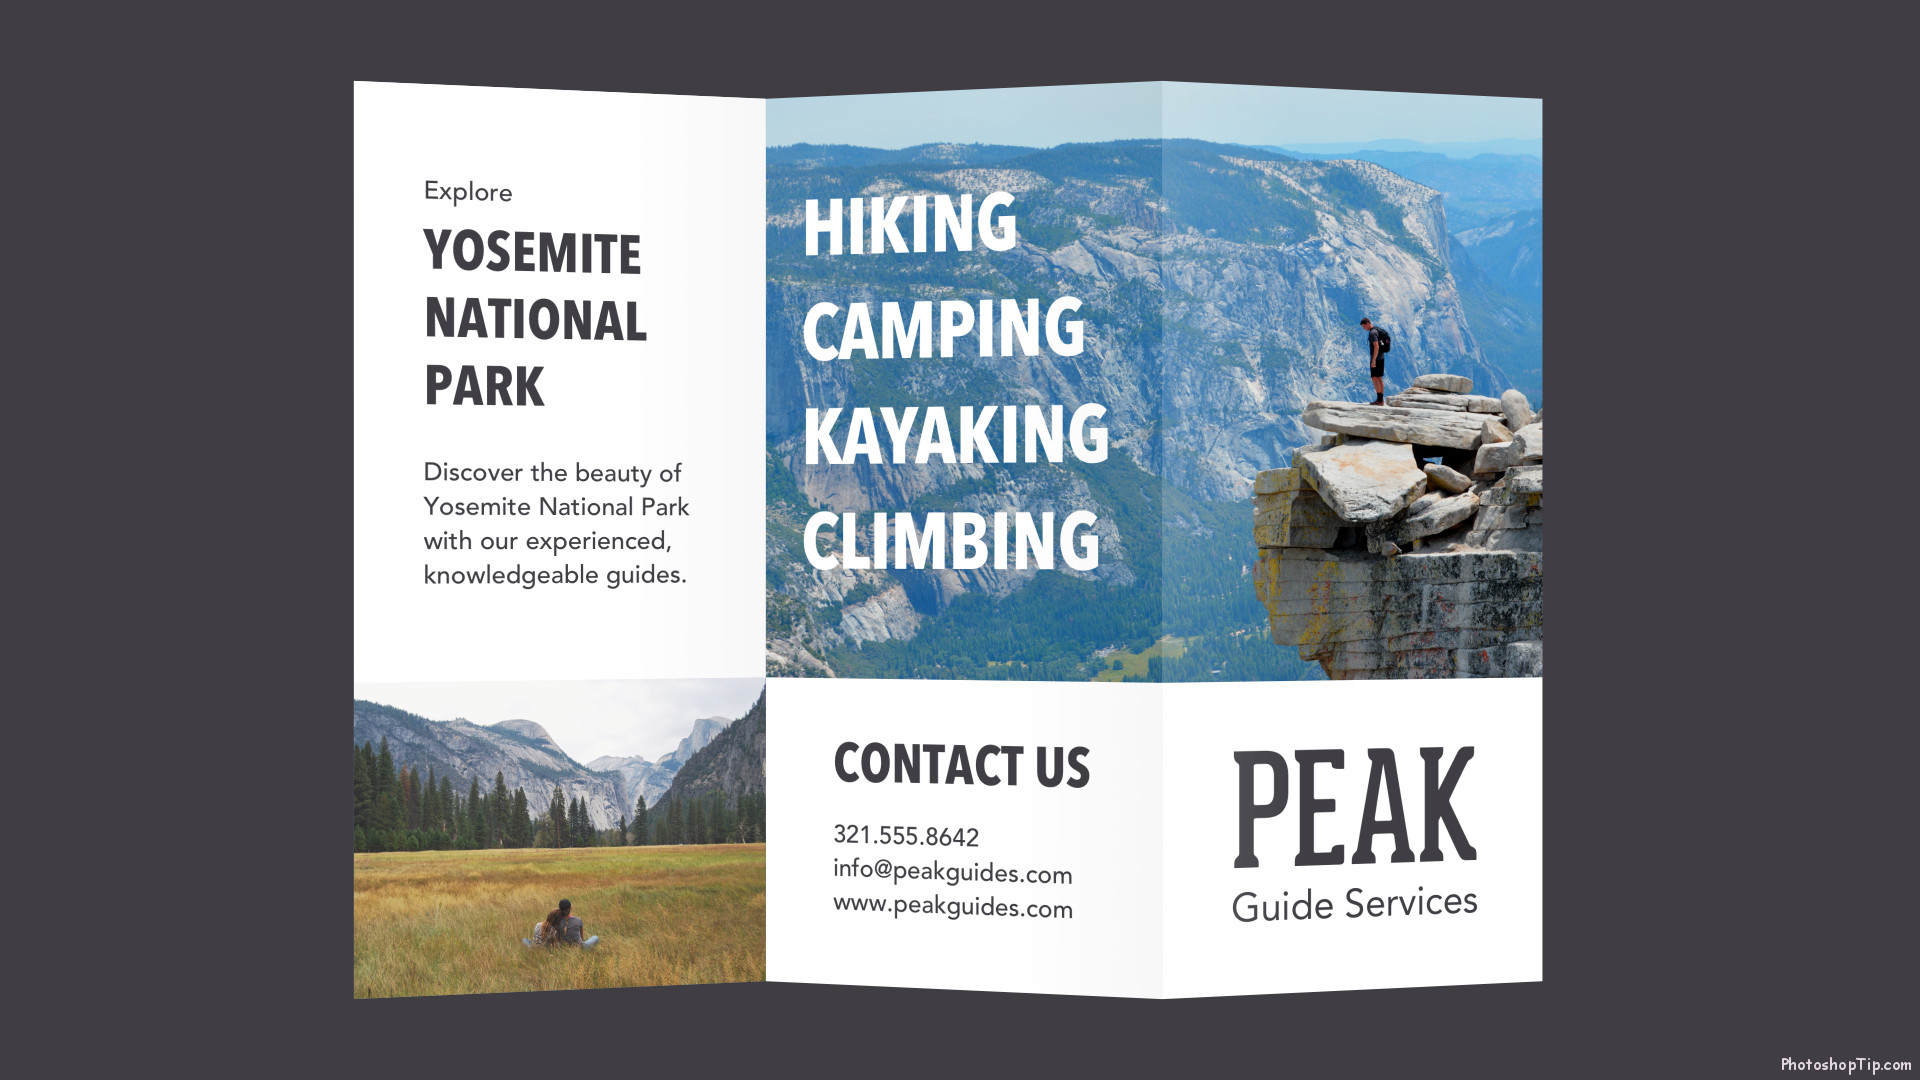
Adding photos, graphics and other images to your work is a great way to make it more appealing. Even a simple wallpaper can turn your design into something special.

make perfect arrangement

Just remember you have learned about image quality – both technically and conceptually – and your work will surely stand out from the simplest.

make perfect arrangement

That’s all. Hope you enjoy learning these basics knowledge. I will write more advance article later.

The Adobe Photoshop Lightroom CC Book for Digital Photographers Review

Home  »  Ebooks   »   The Adobe Photoshop Lightroom CC Book for Digital Photographers Review

The Adobe Photoshop Lightroom CC Book for Digital Photographers Review

By | October 9, 2015

The Adobe Photoshop Lightroom CC Book for Digital Photographers Ebook

The Adobe Photoshop Lightroom CC Book for Digital Photographers is the book for Adobe Photoshop Lightroom CC version written by Scott’s Kelby. Since Lightroom 1.0 launched, Scott’s Kelby has published the book named “The Adobe Photoshop Lightroom for Digital Photographers”, which has been the world’s #1 best-selling book and has been translated into over 10 different languages.

As we already know that Scott is the co-founder of Photoshop User magazine. He is a photographer, designer, and author of more than 60 books. At present, Scott is the CEO of KelbyOne (an online educational community for photographers, this book is useful for people study Photoshop CC)

The Adobe Photoshop Lightroom Book for Digital Photographers CC (E-Book and paper) is divided into 16 chapters from basic to advanced, which is very suitable for newcomers to Adobe Photoshop Lightroom CC and experts on the image editing. To give the readers a better understanding, I would like to explain briefly advantages and disadvantages of the book.

The Adobe Photoshop Lightroom CC Book for Digital Photographers Ebook

Advantages:
– The content of the book is detailed, easy to read and understand.
– The layout of the book helps readers look up quickly each feature of the software, because these features are divided into separate sections.
– The book recommends many different views when editing and designing with Lightroom.
– Ebooks are available from anywhere which is suitable for you to carry when traveling.
– In particular, the book refers to a real photo shoot as well as tools used to edit the cover of the book.

Disadvantages:

The author compares not much differences between CC Lightroom with earlier versions.

https://photoshoptip.com/wp-content/uploads/2015/10/buyproduct.gif
You can buy and download ebook from Amazon

The book consists of 16 chapters as follow:

Chapter 1 : IMPORTING – GETTING YOUR PHOTOS INTO LIGHTROOM

Chapter 2 : LIBRARY – HOW TO ORGANIZE YOUR PHOTOS

Chapter 3 : CUSTOMIZING – HOW TO SET THINGS UP YOUR WAY

Chapter 4 : EDITING ESSENTIALS – HOW TO DEVELOP YOUR PHOTOS

Chapter 5 : LOCAL ADJUSTMENTS – HOW TO EDIT JUST PART OF YOUR IMAGES

Chapter 6 : SPECIAL EFFECTS – MAKING STUFF LOOK…WELL…SPECIAL

Chapter 7 : LIGHTROOM FOR MOBILE – USING THE MOBILE APP

Chapter 8 : PROBLEM PHOTOS – FIXING COMMON PROBLEMS

Chapter 9 : EXPORTING IMAGES – SAVING JPEGS, TIFFS, AND MORE

Chapter 10 :JUMPING TO PHOTOSHOP – HOW AND WHEN TO DO IT

Chapter 11 : BOOK OF LOVE – CREATING PHOTO BOOKS

Chapter 12 : SLIDESHOW – CREATING PRESENTATIONS OF YOUR WORK

Chapter 13 : THE BIG PRINT – PRINTING YOUR PHOTOS

Chapter 14 : THE LAYOUT – CREATING COOL LAYOUTS FOR WEB & PRINT

Chapter 15 : DSLR: THE MOVIE – WORKING WITH VIDEO SHOT ON YOUR DSLR

Chapter 16 : MY PORTRAIT WORKFLOW – MY STEP-BY-STEP PROCESS FROM THE SHOOT

Hope that The Adobe Photoshop Lightroom CC Book for Digital Photographers will be useful for you.

https://photoshoptip.com/wp-content/uploads/2015/10/buyproduct.gif

Thanks for reading.

Author: Admin PhotoshopTip

Hello, I’m Hanna Kim. I love Photoshop and like designing web with Photoshop. I will try to post more tutorials. Please press LIKE or G+ button if this article is useful.

Terms and Conditions – Photoshop Tutorials

Home  »  Terms and Conditions

Terms and Conditions

Welcome to our website. If you continue to browse and use this website, you are agreeing to comply with and be bound by the following terms and conditions of use, which together with our privacy policy govern Photoshoptip.com’s relationship with you in relation to this website. If you disagree with any part of these terms and conditions, please do not use our website.

The term “Photoshoptip.com” or “us” or “we” refers to the owner of the website. The term “you” refers to the user or viewer of our website.

The use of this website is subject to the following terms of use:

The content of the pages of this website is for your general information and use only. It is subject to change without notice.
Neither we nor any third parties provide any warranty or guarantee as to the accuracy, timeliness, performance, completeness or suitability of the information and materials found or offered on this website for any particular purpose. You acknowledge that such information and materials may contain inaccuracies or errors and we expressly exclude liability for any such inaccuracies or errors to the fullest extent permitted by law.
Your use of any information or materials on this website is entirely at your own risk, for which we shall not be liable. It shall be your own responsibility to ensure that any products, services or information available through this website meet your specific requirements.
This website contains material which is owned by or licensed to us. This material includes, but is not limited to, the design, layout, look, appearance and graphics. Reproduction is prohibited other than in accordance with the copyright notice, which forms part of these terms and conditions.
All trademarks reproduced in this website, which are not the property of, or licensed to the operator, are acknowledged on the website.
Unauthorised use of this website may give rise to a claim for damages and/ or be a criminal offence.
From time to time, this website may also include links to other websites. These links are provided for your convenience to provide further information. They do not signify that we endorse the website(s). We have no responsibility for the content of the linked website(s).
Your use of this website and any dispute arising out of such use of the website is subject to all prevailing national and applicable International laws.

Summarize of some Dark Texture Download free

Home  »  Download   »   Summarize of some Dark Texture

Summarize of some Dark Texture

By | August 3, 2017

photoshop texture

Just recently, a friend from Google+ asked me to help some Dark Texture, which was originally mistaken for a pattern. In fact, the Pattern and Texture used in Photoshop functioned quite similarly, I will write a tutorial later. Simply, I said that the Pattern is very small, and used to fill the background, while the Texture is big and used to apply pressure to the background. I collected more and post here to share with everyone some of this texture.

Actually, it has many textures, but I will update slowly so you are not shocked, because this form of texture is a bit horrible. So the first, I will summarize part 1. The Dark Texture is often used to make horror and deadly works. Here are some demo images I brought to the show only, the rest you download here (total of 37 textures).

photoshop texture

photoshop texture 4

photoshop texture 2

photoshop texture 1

grunge-wall

dark-metal-texture

black-textures

Simple Good Pictures Free Download Quickly improve your photos

Home  »  DownloadTutorials   »   Simple Good Pictures Free Download Quickly improve your photos

Simple Good Pictures Free Download Quickly improve your photos

By | July 6, 2017

Simply Good Picture interface

We often take photos, but sometimes there are pictures with nice scenes but encountered shooting errors such as noise, lack of light or color is not true? With the help of Simply Good Pictures, these problems will be resolved easily.

To edit and help a picture becomes more beautiful and perfect, many people think of Photoshop software immediately. However, using Photoshop proficiently is not easy.

Simple Good Pictures is a small software but very useful, it utilizes image processing algorithms to optimize the quality of images and help pictures look better with color is more faithful. The highlight of the software is very simple to use and suitable for everyone.

Today, Simple Good Pictures is considered to be one of the optimization software.

Guide to download and register copyright

Simple Good Pictures costs 15 USD and the free trial period is only available for 3 days. However, there are currently promotions, which allow users to register for free. Follow these steps to join this promotion.

  • Download the trial version of the software HERE .
  • Next, you visit HERE, fill out the information in the dialog box, including first name, last name and email address. Then click “Send”.

Simply Good Pictures registeration

  • Waiting a moment, an email is sent with the title “Simple Good Pictures 2”, which contains the registration confirmation link. After clicking on this link, a second email will be sent to your inbox containing the code to activate the software.
  • Install Simple Good Pictures. In the first using, a dialog box appears asking the user to enter the code to activate the software. Using the code above to fill in the “License Key”, then click “Check license key”.

Simply Good Pictures registeration 2

  • Now, you can use the software with full copyright without any restrictions on features as well as the number of using days.

Note: In case you do not receive the email with the above header, try checking the Spam (or Bulk) folder to prevent spam emails from being mistakenly filtered.

Manual instruction

Using this software is very simple, first click “Open File” button on the main interface of the software, or select ” File -> Open File” from the menu.

The image that needs optimization after the selection will be displayed on the main interface of the software. Basically, the software only equips users with four functions to optimize and enhance the quality image, including two repair functions and two optimizing functions.

Simply Good Picture interface

Simply Good Picture interface

The Repair section on the left gives users two options to customize quality images, including:

  • Remove Artifacts: this is a faulty image in the JPG or GIF file compression by the software, creating strange symbols on the images or making the quality images is not as original. This feature will allow you to process and delete the above phenomenon to increase the quality and true level for images.
  • Remove Noise: image noise is a phenomenon that occurs when shooting in low light conditions, when your images will look like there are many tiny dots on it, resulting is the quality images not high and not beautiful.

Contrary to the Repair section about errors can be encountered on the image, Optimize section will perform the optimization functions to improve the quality of the images. This feature can be used even if normal images have no errors. The Optimize offers two options, including:

  • Automatic: With this option, the software will automatically optimize the images according to the algorithm that the software considers best for the highest quality images. If you check this option, the software will automatically do its work, users need not do another operation.
  • Auto-Color: However, it is not always possible to automatically produce results. In this case, you can perform optimization manually images with the Auto-Color option. With this feature, you can optimize the color on the images to become more honest and more vivid, which will help to improve the quality of the images.

In order to use the above four functions, users only have to tick the options (multiple options can be selected at the same time), then using the scroll bar to adjust the level of optimization. The images after being edited/ optimized will be displayed in the Preview pane on the right allowing the users preview the quality images.

Image before and after optimized by Simple Good Pictures

Image before and after optimized by Simple Good Pictures

If you feel the images after editing and optimization are fine, you click the Save button, then find and select the location to save the new images after optimization.

With the help of Simple Good Pictures, you need not use professional graphics software and spend too much time to practice, users can create high-quality images.

Remove Background from Image with Photoshop fast and simple

Home  »  Tutorials   »   Remove Background from Image with Photoshop fast and simple

Remove Background from Image with Photoshop fast and simple

By | December 8, 2015

Removing background is a common technique used commonly in Photoshop. There are quite a few ways of detaching depending on the complexity of the photo. The below post gives you guidelines on using colours scheme Channels in Photoshop to detach background out of a photo.

Preparation:

– To download and install Photoshop in computer
– A photo that needs detaching.
– Can see the last post here

Step 1: Open the photo with Photoshop

Remove back ground with Photoshop

Remove Background from Image with Photoshop fast and simple

Step 2: Open colour scheme Channels (go to Window/Channels) and choose colour scheme with the highest contrast.

Remove-back-ground-with-Photoshop-003

Here we choose Blue.
Remove-back-ground-with-Photoshop-004
Remove-back-ground-with-Photoshop-005

Step 3: Click right mouse in colour channel Blueand choose Duplicate Channel…to duplicate the colour.

Remove-back-ground-with-Photoshop-006

Step 4: Increase contrast to detach background. Use Quick Selection Tool (W) to select areas that need higher contrast.

Remove-back-ground-with-Photoshop-007

Then go to Image/Adjustments/Level…to open box Leveland adjust as in below picture.

Remove-back-ground-with-Photoshop-008

Remove-back-ground-with-Photoshop-009

Here’s the result:

Remove-back-ground-with-Photoshop-010

Step 5: Use Brush (B) tool to colour the background White (1) and the object Black (2).
Remove-back-ground-with-Photoshop-011
This is what we’ve got after coloring:

Remove-back-ground-with-Photoshop-012

Step 6:
Press Ctrl button and choose layer Blue copy, the software automatically chooses the White area. To change into the Black area (Object), right mouse click in the photo and choose Select Inverse.

Remove-back-ground-with-Photoshop-013

Step 7: Turn off layer Blue copyand turn on layer RBG.

Remove-back-ground-with-Photoshop-014

We get:

Remove-back-ground-with-Photoshop-015

Step 8: Double-click in Background to adjust to layer 0. Then press Ctrl +J to duplicate layer. Finally, turn off layer 0, we’ll find the photo detached from the background.

Remove-back-ground-with-Photoshop-016

You can also insert another Background to make the photo more lively.

Remove back ground with Photoshop

Remove back ground with Photoshop

This post gives guidelines on detaching background in Photoshop. In this way, you can detach any object from the background to make your own unique and fancy photos.

Admin PhotoshopTip
Author: Admin PhotoshopTip

Hello, I’m Hanna Kim. I love Photoshop and like designing web with Photoshop. I will try to post more tutorials. Please press LIKE or G+ button if this article is useful.

One thought on “Remove Background from Image with Photoshop fast and simple

  1. Andy

    Thanks, I’m very grateful for your tips here. great instructions. fully helped. thanks a lot.

    Reply

Remove a Person From a Photo in Photoshop CC vs Cs6

Home  »  Tutorials   »   Remove a Person From a Photo in Photoshop CC vs Cs6

Remove a Person From a Photo in Photoshop CC vs Cs6

By | December 8, 2015

How to Remove a Person From a Photo in Photoshop? Photoshop is a well-known tool for editing photos, of which detaching human body out of the photo is processed professionally, so you can have beautiful, impressive and distinct photos. Or when you have a photo with friends, but for some reasons you want to detach your body from those together-shooting photos, Photoshop is the best solution to realize it.

Detach Human Body from photo with Photoshop
Preparation:
– To download and install Photoshop in your computer here:
– Full software for installation of Photoshop : Here
– A photo that needs detaching human body out of the background.
– For those photos with hair, refer to the post detach hair with Photoshopto detach hair contents.
Step 1: Open the photo with Photoshop.

Remove a Person From a Photo in Photoshop

Remove a Person From a Photo in Photoshop

Step 2: Use Quick Selection Tool (W) and make selected area around the human body that needs detaching.

Remove-a-Person From-a-Photo-in-Photoshop-image003

Remove-a-Person From-a-Photo-in-Photoshop-image004

Step 3: Right-mouseclick into the photo and choose Refine Edge.

Remove-a-Person From-a-Photo-in-Photoshop-image005

Step 4: When the box Refine Edge appears, adjust as in below picture:
Remove-a-Person From-a-Photo-in-Photoshop-image006

Remove-a-Person From-a-Photo-in-Photoshop-image007

Step 5: This is the most important step. Use Refine Radius Tool(E)to draw around the object to take remaining details like hair….
Remove-a-Person From-a-Photo-in-Photoshop-image008

Besides, you can use Erase Refinements Tool(E) to erase the selected excess areas
Remove-a-Person From-a-Photo-in-Photoshop-image009

Step 6: Go to Output in box Refine Edge, adjust as in picture and click OK for result.
Remove-a-Person From-a-Photo-in-Photoshop-image010

Here’s what we’ve got:
Remove-a-Person From-a-Photo-in-Photoshop-image011

Insert another background to make the photo more beautiful.
Remove-a-Person From-a-Photo-in-Photoshop-image012
We’ve finished detaching human body from the background with Photoshop, In this way, you can make your own unique, impressive photos. Besides, you can refer to below posts:

Admin PhotoshopTip
Author: Admin PhotoshopTip

Hello, I’m Hanna Kim. I love Photoshop and like designing web with Photoshop. I will try to post more tutorials. Please press LIKE or G+ button if this article is useful.

Privacy Policy

Home  »  Privacy Policy

Privacy Policy

Photoshop Tutorials takes your privacy seriously. This privacy policy describes what personal information we collect and how we use it. See this privacy policy primer to learn more about privacy policies in general.

Routine Information Collection

All web servers track basic information about their visitors. This information includes, but is not limited to, IP addresses, browser details, timestamps and referring pages. None of this information can personally identify specific visitors to this site. The information is tracked for routine administration and maintenance purposes.

Cookies and Web Beacons

Where necessary, Photoshop Tutorials uses cookies to store information about a visitor’s preferences and history in order to better serve the visitor and/or present the visitor with customized content.

Advertising partners and other third parties may also use cookies, scripts and/or web beacons to track visitors to our site in order to display advertisements and other useful information. Such tracking is done directly by the third parties through their own servers and is subject to their own privacy policies.

Controlling Your Privacy

Note that you can change your browser settings to disable cookies if you have privacy concerns. Disabling cookies for all sites is not recommended as it may interfere with your use of some sites. The best option is to disable or enable cookies on a per-site basis. Consult your browser documentation for instructions on how to block cookies and other tracking mechanisms. This list of web browser privacy management links may also be useful.

Special Note About Google Advertising

Any advertisements served by Google, Inc., and affiliated companies may be controlled using cookies. These cookies allow Google to display ads based on your visits to this site and other sites that use Google advertising services. Learn how to opt out of Google’s cookie usage. As mentioned above, any tracking done by Google through cookies and other mechanisms is subject to Google’s own privacy policies.

Contact Information

Concerns or questions about this privacy policy can be directed to contact@photoshoptip.com for further clarification.

This privacy policy was generated by the Privacy Policy for WordPress plugin.

Color Schemer Studio 2.0 Free Download Picking color code quickly

Home  »  Download   »   Color Schemer Studio 2.0 Free Download Picking color code quickly

Color Schemer Studio 2.0 Free Download Picking color code quickly

By | July 14, 2017

color schemer studio 2

In the design world, color is a very important factor that directly affects the quality and aestheticism of products. If you want to know the color code of a image that inspired you, Color Schemer Studio will be a noteworthy software.

Beside the ability of displaying color parameters in many different standards, Color Schemer Studio offers many other great features to get accurate parameters of any color displayed on the computer screen. The most distinctive feature is the Color Mixer.

Color Schemer Studio 2.0 can pick color code everywhere from website to PC screen that has the smallest color coding  function with the smallest pixel.


color schemer studio 2

It is very easy to use. After opening up, this interface will appear, select the Screen Picker tool to start the process of picking color on images.

color schemer studio 2_1

A small table will display on the top left side and just move the mouse any place that you want to pick its color code

color schemer studio 2_1

After clicking on a color, it will show up the color codes like this.


color schemer studio 2_3

To get the color codes after copying the color codes, we go to the Edit menu, then select Copy, it will have 3 systems of colors for copying. These are colors that we took from the images on web.

It is useful for designers. Now guys, down and enjoy it at ColorSchemer Homepage

Source: Vietdesigner.net

Photoshop – Detach hair with Channel function

Home  »  Tutorials   »   Photoshop – Detach hair with Channel function

Photoshop – Detach hair with Channel function

By | May 3, 2016

Hair is the most difficult part to detach in an image when you want to detach that image to insert into another background. Photoshoptip.com will give you simple guidelines on how to detach hair with Channel function using image-editing software Adobe Photoshop.

Adobe Photoshop is the most famous and chosen image-editing software in the world. While the previous posts in Photoshoptip.com once introduced ways to make photo collage, this post introduces you technique to detach hair with the available Channel function.

Detach-hair-001

Detaching hair from background is one of the most basic photo collage and editing techniques in Photoshop. However if you do not know how to do it and use only Lasso Tool, you cannot detach all the hair with tiny details.
Your compatible Photoshop versions are available here: : Download PhotoShop

DETACH HAIR FROM BACKGROUND IN PHOTOSHOP

Step 1: Open Adobe Photoshop, choose any image to detach..gives guidelines with below image
Detach-hair-001002

Step 2: Open the image, duplicate the image by clicking Layer –> Duplicate
Detach-hair-001003

Turn to Channel mode

Detach-hair-001004

Step 3: Click into each available Channel, choose the Channel which clearly shows contrast between the person and the background in the image. In this image, you can see clearly that Blue mode has the sharpest contrast.

Detach-hair-001005

Step 4: Right-mouse click into Blue mode, choose Duplicate Channels duplicate Channels
Detach-hair-001006

Step 5: in the copied Channel, use 1 of the below 2 methods to adjust contrast for make the contrast sharper:
– Levels ( Ctrl +L): Click Image –> Adjustments –> Levels
– Curves (Ctrl + M): Click Image –> Adjustments –> Curves

Detach-hair-001007

Detach-hair-001008

To increase contrast, choose White Point
Detach-hair-001009

Reverse Channel by clicking Ctrl + I

Detach-hair-001010

Step 6: Use Brush tool (Shortcut B) and white the object
Detach-hair-001011

Hold Ctrl –> click Thumbnail of Channel Blue copy
Detach-hair-001012

Step 7: Reselect Channel RGB mode and come to layer to duplicate the layer you have worked
Detach-hair-001013
So we’ve finally detached the image with all the hair of the girl, successfully. You now just put this image of the girl into another background.

And here’s the result
Detach-hair-001014

Author: Admin PhotoshopTip

Hello, I’m Hanna Kim. I love Photoshop and like designing web with Photoshop. I will try to post more tutorials. Please press LIKE or G+ button if this article is useful.

Photoshop CS6 new features

Home  »  Tutorials   »   Photoshop CS6 new features

Photoshop CS6 new features

By | August 22, 2014

Color theme in Photoshop CS6

What’s new in Photoshop CS6 or What are new features in Adobe Photoshop CS6 ? Should we use Photoshop CS6 or CS5 ? In this post, I hope we will know new features in Photoshop CS6. If your computer don’t have this software, you can install it on your computer How to install Photoshop CS6 trial version

In Photoshop CS6, Adobe have many upgrade items. Here’s an overview :

1/ Workspace in Photoshop CS6:

No matter which version you are using Adobe Photoshop, Photoshop worksapce has a black color theme. But with CS6, you can change color theme to gray or charcoal gray color. You can also have more screen real estate, because Adobe removed the application bar to give screen area.

Color theme in Photoshop CS6

Color theme in Photoshop CS6

Settings for Adjustment layers, layer masks, and 3D items are consolidated into Properties panel. Photoshop CS6 also show a new Mercury Graphics Engine that bases on your computer’s graphics processing unit. This speeds up the live previews of things like Free Transform, Warp Transform, Puppet Warp, Liquify, and Lighting Effects.

Move tool, the Crop tool and Free Transform command show a info next to your cursor. You also see this handy overlay when you resize a brush cursor by Alt + right-click+dragging on a PC (Ctrl-Option-dragging on a Mac); it displays brush size, hardness, and opacity.

2/ Auto Save, Auto Recover, and Background Save :

When we work in Adobe Photoshop, we can lose document if your power outages. So that, we have to “SAVE” or press “Ctrl + S” repeatedly. But with Auto Save function in Photoshop CS6, It will help you save automatically saves our file every few minutes. We don’t have to wait until the program is finished saving your document before you perform other edits.

3/ 64-bit Bridge :

You can access faster to files with 64 bit. On Window, We can use 32 bit or 67 bit. But you only use 64 bit, Photoshop CS6 don’t have 32 bit version on Mac.

4/ Edit Video in Photoshop CS6.

You can import, trim, and split clips; create effects using filters, Adjustment layers, and layer styles; and export your finished videos.

5/ New character and paragraph styles

You can change font size, rasterize Type laysers and included a Paster Lorem Ipsum command. It can help you create placeholder text automatically.

6/ Layer filtering in Photoshop CS6

You can show/hide layers in Layers panel and you can also change the blend mode of multiple layers if you want.

7/ Camera Raw in Photoshop CS6

Camera Raw in Photoshop CS6 do a much better work of correcting the colorand lighting in images while preserving details in the shadows and highlights.

Author: Admin PhotoshopTip

Hello, I’m Hanna Kim. I love Photoshop and like designing web with Photoshop. I will try to post more tutorials. Please press LIKE or G+ button if this article is useful.

Photoshop CS6 64 bit download full for free

Home  »  Photoshop downloads   »   Photoshop CS6 64bit download full for free

Photoshop CS6 64bit download full for free

By | October 13, 2014

Photoshop CS6 64bit download free

In this tutorial, I will show how to download photoshop CS6 64 bit full version and trial version free for Window or Mac OS X with direct link. You should use Photoshop CS6 full version if you have serial key. Or using Photoshop CS6 64bit trial version with 30 days free. With 64 bit version, you have to install with 64 bit System ( Window 7 64 bit or Windows 8 64bit).

In the last post, I also talk about Photoshop CS6 32 bit download free. Do use Photoshop CS6 or Photoshop CC ? reading article What is difference between Photoshop CS6 and Photoshop CC, Photoshop CS6 new features. If you are professional designer, you should use Photoshop CC ( How to install Photoshop CC )

Bonus : Install Photoshop CS6 intruction here How to install Photoshop CS6 trial version

Photoshop CS6 64bit download free

Photoshop CS6 64bit download free

Download Photsohop CS6 64bit only use several basic steps. Now, we begin for main content in this post. How to download Photoshop CS6 64 bit full version and trail version for free.

Step 1 : Go to direct link to download Download Photoshop CS6 64 bit

Step 2: finding and Clicking on “Photoshop CS6, Photoshop CS6 Extended”. Then select language for Photoshop CS6. If you want to change Photoshop CS6 language to English, please read How to change Photoshop CS6 language to English.

Some language you can use :

– English—International, English—Universal, Japanese
– Danish, Dutch, French, Portuguese—Brazil, Spanish, Spanish—Latin America, French—Canada, German, Italian, Norwegian, Spanish—North Ame, Hungarian, Middle Eastern English Arabic, Middle Eastern, English Hebrew, Polish, Romanian, Russian, Turkish, Finnish
– Czech, French—North Africa, Ukrainian
– Chinese Simplified, Chinese Traditional, Korean

download photohsop cs6 64bit free

download photohsop cs6 64bit free

Thanks for reading, sorry for my bad English.

Author: Admin PhotoshopTip

Hello, I’m Hanna Kim. I love Photoshop and like designing web with Photoshop. I will try to post more tutorials. Please press LIKE or G+ button if this article is useful.

22 thoughts on “Photoshop CS6 64bit download full for free

  1. me

    An actual link to photoshop download would be nice, but this deception shit to get people to download other things is contemptible

    Reply

  2. dinesh kumar pandey

    please send me photo shop software for window 8 and 64 bit i am interested to download in laptop

    Reply

  3. mansi

    I need help with the version of Photoshop

    i want to instal photoshop compaiteble with

    Can you please let me know which photoshop version is supported?

    Reply

      1. Photoshop Tip

        Can you show me your hardware configuration? Choose Start -> Run -> type “dxdiag” to see the configuration of your laptop! Then read it for me!

        Reply

  4. Julian Fineman

    Do you have any kind of details concerning pdf book?

    Reply

  5. KENNY PARRISH

    NEED A LINK FOR LATEST VERSION OF PHOTOSHOP PLEASE. WINDOWS 7 64-BIT

    Reply

Photoshop CS6 32 bit download free

Home  »  Photoshop downloads   »   Photoshop CS6 32 bit download free

Photoshop CS6 32 bit download free

By | October 8, 2014

adobe photoshop cs6 32 bit download free

How to download free Adobe Photoshop CS6 32 bit or 64 bit for Window or Mac OS X. You can download Photoshop CS6 trial version with direct link on Adobe’s website. You only install Photoshop CS6 32bit on Windown XP or Win 7 with 32 bit (In Win 7 64 bit, you can also install Photoshop CS6 32 bit, but you can’t install Photoshop CS6 64 bit on Win 7 32 bit ). If you want to use full version, you should enter serial key number Photoshop CS6 when you install Photoshop. Of course, you have to buy a key, you can buy serial number for photoshop CS6 to use Photoshop CS6 full version. Some websites, you can buy key as : Adobe Photoshop, Amazon…

I think that you should design photos with Photoshop CS6, Because there are more Photoshop CS6 new features . Last post, I also wrote about How to install Photoshop CS6 trial version and How to install Photoshop CC.

Bonus : Photoshop CC is the lastest version of Adobe software. What is difference between Photoshop CS6 and Photoshop CC ?

adobe photoshop cs6 32 bit download free

Adobe Photoshop CS6 32 bit download free

Now, we see the main content in this post. How to download Photoshop CS6 free ? In this tutorial, I will show step by step to download Photoshop CS6 32 bit.

Step 1 : go to this link : Download Photoshop Products

You can buy Adobe Photoshop in Amazon : http://amzn.to/1UWF389

Step 2: find Photoshop CS6, Photoshop CS6 Extended and click here. You attend to download for Mac OS X or Windows

Step 3 : Select language for download Photoshop CS6. In last post, I also introduce How to change Photoshop CS6 language to English

You can use some languages as follow :

– English—Universal, English—International, Japanese
– Danish, Dutch, Finnish, Italian, Norwegian, Portuguese—Brazil, Spanish, Spanish—Latin America, French, French—Canada, Spanish—North America, Swedish, German.
– Czech, Middle Eastern English Arabic, Middle Eastern English Hebrew, French—North Africa, Hungarian, Polish, Romanian, Turkish, Ukrainian, Russian, .
– Korean, Chinese Simplified, Chinese Traditional.

select download photoshop cs6 version

Select download photoshop cs6 version and languge to use

The next post, I will write Photoshop CS6 64 bit download free for Window and Mac OS X.

Thanks for your reading ! Good luck.

Sorry for my bad english.

Author: Admin PhotoshopTip

Hello, I’m Hanna Kim. I love Photoshop and like designing web with Photoshop. I will try to post more tutorials. Please press LIKE or G+ button if this article is useful.

34 thoughts on “Photoshop CS6 32 bit download free

  1. Lokender

    Nyc Web site i cant find tha adobe photoshop But suddenly i Found your Web Site I love the Web site I found esyly Adbobe photoshop …..Thanks ….

    Reply

      1. sohil

        I Need Version CS6 photoshop for windows 7 64Bit please give me Direct download link

        Reply

  2. hardik borda

    wow, its amazing …
    i couldn’t find photo shop anywhere but then i found your website and i was able to download
    thank you very much it’s really working site….

    Reply

    1. sohil

      Bro Please give me download link CS6 photoshop 64Bit Win7 please bro

      Reply

  3. Ramesh S. Lanke Patil

    Hello, I want to photoshop CS6 full version, Please Given me Setup. Thanks

    Reply

  4. Therese

    Is this just the trial version or the full version already? Thank you! Will be hoping for your response.

    Reply

  5. pokebro

    thank u very much
    can you teach me how to do it for other softwares

    Reply

  6. pokebro

    well my friend created a website neave.com
    you should visit it

    Reply

  7. Chinmay Agrawal

    Which photoshop version is required for windows 7 professional and 32-bit OS?

    Reply

  8. Kristina

    Hello, I want to photoshop CS6 full version, Please Given me Setup.

    Reply

  9. Muhammad Adeel

    please tell me the serial number of cs6 extended 32bit Photoshop

    Reply

  10. Rahim

    I need Adobe Photoshop cs6 for 32 bit oparating System in Windows 7

    Reply

Photoshop CC trial version download free

Home  »  Photoshop downloads   »   Photoshop CC trial version download free

Photoshop CC trial version download free

By | November 5, 2014

How to download Photoshop CC free

How to download Photoshop CC trial version or full version free. In this tutorial, I will introduce to download Photoshop CC full version and trial free version. Some people think that photoshop CC can download easily, but a beginner photoshop meet a little difficulty. Photoshop CC is latest version of Adobe Photoshop. You can download Photoshop CC on the Home Adobe’s website. Photoshop CC have more functions than Photoshop CS6, example you and your parter can design a photo on the internet. In the last post, I worte 2 article about Photoshop CC
1/ How to install Photoshop CC
2/ What is difference between Photoshop CS6 and Photoshop CC

In this tuorial, I will be going to show how to download Photoshop CC trial version and full version.

Step 1: Go to link http://www.adobe.com/ ( Or download Photoshop in Amazon )
Step 2 : Click MENU then select Photoshop

How to download Photoshop CC free

How to download Photoshop CC free

Step 3 : Click Free trial if you want to use trial verion with 30-day free. You should buy this sofware by click buy now. In this tutorial, I will download trial version of Photoshop CC.

free trial version photoshop cc

Free trial version Photoshop CC

Step 4: Create ID Adobe, ” Please sign in with your Adobe ID, or sign up if you don’t have one. Once that’s done, your download will begin immediately.”

You can change language by clicking on below.

Please sign in with your Adobe ID

Please sign in with your Adobe ID

Adobe id dialog box

Adobe id dialog box

Step 5 : Photoshop CC is downloaded automatically or you can click “Click here to get started” if not automatic.

downloading photoshop cc

Downloading photoshop cc

You can download Photoshop CS6 32 bit and 64 bit
Photoshop CS6 64bit download full for free
Photoshop CS6 32 bit download free

Thanks for your reading !

Author: Admin PhotoshopTip

Hello, I’m Hanna Kim. I love Photoshop and like designing web with Photoshop. I will try to post more tutorials. Please press LIKE or G+ button if this article is useful.

6 thoughts on “Photoshop CC trial version download free

  1. Senaida

    Picture, a course that is indeed powerful as well as complex this
    created a complete business of folks and item to show you How to work with this.
    Press CTRL Page Down (Mac: Command Page Down) to go the screen view one full
    screen off to the right. Of course, try to choose your textures wisely because
    you do not desire to make your design look too.

    Reply

Photoshop CC Keyboard Shortcuts Hot key

Home  »  Tutorials   »   Photoshop CC Keyboard Shortcuts Hot key

Photoshop CC Keyboard Shortcuts Hot key

By | September 1, 2015

Adobe Photoshop CC Keyboard Shortcuts use on the windows and Mac. Photoshop CC Provide many tools to edit photos. When you are a biginer, you can go to menu then click a tool. So, this work is lowly. How to edit photoshop in Photoshop CC quickly ? Using shorcuts is the answer for this question. In this tutorial will show how to use Photoshop’s keyboard shortcuts for Windows and Mac. I make a table for comparison Window and Mac. You can download Photoshop CC Keyboard Shortcuts file in attached.

Here are many of Photoshop’s keyboard shortcuts

Photoshop CC shortcuts frequently used on Mac version :

Photoshop CC Keyboard Shortcuts Hot key

Photoshop CC Keyboard Shortcuts Hot key

Window menu pannels :
– Burshes : F5
– Color : F6
– Layer : F7
– Info : F8
– Levels layer : Ctrl+Alt+L
– Merge Layers : Ctrl+E
– Merge Visible : Ctrl+Shift+E
– New Layer : Ctrl+Shift+N
– New Layer (no dialog) : Ctrl+Alt+Shift+N
– New Layer via Copy : Ctrl+J
– New Layer via Copy (show dialog) : Ctrl+Alt+J
– New Layer via Cut : Ctrl+Shift+J
– New Layer via Cut (show dialog) : Ctrl+Alt+Shift+J

File menu

– New : Ctrl + N
– Open : Ctrl + O
– Browse in Bridge : Alt + Ctrl + O
– Close : Ctrl + W
– Close all : Alt + Ctrl + W
– Close and go to Bridge : Shift + Ctrl + W
– Save : Ctrl + S
– Save As : Shift + Ctril + S
– Save for Web : Alt + Shift + Ctrl + S
– Print : Ctrl + P
– Print One Copy : Alt + Shift + Ctrl + P
– Exit/Quit : Ctrl + Q

Layer Menu
– Ney Layer : Shift + Ctrl + N
– Layer via Cut : Shift + Ctrl + J
– Create Clipping Mask : Alt + Ctrl + G
– Grpup Layers : Ctrl + G
– Merge Layers : Ctrl + E

Edit Menu : Ctrl + E

– Undo/Redo : Ctrl + Z
– Step Forward : Shift + Ctrl + Z
– Step Backward : Alt + Ctrl + Z
– Cut, Copy, Past : Ctrl + X, C, V
– Paste Into : Shift + Ctrl + V
– Content Aware Scale : Alt + Shift + Ctrl + C
– Free Tranform : Ctrl + T
– Transform : Shift + Ctrl + T
– Color Settings : Shift + Ctrl + K
– Preferences : Ctrl + K
– Assign Profile : Ctrl+Alt+Shift+ [
– Convert to Profile : Ctrl+Alt+Shift+ ]
– Clear (selection) : Delete / Backspace
– Content-Aware Scale : Ctrl+Alt+Shift+C
– Copy Merged : Ctrl+Shift+C
– Fade (last filter / adjustment) : Ctrl+Shift+F
– Fill (show dialog) : Shift+Backspace
– Fill from history : Ctrl+Alt+Backspace
– Fill from history & preserve trans.: Ctrl+Alt+Shift+Backspace
– Transform Again with duplicate : Ctrl+Alt+Shift+T
– Fill w/ background & preserve trans : Ctrl+Shift+Backspace
– Transform Again : Ctrl+Shift+T
– Fill w/ foreground & preserve trans : Alt+Shift+Backspace
– Fill with background color : Ctrl+Backspace
– Fill with foreground color : Alt+Backspace
– Free Transform : Ctrl+T
– Free Transform with duplicate : Ctrl+Alt+T
– Keyboard Shortcuts : Alt+Shift+Ctrl+K
– Menus : Ctrl+Alt+Shift+M
– Paste : Ctrl+V
– Paste in Place : Ctrl+Shift+V
– Paste Into (selection) : Ctrl+Alt+Shift+V
– Preferences (General) : Ctrl+K
– Preferences (last used) : Ctrl+Alt+K
– Purge All Ctrl+Shift+ ‘
– C Purge All (no dialog) : Ctrl+Alt+Shift+ ‘
– Step Backward (history) : Ctrl+Alt+Z
– Step Forward (history) : Ctrl+Shift+Z

Tools
– Add mode (Shape tools) : +
– Subtract mode (Shape tools) : –
– Lock transparency pixels (on / off) : /
– Decrease brush size : [
– Increase brush size : ]
– Decrease brush hardness by 25% : Shift+ [
– Increase brush hardness by 25% : Shift+ ]
– Previous brush : ,
– Next brush : .
– First brush : Shift+ ,
– Last brush : Shift+ .
– Tool opacity 10% ® 100% : 1 → 0
– Flow 10% → 100% : Shift+1 → 0
– Path / Direct Selection tools : A
– Brush / Pencil / Color Replacement / Mixer tools : B
– Crop / Perspective Crop / Slice / Slice Selection : C
– Default Foreground and Background Colors : D
– Eraser / Background Eraser / Magic Eraser : E
– Gradient / Paint Bucket / 3D Material Drop tools : G
– Hand tool (bird’s eye view) : H
– Eyedropper / 3D Material / Sampler / Ruler / Note… : I
– Spot / Healing / Patch / Red Eye / Content-Aware : J
– C Blur / Sharpen / Smudge tools : K
– asso / Polygonal Lasso / Magnetic Lasso : L
– Rectangular / Elliptical Marquee tools : M
– C Foreground Color Picker : N
– Dodge / Burn / Sponge tools : O
– Pen / Freeform Pen tools : P
– Edit in Quick Mask Mode (on / off) : Q
– Rotate View tool : R
– Clone / Pattern Stamp tools : S
– Type tools (Horiz / Vert / Horiz Mask / Vert Mask) : T
– Shape tools (Rect / Round Rect / Ellipse / etc.) : U
– Move tool : V
– Quick Selection / Magic Wand tools : W
– Switch Foreground and Background Colors : X
– History / Art History Brush tools : Y
– Zoom tool : Z
– Hand tool (toggle) : Space
– Zoom In (toggle) : Ctrl+Space
– Zoom Out (toggle) : Alt+Space
– Cycle Path / Direct Selection tools : Shift+A
– Cycle Brush / Pencil / Color Replacement / Mixer : Shift+B
– Cycle Crop / Perspective / Slice / Slice Selection : Shift+C
– Cycle Eraser tools : Shift+E
– Cycle Gradient / Paint Bucket / 3D Material Drop : Shift+G
– Cycle Eyedropper / 3D Material / Sampler / Ruler… : Shift+ I
– Cycle Spot / Healing / Patch / Red Eye / etc. : Shift+J
– C Cycle Blur / Sharpen / Smudge tools : Shift+K
– Cycle Lasso tools : Shift+L
– Cycle Rectangular / Elliptical Marquee tools : Shift+M
– Cycle Dodge / Burn / Sponge tools : Shift+O
– Cycle Pen / Freeform Pen tools : Shift+P
– Cycle Clone / Pattern Stamp tools : Shift+S
– Cycle Type tools : Shift+T
– Cycle Shape tools (Rect / Round Rect / etc.) : Shift+U
– Cycle Quick Selection / Magic Wand tools : Shift+W
– Cycle History / Art History Brush tools : Shift+Y
– Airbrush (with Brush tools selected) : Alt+Shift+P
Thanks for reading !
This article is written by Admin Photoshop Tutorials

Author: Admin PhotoshopTip

Hello, I’m Hanna Kim. I love Photoshop and like designing web with Photoshop. I will try to post more tutorials. Please press LIKE or G+ button if this article is useful.

3 thoughts on “Photoshop CC Keyboard Shortcuts Hot key

  1. Lisabeth Greenman

    I enjoy reading through a post that will make people think. Also, thanks for allowing for me to comment!

    Reply

Patch tool in Photoshop CS6

Home  »  Tutorials   »   Patch tool in Photoshop CS6

Patch tool in Photoshop CS6

By | November 7, 2014

How to use patch tool in photoshop cs6

How to use patch tool in photoshop cs6 ? Patch tool is the new tool in Photoshop CS6. Patch tool help you to remove unwanted image elements and give you the flexibility to choose the source area. Patch tool use usally in Photoshop CS6. Example, remove acne or pimple. In the next post I will write How to remove acne and smooth skin in Photoshop CS6 using Patch tool.

Amazing photo is designed by Patch tool in Photoshop CS6

patch tool in photoshop cs6

A cat with two eye and two ear is designed by Patch tool in Photoshop CS6

Patch tool allow you to copy a area. As photo, left eye, ear and right eye, ear are copied.

Step 1: Right Click in Patch tool icon

How to use patch tool in photoshop cs6

How to use patch tool in photoshop cs6

Step 2 : create a area you want to insert element then drag this area to one.

Then double click or let down.

Thanks for your reading.

Author: Admin PhotoshopTip

Hello, I’m Hanna Kim. I love Photoshop and like designing web with Photoshop. I will try to post more tutorials. Please press LIKE or G+ button if this article is useful.

Photoshop Tutorials – Page 9 of 12 – Photoshop Tutorials and Tips

Patch tool in Photoshop CS6

By | November 7, 2014

How to use patch tool in photoshop cs6 ? Patch tool is the new tool in Photoshop CS6. Patch tool help you to remove unwanted image elements and give you the flexibility to choose the source area. Patch tool use usally in Photoshop CS6. Example, remove acne or pimple. In the next post I will write How to… Read More »

Photoshop CC trial version download free

By | November 5, 2014

How to download Photoshop CC trial version or full version free. In this tutorial, I will introduce to download Photoshop CC full version and trial free version. Some people think that photoshop CC can download easily, but a beginner photoshop meet a little difficulty. Photoshop CC is latest version of Adobe Photoshop. You can download Photoshop CC on… Read More »

How to insert special symbols in Photoshop

By | October 23, 2014

How to Insert Special Text Characters Symbols in Photoshop CS6. You want to type a special text character symbols but you can’t find where to add symbol to your document. Unfortunately, Photoshop CS6 don’t have symbols menu like world. It also don’t have special symbols on the keyboard. Sometimes you may want to insert special character or symbols… Read More »

How to undo more in Photoshop CS6

By | October 19, 2014

How do I undo and revert more in Photoshop CS6, Adobe Photoshop Creative Suite 6 is very forgiving. This software allow you to use many different ways to undo what you did. By default, You can undo twenty previous actions. Sometimes you want to redo more reapply effects you’ve cancelled. How to use the Multiple Undo Shortcut ?… Read More »

Photoshop Tutorials – Page 8 of 12 – Photoshop Tutorials and Tips

Change hair color in Photoshop CC

By | September 11, 2015

How to change hair colour in Photoshop CC ? Photoshop is the most powerful image editing tool with many useful features which allows you to edit your photos easily. There are many professional designers in the world have used this software in their work. The following tutorial will guide you how to use Photoshop to change hair color… Read More »

How to remove tattoos in Photoshop

By | August 10, 2015

How to remove tattoos using Photoshop ? I will show how to remove a tattoo in Photohsop. You have a tattoo in body, you’re uncomfortable with them. You can remove tattoo naturally at home (…). But using Photoshop is very fastly and easily (just for photo). In this Photoshop tutorials, I have tested in Photoshop Cs6 and Photoshop… Read More »

Making a tattoo with Photoshop

By | May 6, 2015

How to make a tattoo on your body in Photohsop CS6 ? In this tutorial, I will guide you make a tattoo easyly in Photoshop CS6 and Photoshop CC. Nowadays, tattoo has become an art and it is getting greater when you can cover your body with tattoos by yourself in order to enhance the artistry in your… Read More »

Instruction to quickly erasing background by Photoshop

By | April 28, 2015

How to remove an image background or transparent background in Photoshop. In this tutorial I will guide how to remove an image background in Photoshop. With Photoshop, there are many ways to erase a white or color background, even in complex background pictures. In previous versions, you can use tools of Extract, Mode, and Channel to erase background… Read More »

Photoshop Tutorials – Page 7 of 12 – Photoshop Tutorials and Tips

Change T shirt color in Photoshop

By | January 11, 2016

When taking photos, you may find color of the T-shirt in the photo not nice enough. In this case, you can change into another nicer color that you like. * In this way, the color should be one plain color covering overall the T-shirt, or spotted with only few patterns. This way is not applicable to the T-shirt… Read More »

How to Switch Colors with Replace Color in Photoshop CS6

By | January 6, 2016

Simple way to change color in Photoshop Cs5 cs6–Change Photoshop color with Replace Color. Changing color in Photoshop is one of the most basic function in Photoshop, including changing T-shirt color, hair color, skin color, etc… and there are different ways to do this to get a so-real photo depending on each circumstance. The easiest way is to… Read More »

Remove Background from Image with Photoshop fast and simple

By | December 8, 2015

Removing background is a common technique used commonly in Photoshop. There are quite a few ways of detaching depending on the complexity of the photo. The below post gives you guidelines on using colours scheme Channels in Photoshop to detach background out of a photo. Preparation: – To download and install Photoshop in computer – A photo that… Read More »

Adobe Photoshop CS 5 free download full version

By | November 18, 2015

In this article, I will guide you how to download Photoshop CS 5 software directly from Adobe. Adobe® Photoshop® CS5 Extended is the ultimate solution to handling premium digital photo. It not only provides all available features on compositing and editing on Photoshop CS5 but also have more breakthrough tools which allow you to create and edit 3D… Read More »

Difference Between Photoshop CC and CS6

By | November 5, 2015

In this article, I will compare Photoshop CC with Adobe Photoshop CS6. I will try to summarize the similarities and differences between the two versions, therefore, you can decide to buy Photoshop software that is most suitable for your work. In previous articles, I also have introduced and guided you how to buy Photoshop software directly on the… Read More »

How to Create a Visual Video by Timeline in Photoshop CC

By | October 19, 2015

I will show How to Create a Visual Video by Timeline in Photoshop CC in this tutorial. Timeline function has been already available in previous versions of Photoshop, however, in the version of Photoshop CC has added many new enhancements, which help the edit and creation of video effects become extremely simple. The beta of Photoshop CC was… Read More »

The Adobe Photoshop Lightroom CC Book for Digital Photographers Review

By | October 9, 2015

The Adobe Photoshop Lightroom CC Book for Digital Photographers is the book for Adobe Photoshop Lightroom CC version written by Scott’s Kelby. Since Lightroom 1.0 launched, Scott’s Kelby has published the book named “The Adobe Photoshop Lightroom for Digital Photographers”, which has been the world’s #1 best-selling book and has been translated into over 10 different languages. As… Read More »

Photoshop Tutorials – Page 6 of 12 – Photoshop Tutorials and Tips

How to use layer in Photoshop CS6 – Part 3 User Instruction : Layers

By | June 14, 2016

One of the standard components of Photoshop is Layers, which is the basis on which you can create beautiful pictures. In this post, we will introduce some basic layer usage tips to make a picture outstanding. Basic post on Adobe Photoshop CS6 you maybe interested in: • Part 1: Toolbox and friends. • Part 2: Control Panels. Layers… Read More »

Customize Toolbox in Photoshop CS 6 – part 1

By | May 12, 2016

Photoshop is one of the most powerful image-editing softwares to all levels and skills. However, it’s the most ‘horrible’ software to beginners. In this post, we will give basic guidelines to new users of Photoshop, especially Adobe Photoshop CS6; in terms of the most basic tools and methods. After installation, you can see CS6 interface has so many… Read More »

Create 3D Text in Photoshop CS 6

By | May 8, 2016

Text effects in Photoshop are varied depending on designers. This post recommends a beautiful 3D effect for your reference. Firstly open Photoshop and create a new project, write the text that needs effect. Step 1 It’s better to choose reasonable fonts, for example: Step 2: Choose Effect > 3D > Extrude & Bevel… Key in variables where was… Read More »

Photoshop – Detach hair with Channel function

By | May 3, 2016

Hair is the most difficult part to detach in an image when you want to detach that image to insert into another background. Photoshoptip.com will give you simple guidelines on how to detach hair with Channel function using image-editing software Adobe Photoshop. Adobe Photoshop is the most famous and chosen image-editing software in the world. While the previous… Read More »

Download Photoshop CS 4 free full version 32 & 64 bit for windows 7, 8

By | March 8, 2016

Adobe Photoshop CS4 – No.1 software in editing professional images. You can do more with Photoshop. Download Adobe Photoshop CS4 Extended – free for users. Adobe Photoshop CS4, Photoshopsofware, photoshop software is the best software in editing professional images, you can do more with Photoshop. Its creative tools bring you extraordinary outcomes. Its amazing abilities that have not… Read More »

How to Read and Use Histograms for Photo editing software

By | February 17, 2016

One of the most important and valuable tool that Photoshop gives you to edit or recover images is histograms. Histograms are, in fact, very valuable and not only limited in Photoshop. You’ll find them in many other photo editing programs such as Photoshop Elements, Adobe Lightroom, Camera Raw plug-in, and much more! Quite a few digital cameras nowadays… Read More »

How to check if a photo edited

By | February 1, 2016

Guidelines onhow to check if a photo has been edited! Nowadays photossharing is easier and more and more popular thanks to the arrival and strong development of social networks like Facebook, Twitter, Pinterest, etc. However, many among those endless shared photos have been edited more or less before uploading. Photoshopis currenly one of the strongest professional editingtool. In… Read More »

Photoshop Tutorials – Page 5 of 12 – Photoshop Tutorials and Tips

10 extremely effective tools to mix colors for designers

By | January 28, 2017

10 effective tools below will be helpful if you are looking for a color scheme. Choosing an impressive and beautiful color scheme can be considered as a key task for all graphic products. With a strong development of technology, the color tools bring great suggestions so you can easily and quickly choose the most appropriate color scheme. What are… Read More »

Jamie

How to remove text from image by Photoshop CS5/CS6

By | January 16, 2017

When downloading images from the Internet such as cover photos, desktop wallpapers,… you may find out watermarked image sometimes. You want to remove it instantly to make it your own image. So you can follow this simple and quickly instruction below. However, this tutorial is only available by Photoshop CS5 and CS6 but not earlier. First of all, open… Read More »

Jamie

How to create beautiful photo frames in Photoshop

By | January 4, 2017

Here are some simple types of photo frames that you can make easily; three different photo frame styles in Photoshop is showed in the article below. Frame 1: Step 1: Open your image in Photoshop then press Ctrl + Shift + Alt + N to create a new layer (Layer 1) Press Ctrl + A (to create a selection… Read More »

Jamie

Make your photo more perfect in Photoshop

By | December 23, 2016

When you look at a photo, you should think about whether it’s OK or not, and what you can do to make it better. Keep this habit and you can have the ability to do the right thing for your photos. In my opinion, a good photo should have clear features, clear colors and sensible contrast. But most of… Read More »

Jamie

How to load and use brush in Photoshop

By | December 18, 2016

Brush in Photoshop is an available frame that we can choose the one we like and then paste it on our photo. There are many types of brush such as star, flower, car, tree,… Most of Photoshop beginner use brush frequently, because if we own nice brush, our work wil be near to success. Nonprofessional can be difficult… Read More »

Jamie

How to Creat Matrix Text Effect in Photoshop CC

By | October 19, 2016

It seems that everybody got to know about the famous movie Matrix with amazing skills and effects. The blue text on a black magical background run seemed messy ,meaningless but brings a miraculous power. And Adobe Photoshop will help you create those magical words that matrix. Is it hard to make these mysterious inscription ? Follow the below… Read More »

Admin PhotoshopTip

Photoshop CS6 Manual – Part 6 : The art of digital photograph

By | August 27, 2016

For the readers that are interested in art, Photoshop offers plenty of options for digital painting. Whether your painting is your “job” or simply want to draw for amusement only, or to study the drawing tools of Photoshop is extremely rewarding. If you always want to become the professional of artwork painted but never spent much time to… Read More »

Admin PhotoshopTip