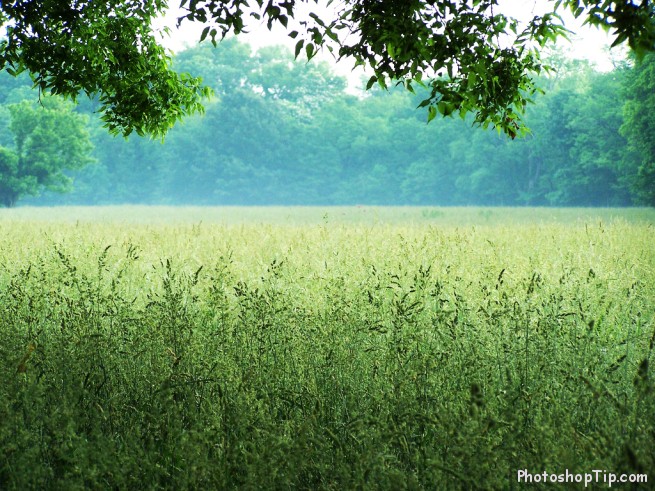
When you look at a photo, you should think about whether it’s OK or not, and what you can do to make it better. Keep this habit and you can have the ability to do the right thing for your photos. In my opinion, a good photo should have clear features, clear colors and sensible contrast. But most of digital cameras we use nowaday can’t take a perfect photo, so you must know how to use Photoshop and adjust parameters. Here is 2 basic adjustments that you can do right now for your photo.
1. Shadow/Highlight
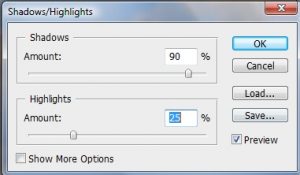
What is wrong in this photo? It’s too dark, in other words it don’t have enough light. This is a popular issue when you use normal camera. To solve it, you must open your photo in Photoshop and then choose Image -> Adjustments -> Shadow/Highlight. All the thing you can do is dragging the parameter of Shadows and Highlights until you satisfied with you photo. Then finish adjusting by clicking on OK.
My result is below. It’s enough light and we can see dark details compared with original photo.
Brightness/Contrast
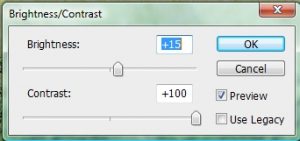
This photo is lack of contrast and has no depth, the color is quite pale. We can solve this by using Image -> Adjustments -> Brightness/Contrast. Do as you do with Shadow/Highlight, just dragging the parameter of Brightness and Contrasts until you feel your photo is perfect.
Here we are. My photo is so subtle and perfect by having more contrast and some brightness.







Its a good and very use full …….