
Fire Text is an awesome effect. You can also apply this effect in case of non-texts.
Step 1: Preparation
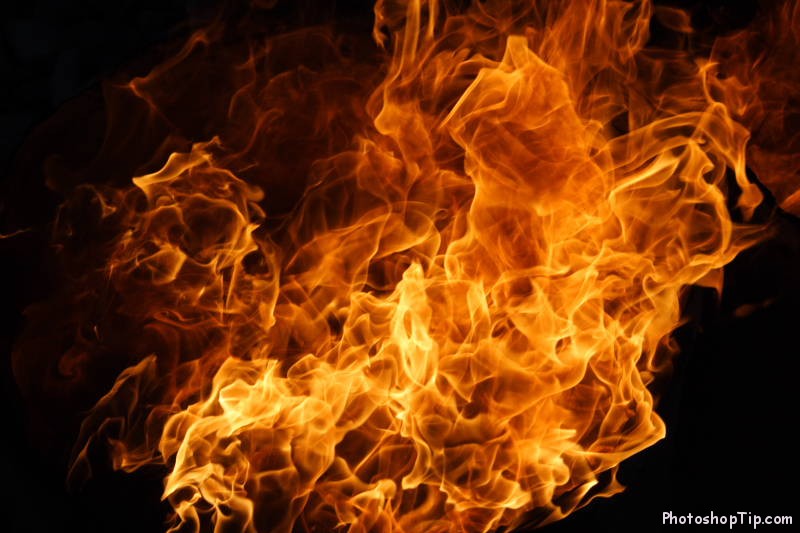
Save this file in your computer
Open Photoshop, click Ctrl + N to create a new file. Choose Black background.
Use Text Tools to create the texts you like, remember to make sure they’re White texts. Choose the font you like.

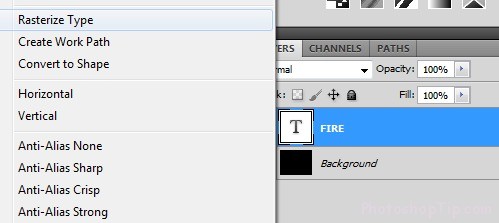
Click right mouse into your layer text, choose Rasterize type to convert this layer text to the common transparent picture that you normally do.
Next: Choose each character (click M). Cut each character to every separate layer (1 layer per character). Name the new layers to the characters, for easy view.
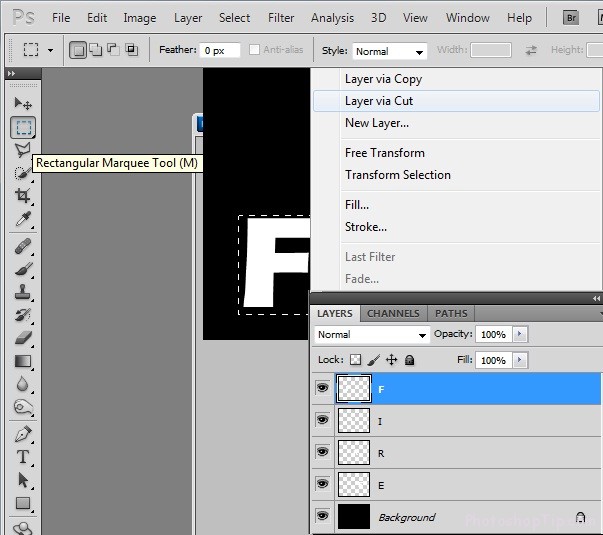
Then the preparation is done
Step 2: Blend
Double-click into any layers, open blend box, key in the following parameters:
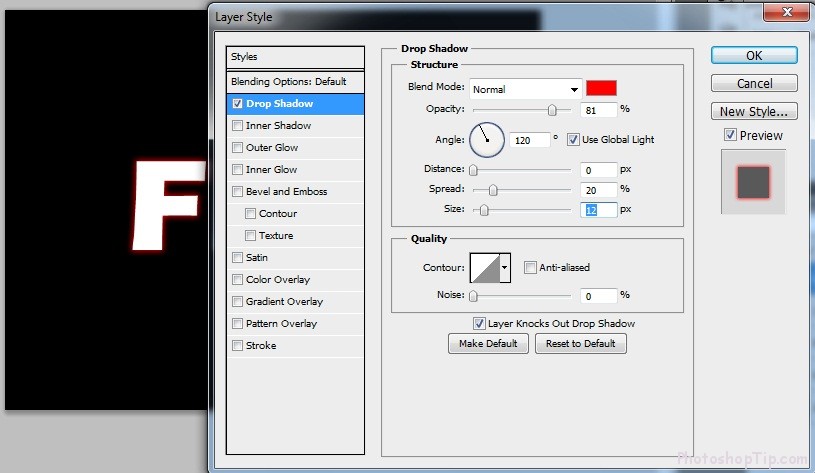
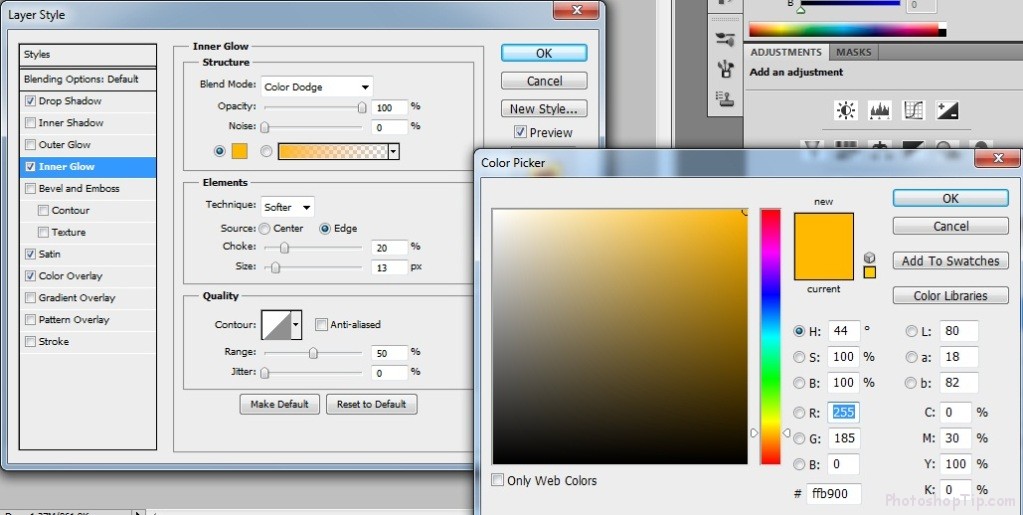
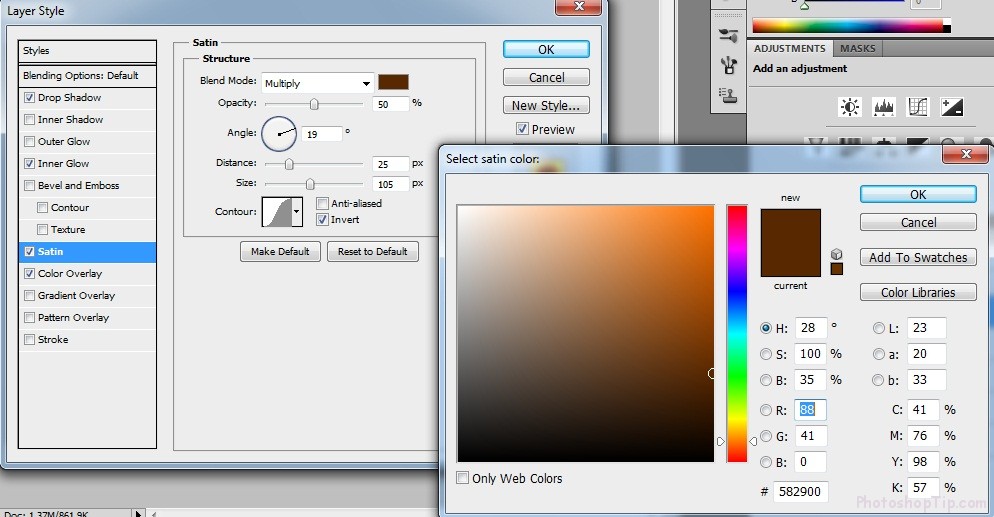
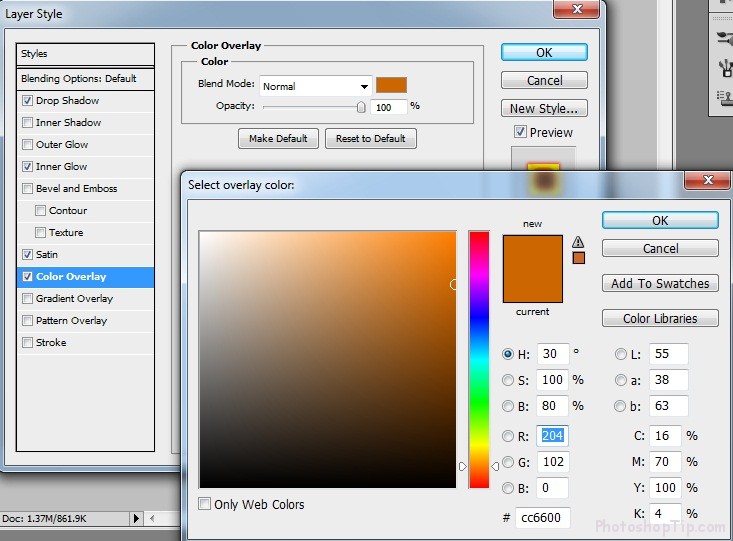
It should be noted to copy parameters as in the image to the colors for parts you have to re-set. Except for the colors, which you cannot choose otherwise, you can choose whatever font size you like
Right-mouse click into the layer, choose copy layer style, hold Shift and choose all layers, and right-mouse click to choose paste layer style to copy all parameters for the remaining characters.
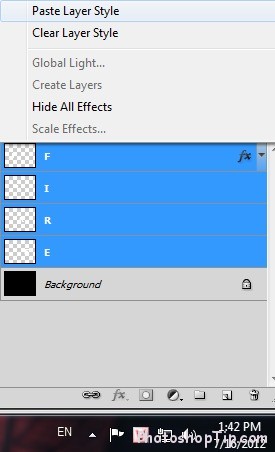
Again choose all layers, click Ctrl + G to group (you can do again or copy this group in case you make some mistakes)
Step 3: Liquify
Open the group (the next step is rather troublesome… in order to convert each character into a normal picture. Only by doing that way can we liquify. Otherwise, it will be totally white if we liquefy).
In the group, follow below steps
• Ctrl + shift +n (create new layer), name each character layer
• Pull this layer under the character layer that you’ve put the same name with
• Choose upper layer
• Click Ctrl + E
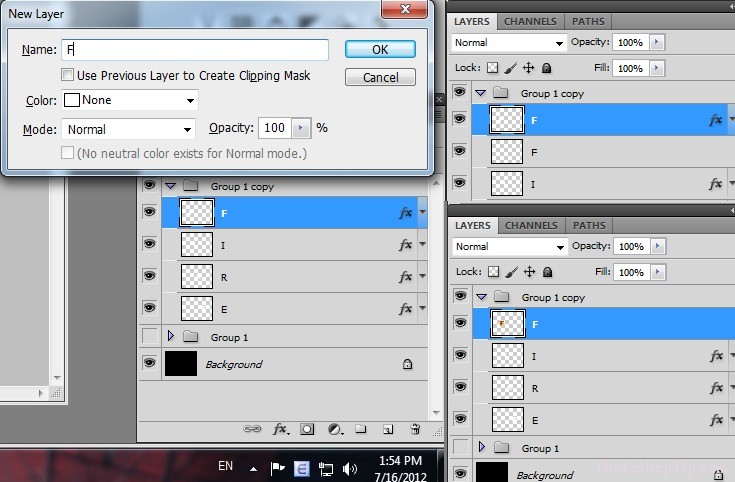
Repeat these steps to other characters.
Result as in the image
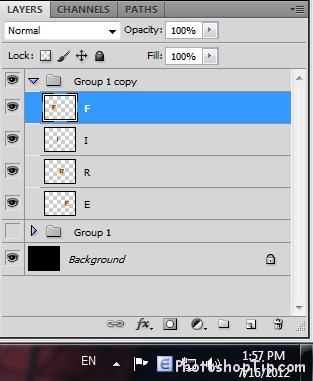
Next step: Be patient, ‘cause it takes time if you want to do it with long words.. But in this way, all characters will not look the same, each character has its own fire style.
Now choose 1 character layer…
Choose filter/liquify
and use Warp tool to make changes as in image, adjust to comfortable size as the change is only made to the edge of the character. You can use your own creativity to make a specific and spectacular fire style to your character. I know only wave style.
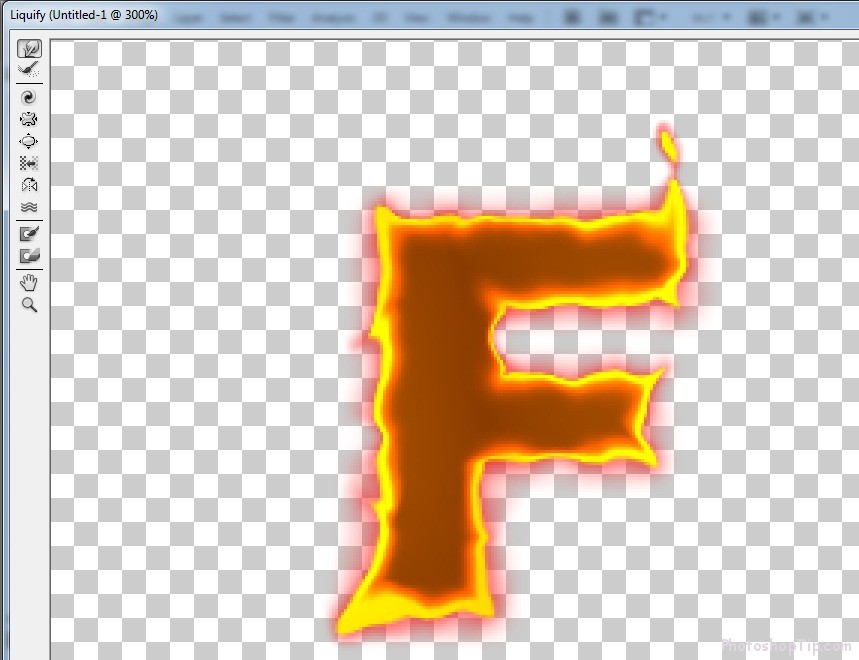
Continue to other characters
Step 4: BURN IT DOWN !!!
Close the group, make it a mask
Then use brush tools to choose black color, size as big as it can get. Make the selected are is in mask. Turn the upper sides of all characters into black. In case of mistakes, turn into white and re-color. The aim is to fade the upper sides of the characters (as the upper area of a fire is always fading).
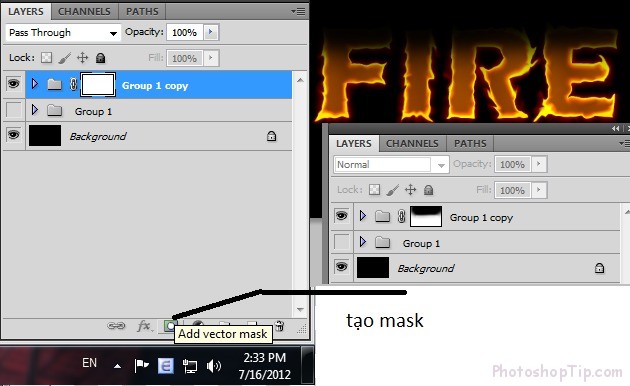
Now open the file you have saved to step 1… choose tab channels, Click ctrl + left mouse and click into channel green
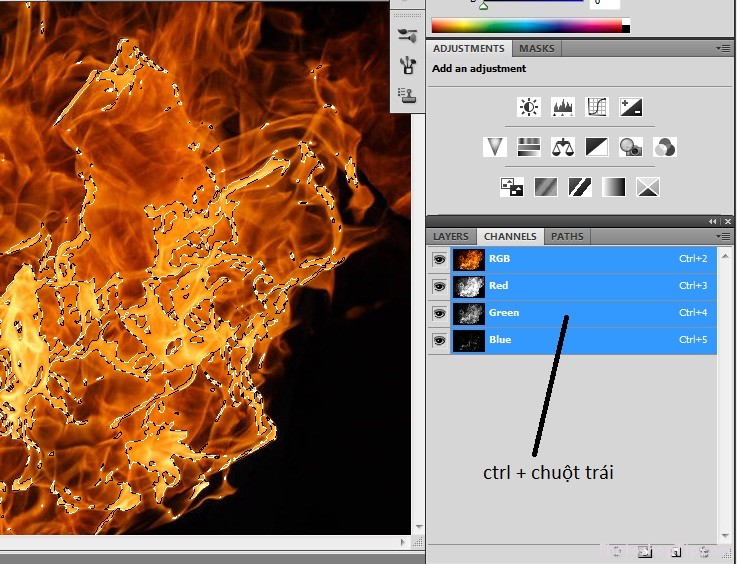
Then pull to the tab you’re working
Put onto any character
Adjust in order to fit the character you choose
Make it a mask (as previous step), choose brush to paste into unnecessary fire area (remember the selected area is mask)
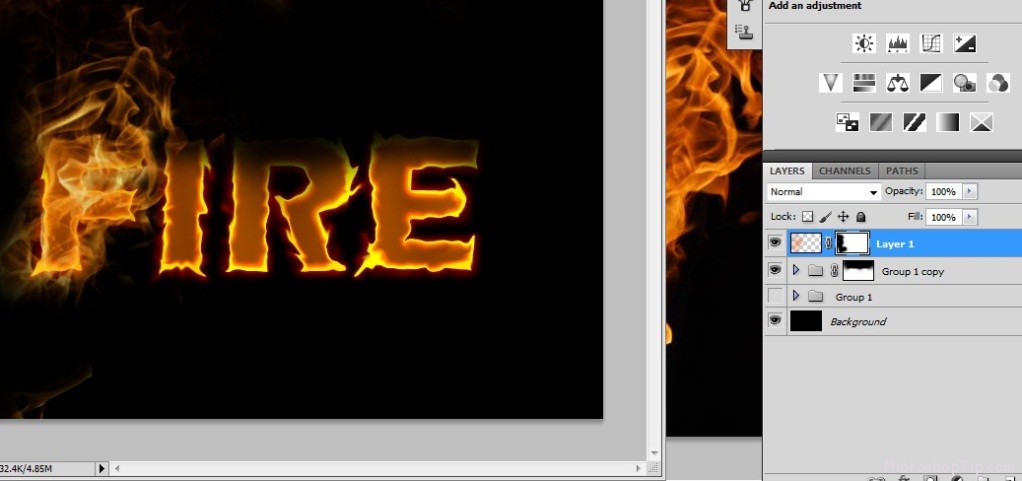
Then multiply to 3 layer (ctrl + J) and you’ll have 3 layers.. choose 3 layers consecutively, the first layer: set up opacity 50%, the other 2 layers: choose overlay.
Result
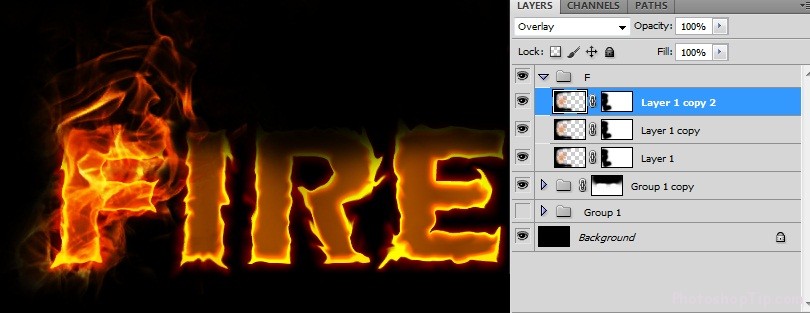
Do the same with other characters (It’s advised that the fire of each text should be adjusted specifically, which makes the image real)
… Then it’s done
Hope you like it.
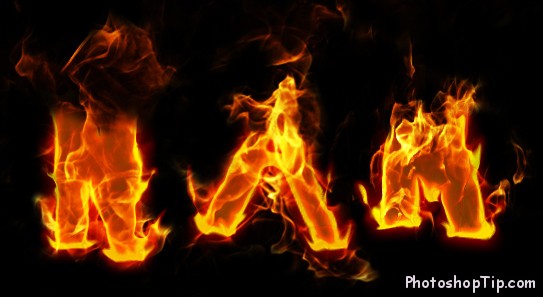
Finished Result

Thanks for reading!


Waw….cool techniqueee ,,,,, !! thankss…..