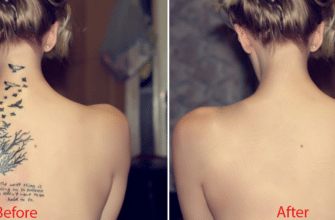
PS has its name that is a reason, as it is a professional editing image program. In this unit, the admin will give you a brief introduction about techniques and help user to improve the quality of family picture.
1. Cut image to have a better look of frame.
As usual, when taking a digital photo, you will have a picture with the spacy view that makes picture blurred. What should do in advance for a picture is to experience tool of Crop.
Press C to choose tool Crop. Using mouse to click and drag to create a rectangle frame inside the picture (if possible to cut it in shape of square, the user will choose both holding down and dragging together).
With the rectangle frame drawn, you can move, change the dimensions for accuracy before clicking Enter to cut image.
You also can undo by Ctrl+z (for multiple times Ctrl+Alt+z) and redo if you are not content with it.
2. Contrast adjustment with tool Levels.
Picture taken captures low light can make your photo become gloomy or dark, does not show the detail of it. These tools adjusting brightness and contrast are best choice in this case and the best one to use is Levels.
Open a picture needs editing, to click Ctrl +L to open the dialogue box in Levels. With the default, it is like below picture.
Three slider buttons represent the fraction Shadows ( the darkest area), Midtones (medium dark area) and Highlights ( the brightest area) of the picture. By adjusting them as shown above, the bright side will be extended, Midtone point is pulled closer to the shadows to enlarge the distance between the midtones and Highlights to make the photo brighter naturally.
Click OK to close the edit mode, you will see the picture much brighter, like the picture below with the sky is not groomy as original one. You will probably edit a few times to make the picture much lighter in natural way.
3. Blurred tint adjustment.
One of the biggest problems with indoor shots is including many colors that make the viewer feel a frightful jumble. Here we give you one siple way to blurrcolour. For instance, we will adjust tint color of yellow.
In this section of Image, choose Adjustment, then Selective color.
Selective Color is tool that allows you to adjust image through the main color. They are Red, Green,Blue, and the other basic color of light, Cyan, Magenta, Yellow and Black . These are the color of printing work , besides we have White and Neutrals.
For example, in the picture, we have so much tone of yellow hence we choose Yellows from Menu Color. You also can select slider bar to adjust which one the most suitable color.
Compared with the original one, the current system color of picture is much more natural, the original one is too much yellow.
4. Sharpen blurry images without damaging the colors.
Sometimes, the indoor lighting effects can bring warm and magical for your photos. However, the extreme fanciful scenery leads to the blurry lines on the picture. There are many filters in Photoshop that may sharpen the image but it can probably falsify the true color or distort image. With some of the following manipulation, it can help you not only sharpen the picture but also kept intact the original warm colors.
Lab color is a pigment space like RGB and CMYK. It is not frequently used in the professional photography but more commonly used in digital artwork files.
To transfer photos to Lab color mode, go to Image > Mode > Lab color.
To change the image to Lab color will bring a change in stool color mode but you cannot see with the naked eyes.
Switching to the Layers panel next to Channels. If it is not found, you can turn it on by going to Window>Channels.
Selecting the Lightness Channel, you will see a color version that is not truly shown.
If you do not see your photo channel Lightness or your picture is not the color mode, you will perform these above manipulations.
In the Filters>Sharpen>Unsharp Mask. Unsharp mask can increase the contrast and sharpen strokes of image. You will adjust the values as long as the images do not make too sharp to retain the natural appearance of the photo.
As usual, the Unsharp Mask filter can generate the dark areas. Therefore, you can adjust Levels to reduce the spot crude of dark side.
Pressing Ctrl + L to open the Level. Adjusting midtones and Hightlights (similar to the example at the top of post) to reduce dark spots are created from the Unsharp Mask filter.
At last, you will move piture back to color mode RGB : Image> Mode> RGB.
Are you content with the outcome? If not, you can repeat all the above steps to edit in proper way.
When you save images, remember not to store upon the original one, because it is not sure that the picture edited is better than the original one.


