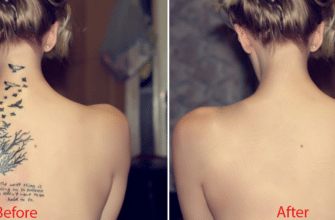
How to change background color in Photoshop. Replacing photo background in Photoshop is one of the basic features that anyone should know when using this professional photo editing software. If you still do not know how to replace the background of a photo in Photoshop, itis fine, because you will find the answer to the problem here by following thistutorial to change the photo background in Photoshop.
Photoshop is a popular professional image editing software with a lot of useful features to help you edit photos. You can also change the photobackground in Photoshop, for instance,changing a desert background into a sunny beach orreplacing any backgroundas your desire.
- GUIDE TO REPLACING PHOTO BACKGROUND WITH PHOTOSHOP
- Step 1: Select the object to keep
- Step 2: Adjust the selected area to retain
- Step 3: Mask the image with the Select and Mask tool
- Step 4: Refine the selected area
- Step 5: Adjust the setting
- Step 6: Remove the background
- Step 7:Apply the new background
- Step 8: Correct the color
GUIDE TO REPLACING PHOTO BACKGROUND WITH PHOTOSHOP
The easiest way to change the photo background in Photoshop is to separate the object to keep and the background that needs to be changed. Photoshop has a lot of different tools that allow us to do that. In this article, Photoshoptip.com will guide you to use the Quick SelectionTool in Photoshop CC 2017.
Step 1: Select the object to keep
Select the Quick Selection Tool inthe toolbar on your left, or you can use the shortcut key W. Click and drag to select the area you want to keep, Photoshop will automatically predict the area you want tokeep based on the contrast of the image. In this example we will keep the girl in the photo.
Before you proceed, you can resize the image in Photoshop to fit the background of the final image. The tip for photo resizing in Photoshop is quite simple, you refer here.
You can also select the background to delete instead of selecting anarea object to keep because it is sometimes easier to select the background than select the object to retain. You use the shortcut combination Shift + Ctrl + Iin Windows OS or Shift + Cmd + Iin Mac OS to inverseyour selection.
Finally, you will see the selected area, but there may be areas of detail you do not want to select but still be selected. This is quite understandablebecause Photoshop only provides prediction on selection of areas, then we will edit these details in the second step.
Step 2: Adjust the selected area to retain
To edit the retained area of the photo, you can zoom in on the image and select the smaller size of the brush tool to suit the editing of details by entering the selection of sizes in the toolbar above.
You can now select and edit the selected area in closer details… or select to remove unwanted areas by holding down the ALT key and click.
Step 3: Mask the image with the Select and Mask tool
The purpose of using the Select and Mask tool is to clearly show the area you selected, so that you can fine-tune the selection more precisely. You will find the Select and Mask tool just on the top edge of the screen.
The result is that only the selected area is showing, the rest of the image is transformed into a “mask” with a completely different color and contrasts with the selected area.
On the left there is the Properties dialog box, the View mod will allow you to select the mask type. You can select which type of mask that you feel the most comfortable. In my opinion, In White is probably the ideal choice, you can press the Fkey to switch among different mask types during refining.
Step 4: Refine the selected area
Now you continue to refine and select other details like hair or other soft edges. You can select different tools on the toolbar on the left such as:
– Quick Selection Tool: This is the tool we used in Step 1, this tool can help you quickly add or remove the selection in your photo.
– Refine Edge Brush Tools: This tool will be used to fine-tune areas such as hair strands or other soft edges
– Brush Tool: This tool is used to adjust the hard edges in the image
– Laso / Polygonal Lasso Tool: This tool will help you draw the area manually to add or remove portions in the selected area.
You can now zoom in your photo by holding down the Alt key and scrolling upyour mouse wheel. You will also see your selection is still not accurate, missing or excessing. Use the tools above to fine-tune and complete your retainedarea.
Step 5: Adjust the setting
In the Select and Mask tool, another tool that can be used to adjust the selection is Global Refinements. Some of the main features of this tool are:
– Smooth: smooths margins of the selected area, remove the zigzag lines. Quite useful forselected areas with clean border.
– Feather: softens margins of the selected area.
– Contrast: Increases the contrast of the selection, highly efficient only when combined with Feather.
– Shift Edge: Expand or shrinkthe selected. When dragging this bar to the left, the selected area is narrowed, and when dragged to the right, the selection is expanded.
Step 6: Remove the background
After you have finished refining the selected area, select Decontaminate Colors in the Output Settings. The Output tooption is automatically selected as New Layer with Layer Mask, or you can choose it manually.
Click Ok to finish.
Step 7:Apply the new background
Next you paste the new background to the photo. Put it under the retainedphoto which is on top.
You can use the Move Tool (shortcut key V) to move the new background image or the retained area to keepthem fit together. You can also use the Free Transform tool (shortcut key Ctrl + T or Cmd + T), hold down the Shift key to keep the adjustment ratio even.
Step 8: Correct the color
The final step is to edit the color of the object and the background to match each other. Select the layer containing the object and then select in Menu: Image => Adjustments => Match Color
In the Match Color dialog box, navigate to Source and select the image that contains the new background. Select Neutralize to remove all colors from the selected layer and adjust the two Luminace and Color Intensitybar so that the object and the background have the same color. You can reduce the color effect by using Fade tool if needed. Last, click OK to complete.
After replacing the image backgroundin Photoshop, you can sharpen your image, the steps to sharpen your image in Photoshop has been shared by Photoshoptip.com.
Here is a tutorial on how to change the image background in Photoshop. You save the picture after you are satisfied with it, you should save it in.PSD format to be able to retain the whole editing process in case you want to change another different background. Hopefully through this post, you are able to followthe steps to replace a photo background with Photoshop. Good luck.


