In this article I will guide you how to blend the color of violet shine. Violet shine is a combination of two colors: violet and pink. Violet shine brings a youthful but classic style that is suitable for girls who love violet and pink. In the last articles I introduced you to use the basic tools of Photoshop. In this one, the tutorial has been tested in two versions of Photoshop CS6 and Photoshop CC and I will introduce step by step so that even the starters can do by themselves; for ones who have already known can skip the details.
Looking forward to receiving your reviews.
“Ingredients” to make up this work are all made by Photoshop, except font and stock that are collected from other sources. To make color layers, right click on the globe as shown below, and select the appropriate tools.
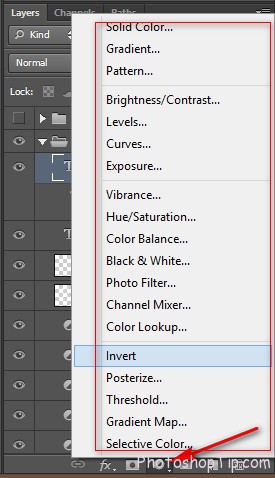
Layer => invert in Photoshop CS6
Stock
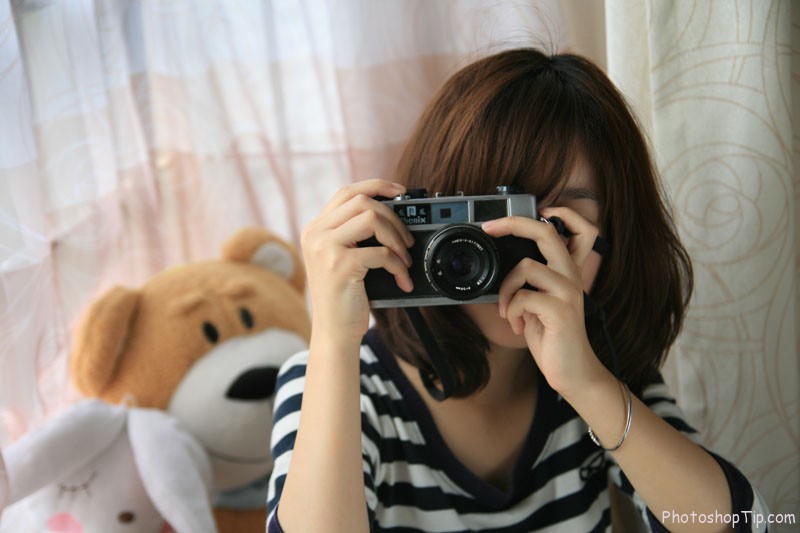
How to blend violet shine color in photoshop ? This Photo will be used for this tutorials.
Step 1: Open the abovementioned stock with Photoshop & Click Ctrl + J to duplicate the background layer.
Crop the image by Crop tool (Press C button) and use the mouse to drag the cut area as shown below. The inner bright area and the saved area.
Step 2: After cropping, create a Selective Color layer and adjust parameters as shown below.
Blend Mode remains as Normal & Opacity of 100%.
Step 3: Create a Black & White layer with parameters as shown below and Blend Mode of Screen and Opacity of 100%.
Step 4: Create a Gradient Maps layer as shown below and Blend Mode of Screen and Opacity of 80%.
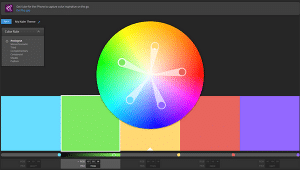
To select color, click the color range directed by the top arrow, then click on each small color box directed by the below arrow.
In the first color button, select the small one, then select Colors box and enter color code #e25a61 for the first colorbutton. Remember to remove#symbolwhenentering the color code.
Repeat these steps with the second color button to create a pink color as above. Then press OK to finish selecting the color range.
Remember to reduce Opacity to a suitable percentage. Don’t set Opacity too high, otherwise the brushwould not be efficient.
Brush the selected area as shown below.
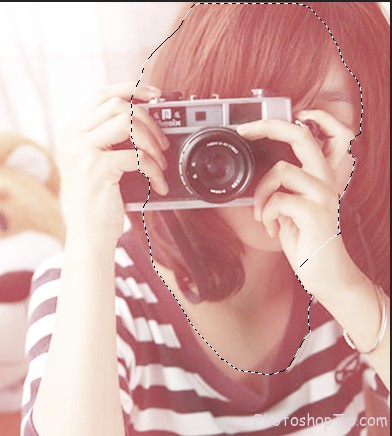
Brush the selected area in Photoshop Cs6
Step 5: Continue to create a similar Gradient maps layer and Blend mode of Screen and Opacity of 50%.
Repeat Step 3 to select color range but don’t use Brush to remove the overlapped area.
Color code on the left is #9999ff and the one on the right is #ccccff.
So far you have hadarelatively nice color.
Step 6: Create a Cruves layer to reducebrightness in the skill area of the model and select parameters as shown below.
In this layer, use black brush with Opacity from 80% to 100% to remove the outer bright area as shown below.
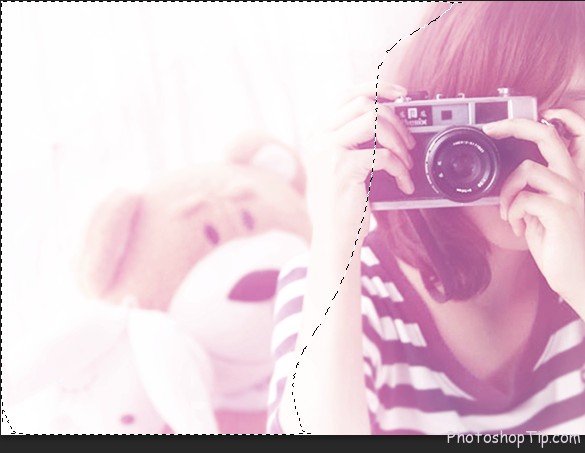
use black brush with Opacity
Step 7 : Press Ctrl + Shift + Alt + E to group all layers together. Then enter Filter > Blur > Gausian Blur with radius of 1px.
In this layer, create Layer mask and press B button to choose Brush tool with softbrush to remove the areas that are not necessari lyblurred as shown below.
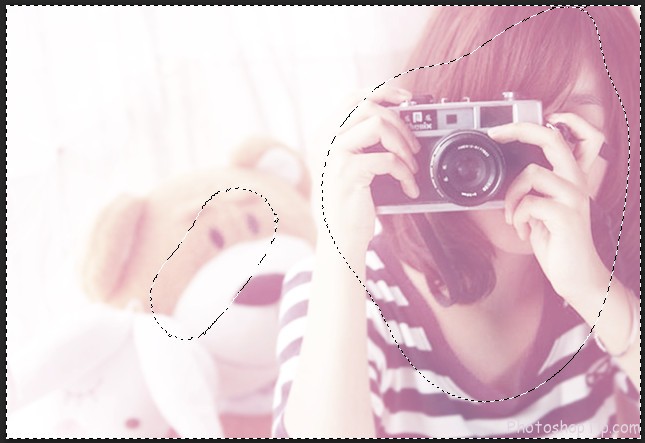
Create Layer mask in Photoshop
Step 8 : Create a Gradient Fill layer (Remember : Gradient Fill, not Gradient Maps)
Do the samestepsto select the color range with Angel of 0.
Blend mode : Screen and Opacity of 30%.
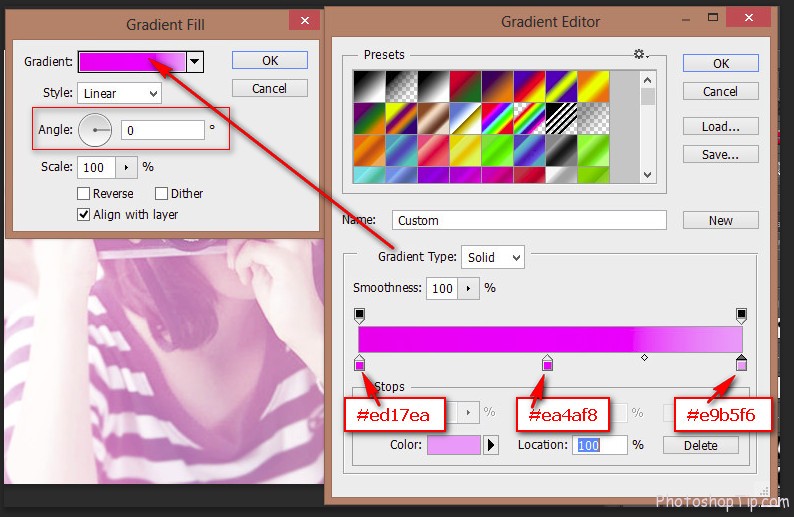
Create a Gradient Fill layer
Step 9 : Create a Cruves layer as shown below to reduce the brightness a little bit.
Step 10 : Press D button to turn back to default colors of upper black and low white. Then create a Gradient Maps layer with colors ranging from black to white.
Blend mode : Soft light and Opacity of 100%
Re-select soft Brush and reduce Opacity to remove the bright area over lapping the model.
In this case, I choose Opacity of 90%.
Step 11 : Create a Levels layer and set parameters as shown below; use soft brush with opacity of 100% to remove the outer over laped dark area.
Remember to brush the wholeoutter area except the model’s face.
Step 12 : Create a Cruves layer as shown below ; the blend mode if not reminded would be set as default.
Step 13 : Create a Photo Filter as shown below and select soft brush to remove the overlapped area.
We’ve finished blending. The next steps are to create texture and image frame.
Press Ctrl + Shift + Alt + E to group all layers together
Step 14 : Press Ctrl + Shift + N to create a new layer.
Press B to select Brush tool, pick hard brush with size of approximately 20px and parameters in each tab as shownbelow.
Brush tool
Brush tool 4
Now brush the image on the newly created layer, a bubble texture will appear ; press‘[‘ or ‘]’ on the keyboard to adjustthe brush size and draw bubbles with various sizes. Remember to keep suitable density of brush to have anice texture.
Step 15 : Create image frame by pressing Ctrl + Shift + Alt + E to group layerstogether, thenpress Ctrl + A.
Next, press M to choose Rectangular tool, right click on the image and choose Stroke.
Choose stroke parameters as shown below.
The workisal most done.
Step 16 : Add text and your signature.
Here is our work.
FINISHED ! HAVE A GOOD JOB !

I like reading an article that can make men and women think. Also, many thanks for permitting me to comment!