We are living on the golden age of 3D technology, we can see art pieces, architectural models, biological simulations, fantasy creatures, futuristic machines, and almost realistic objects everywhere. Most of those graphics have been designed through Photoshop, from texture editing to final mock-ups; making it a must know tool for anyone interested in 3D design.
As you know, with the Photoshop CS5 or CS6 version we can all use the 3D feature. Since releasing of Photoshop CC, Adobe requires that all computers have configurations of supporting graphics card and have at least OpenGL 2.0 library to use 3D feature well.
But the irony is that almost computers use graphics card integrated with Intel (R) HD Graphics now, the manufacturer has removed the OpenGL library from the graphics card drivers that it provides us (Due to concerning about that OpenGL can cause problems for the companies’ computers).
After learning and searching, I would like to guide you to update the OpenGL library for computers. When we have OpenGL. We can use 3D feature for Photoshop CC.
Requirements: Installed CC CC, PS CC has been displayed 3D Menu, but the tools in the 3D menu are blurred and any tool is unusable.
Purpose: Make tools in 3D Menu are not blurred anymore and you can use them.
Note: This guide is only for computers using Intel (R) HD Graphics integrated graphics card.
Let’s get started!
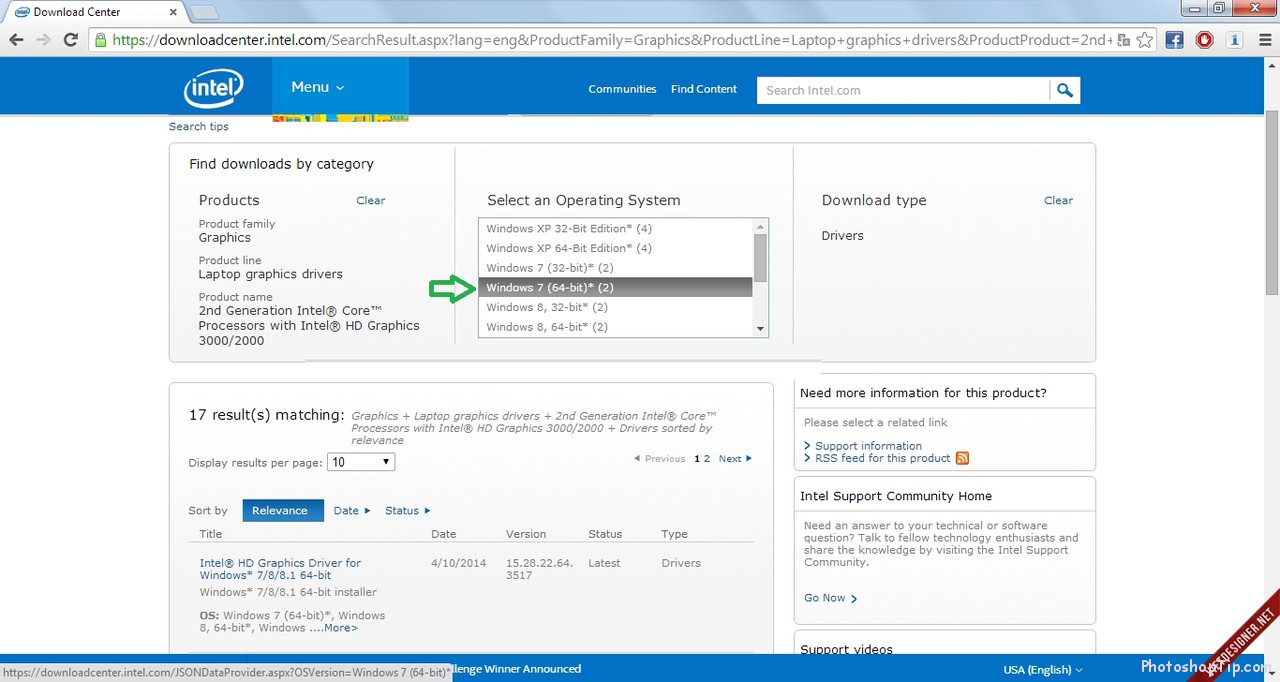
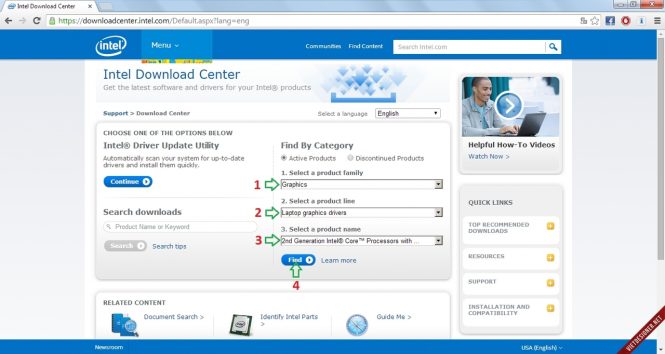
Step 1: You go to the page provided Intel Driver here: https://downloadcenter.intel.com/
Find the driver for the graphics card in the 1st section is Graphics and select the next 2nd section and 3rd section suitable with the graphics card of computers you are using.
Step2: Choose the operating system that fits your computers.
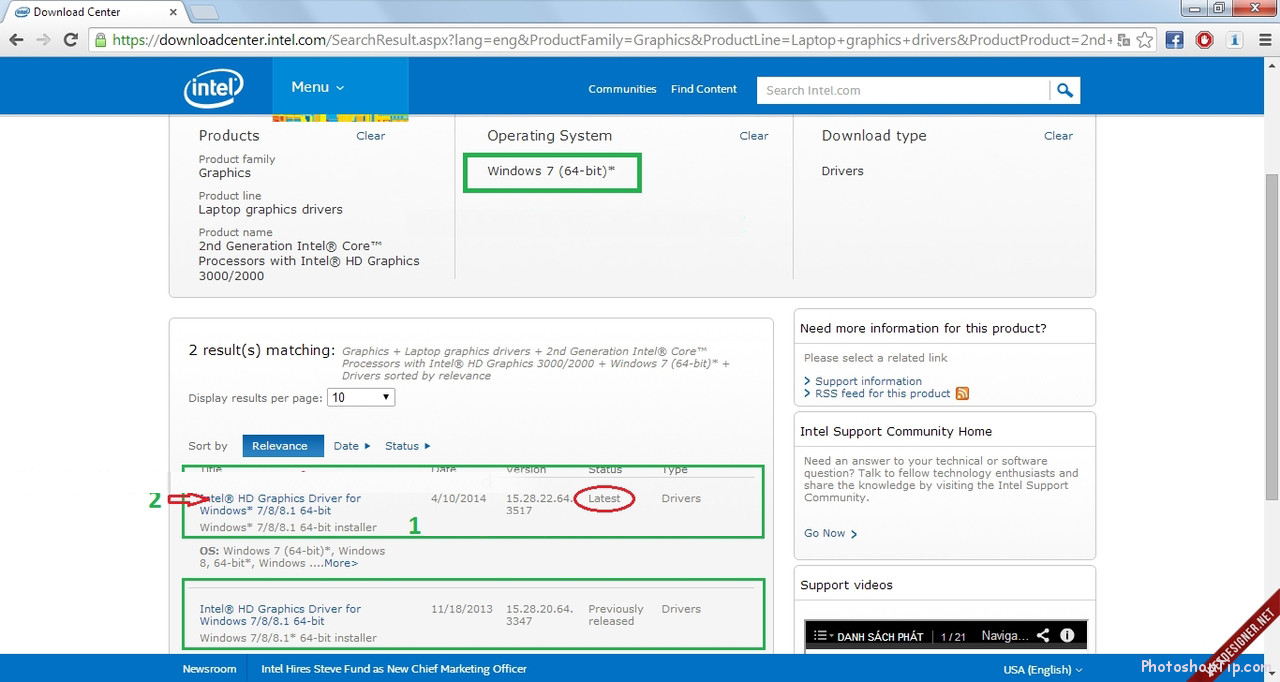
Step 3: After the website filtered drivers that match with the operating system, select the latest driver.
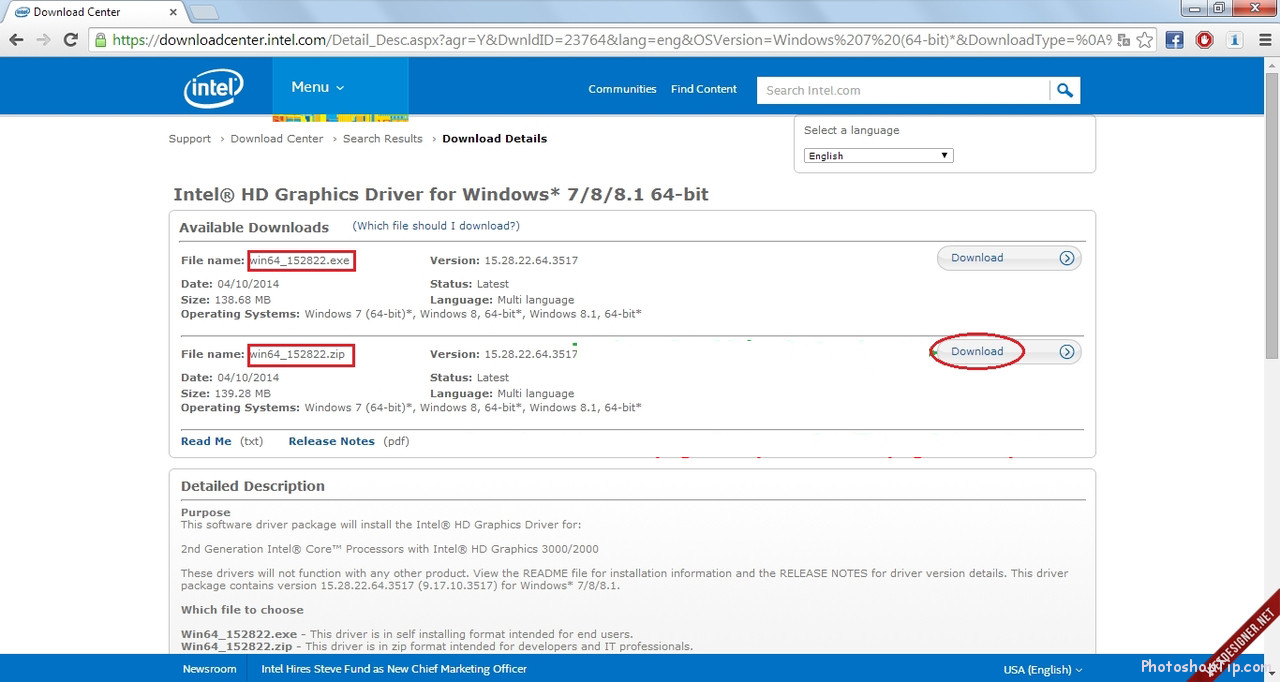
Step 4: Download driver, here Intel provides two types of drivers, we download the compressed .zip version.
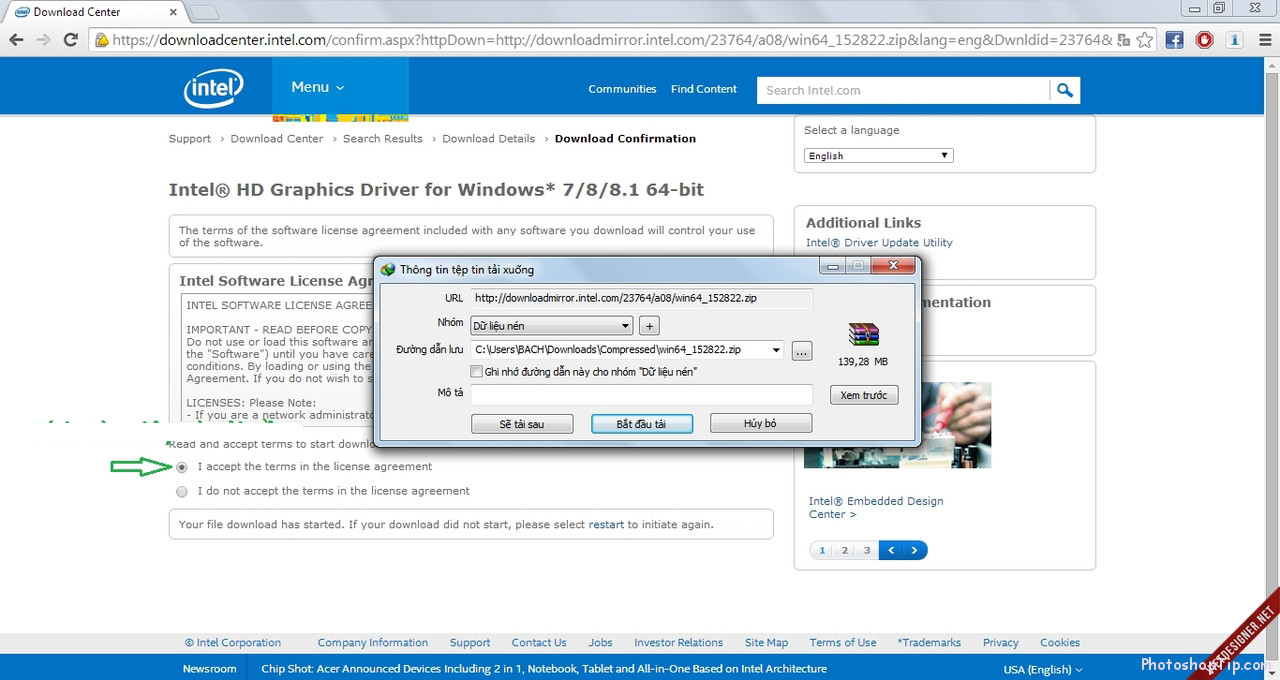
Step 5: Click I accept, the downloader will appear, then you download it.
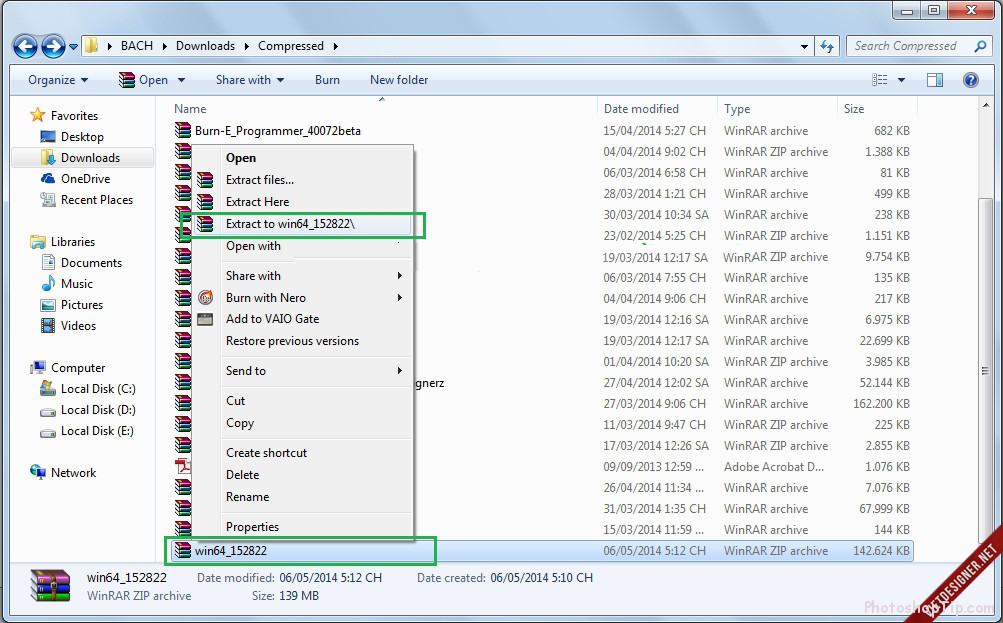
Step 6: After completing the download, you extract it to a separate folder, you choose to extract “Extract to …” as shown below for convenience.
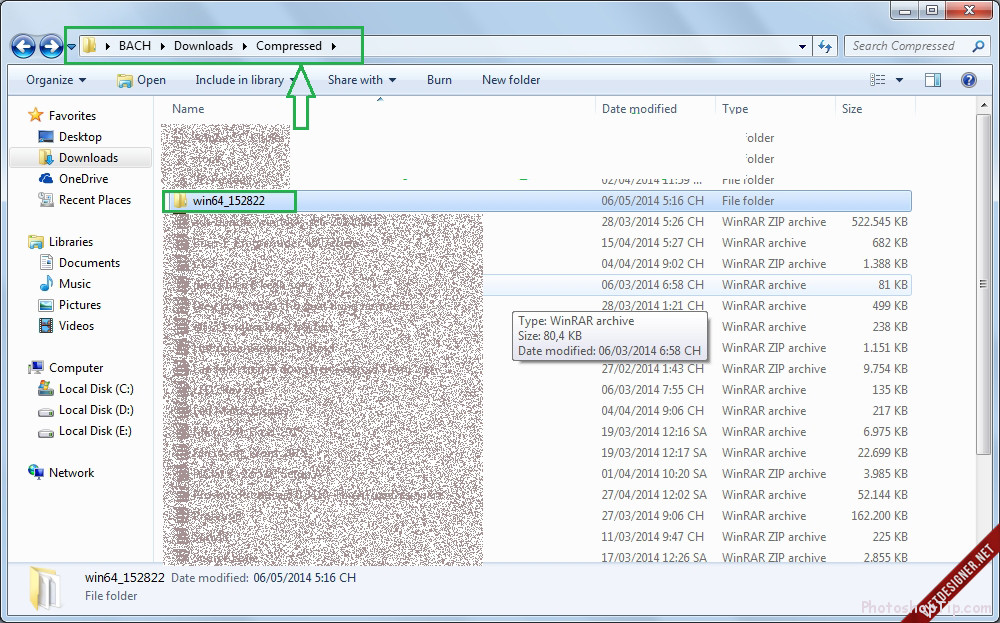
Step 7: After extracting, we have the folder containing the driver as shown in the picture. Remember the path leads to this folder.
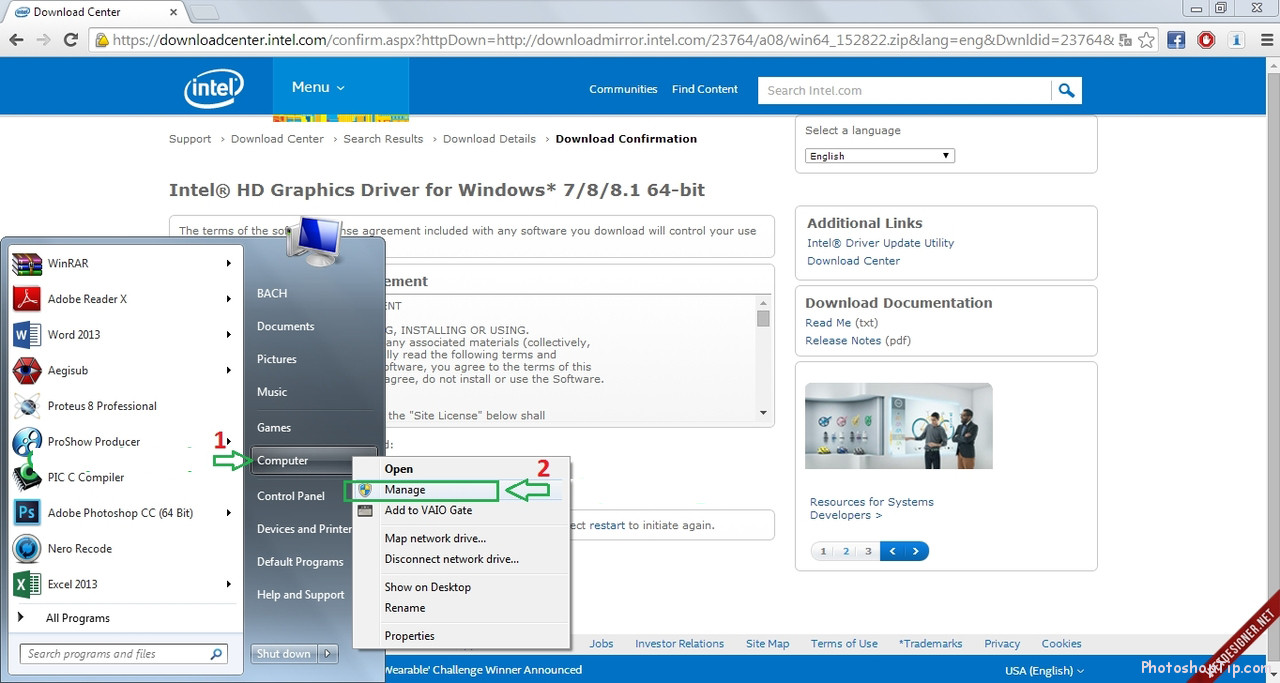
Step 8: Next, we open Manage to update the driver.
Go to Start> Right click on Computer> Select Manage.
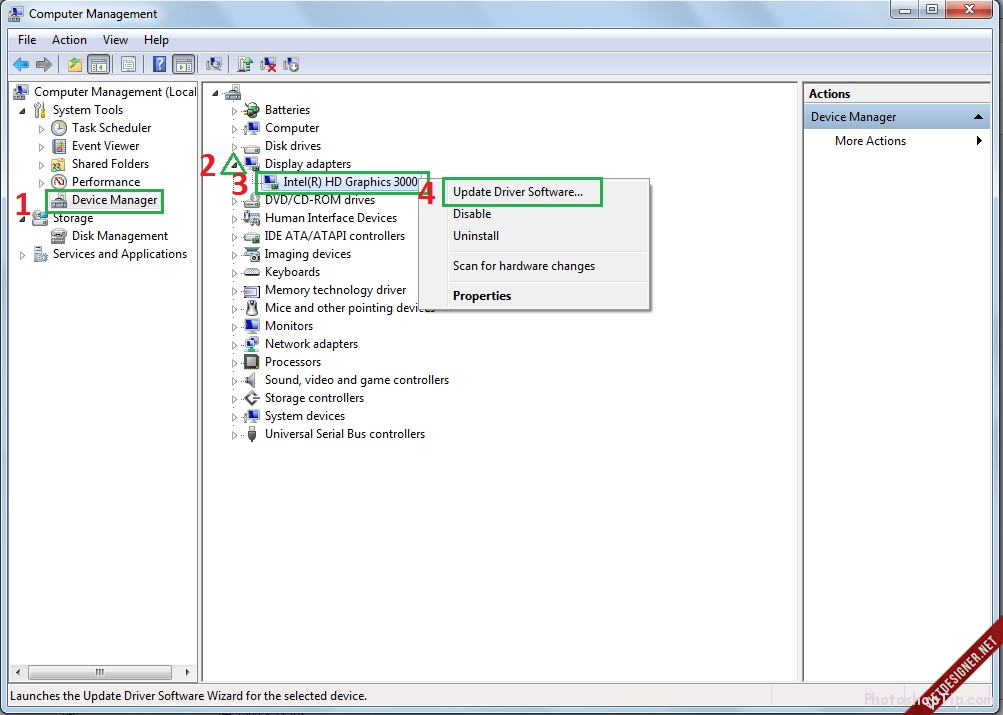
Step 9: At the Computer Management window, select Device Manager > click the arrow next to Display adapters > Select graphics card Intel Graphics (R) *** is in your computers > right click and select Update Driver Software.
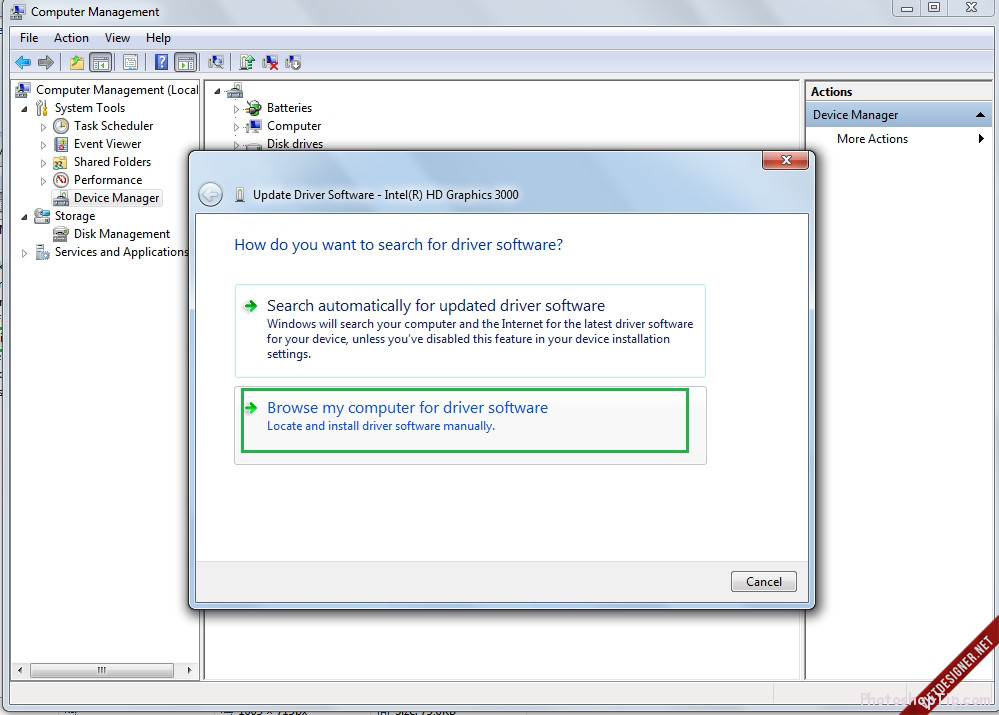
Step 10: The Update Driver Software window will appear > Select Browse my computer for driver software
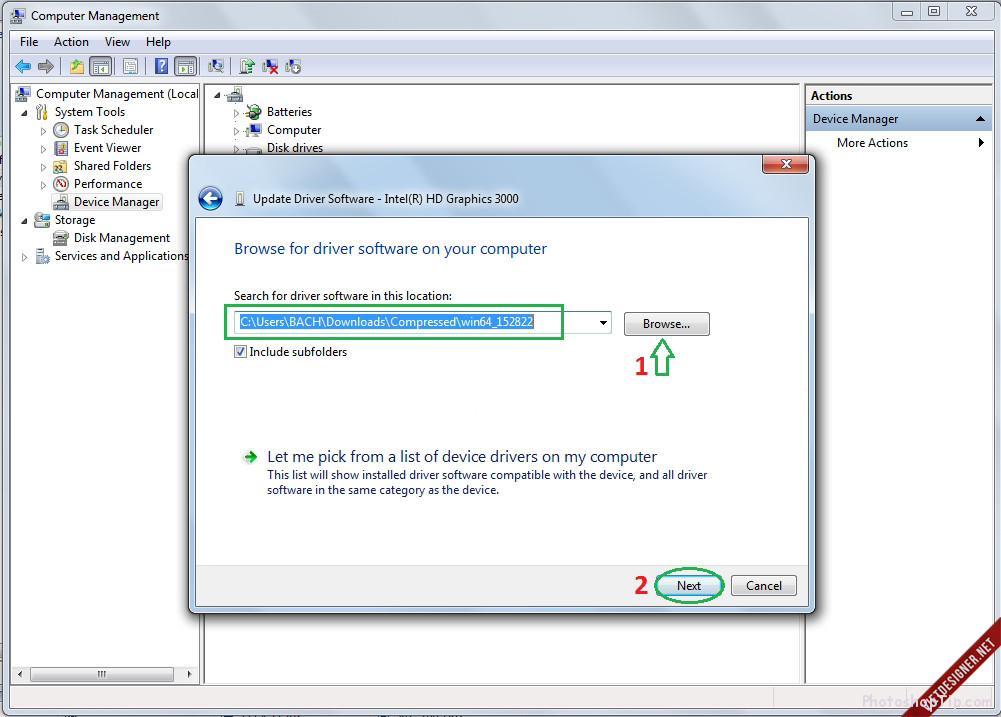
Step 11: Click Browse > Find the driver folder that was extracted > then click Next to start updating Driver as well as the OpenGL library for the computers.
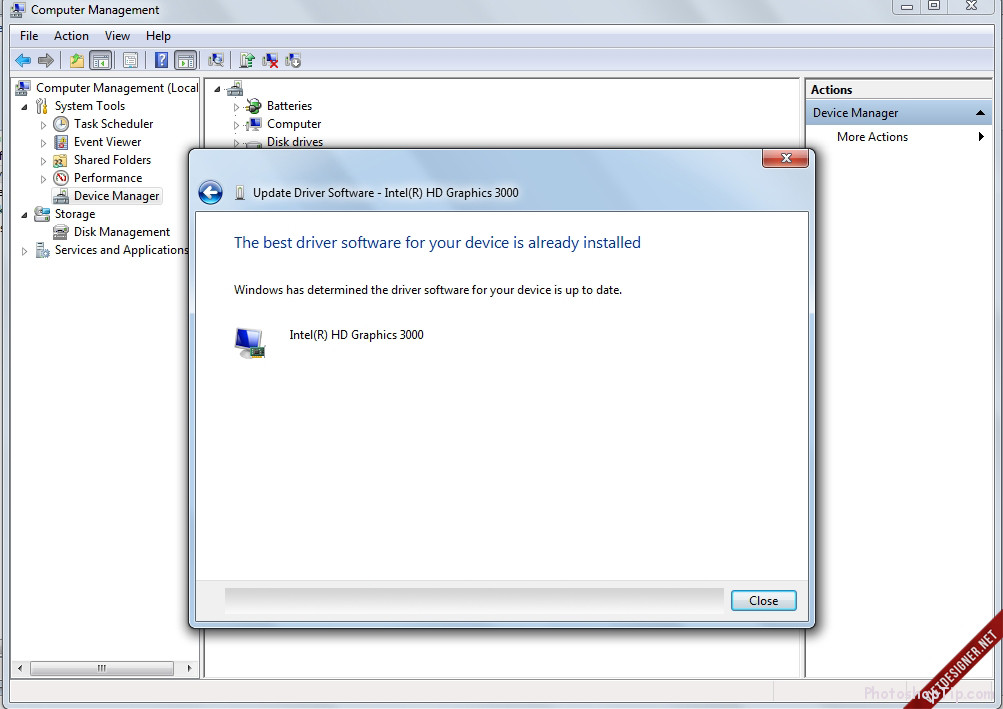
Step 12: Wait a minute, let the computers update. After updating the driver, you Restart your computer.
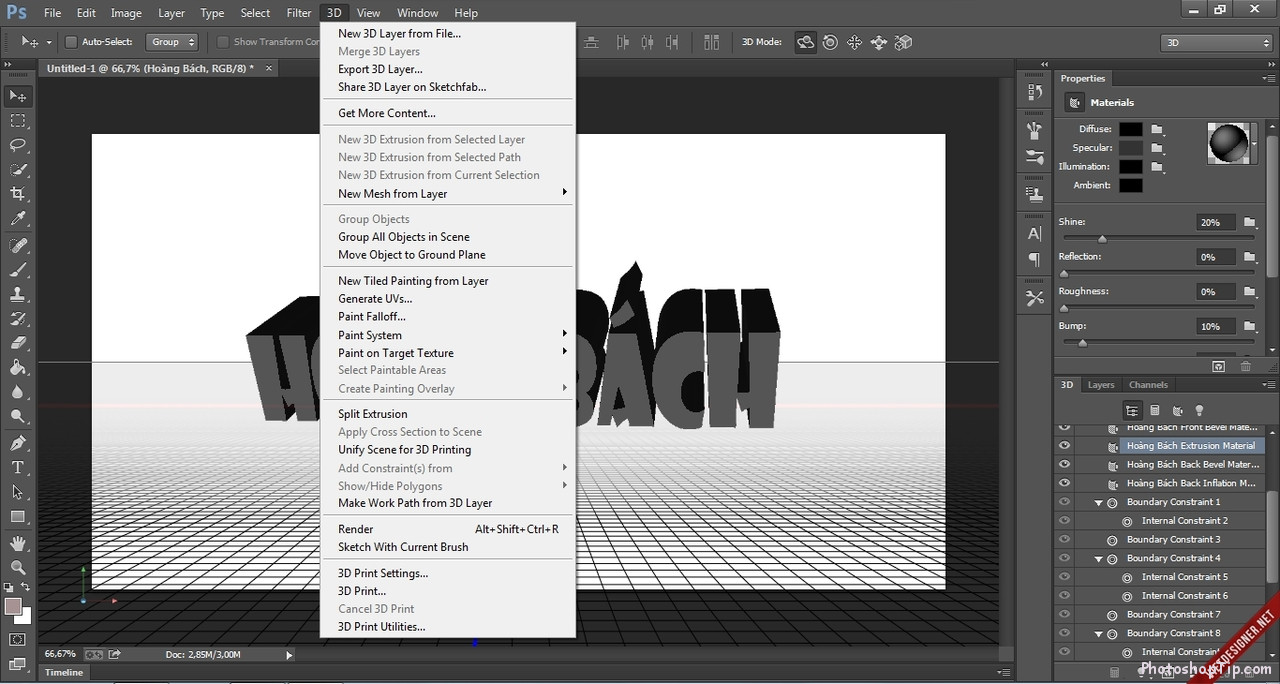
After restarting, you can turn on Photoshop CC and enjoy 3D features.
Here are my result on Photoshop CC.
Next time, I will write another article to show you tools and using of 3D feature in Photoshop. Please follow PhotoshopTip.com to update newest tutorial!

