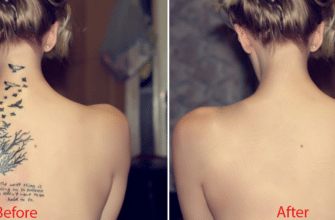
How to make tattoo on body with Photoshop Cs6. Today I will share a mini tutorial how to add tattoo effect on a person with Photoshop. In the last post “Making a tattoo with Photoshop“. I introduced make tattoo in Photoshop. But the last tutorial, I dont talk to “effect”. How to make tattoo effect on body ? This tutorial have tested in Photoshop CS6 and Photoshop CC.
My product :

How to make tattoo on body with Photoshop Cs6
Step 1: Load the model and the tattoo image.
Step 2:Duplicate layer by right-click on the window model image.
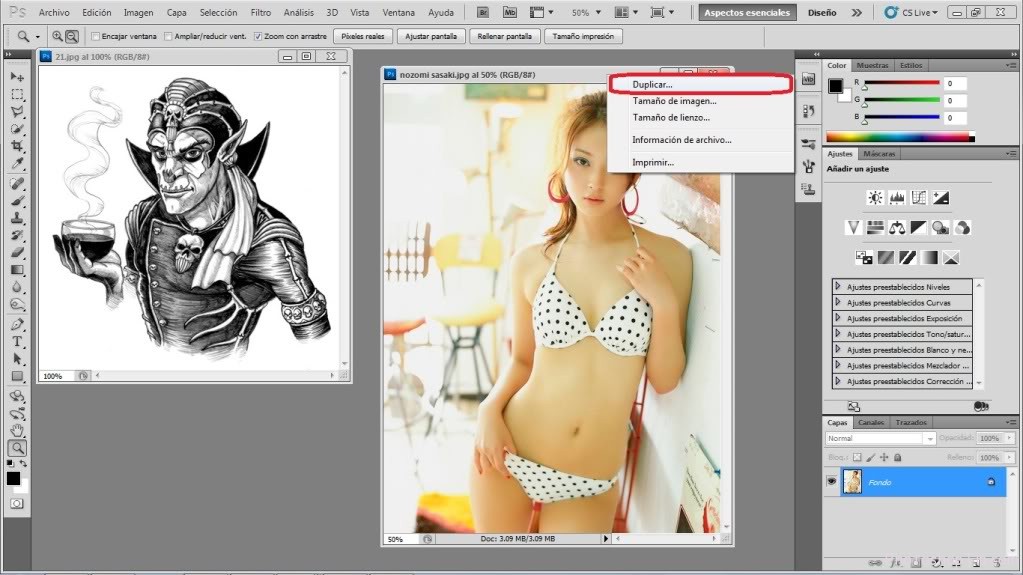
Duplicate layer in Photoshop
Step 3 : We will desaturate the image, Ctrl + shift + u or image / adjustments / desaturate

Desaturate the image in Photoshop
Step4: We will give to / Blur / gussiano. I put 2.9. Iit is the image as seen in this picture. a little fuzzy, but very little.
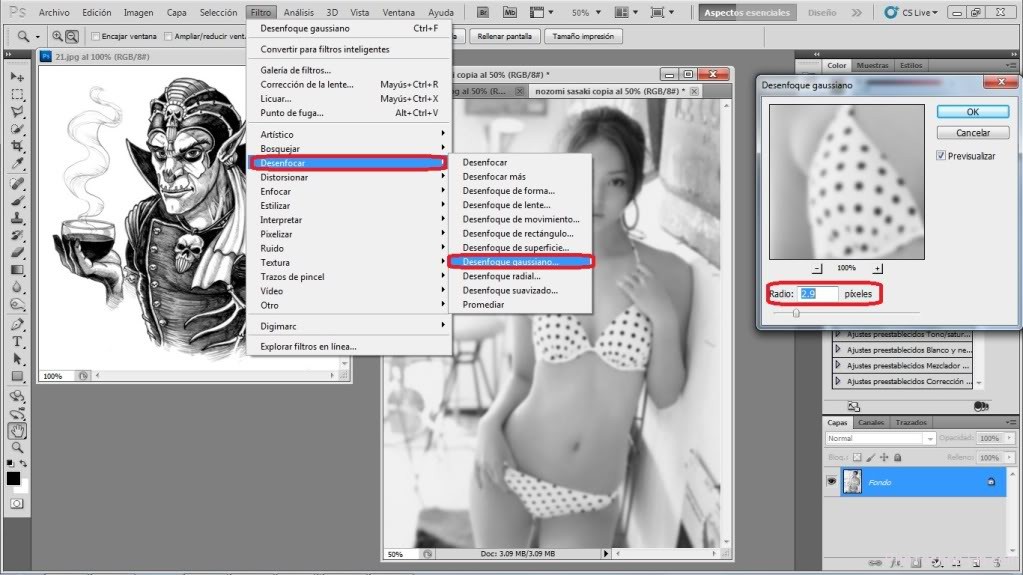
Gussiano image in Photoshop
Step 5 :File / Save As or Shift + Ctrl + S, we keep the image Format: Photoshop PSD, PDD and named Copy to know which is the copy.
Step 6 : Then close the image store, now let the color and work on it will select the Move (V) tool and drag the image to the model, then give Ctrl + T to move the tattoo to your liking, you can be more large smaller, more inclined, etc.
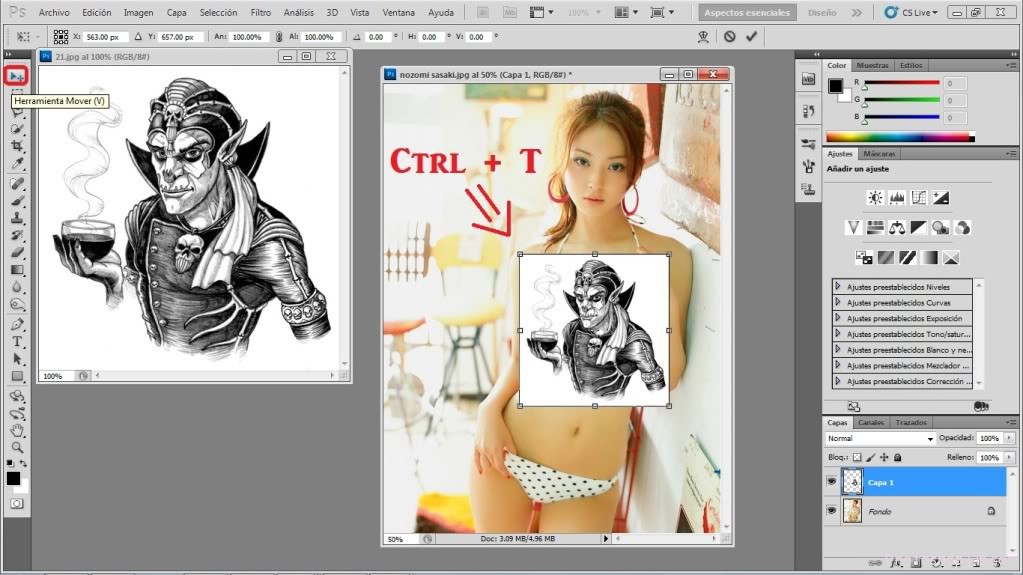
Move tattoo in Photoshop
Step 7 : Then we press the Enter key to place.
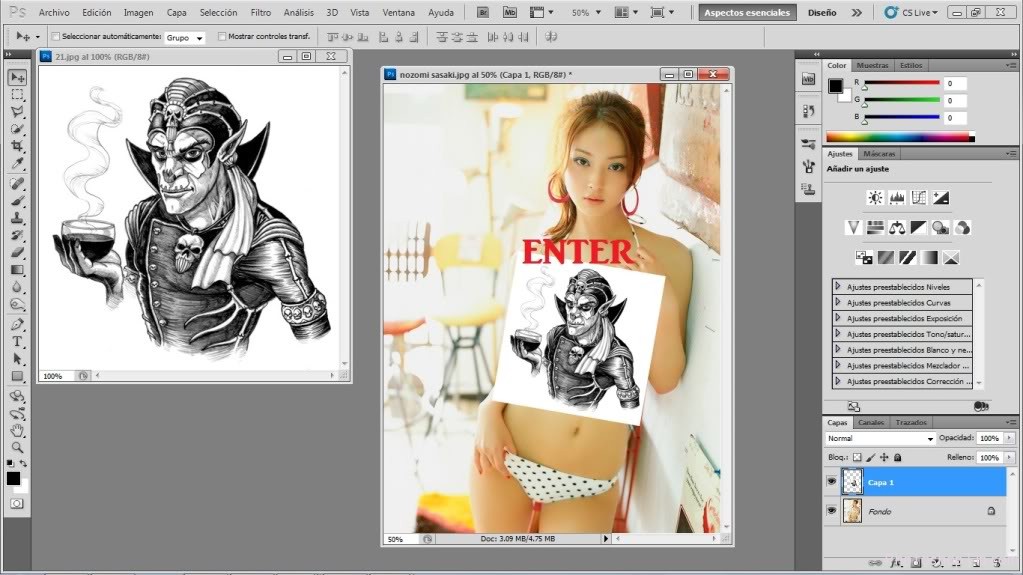
Replace tattoo on body in Photoshop
Step 8: Multiply chop after him, leaving only the tattoo without the white background
Step 9 : We give to Filter / Blur / Blur More
Step 10: We will move to opacity, it is to taste, in my opinion I put about 70%
Step 11 : First, we go Filter / distort / Move, we move box appears, leave the default data, horizontal scale 10 , vertical scale 10 displacement map; selection of stretching. Areas not defined; selection in: Turn / Ok / us then open the window to seek, to apply the image we hold the beginning, that we select and open.
Step 12 :Filter / Shift or Ctrl + F. And see how fits between clothing and skin.
Step 13 : Then we add a vector mask, the bottom of the layers, selected in red.
Step 14 : Chop the Brush tool (B), and this color in Black, We used to remove debris from the tattoo as well as on clothing, outside the area, etc.
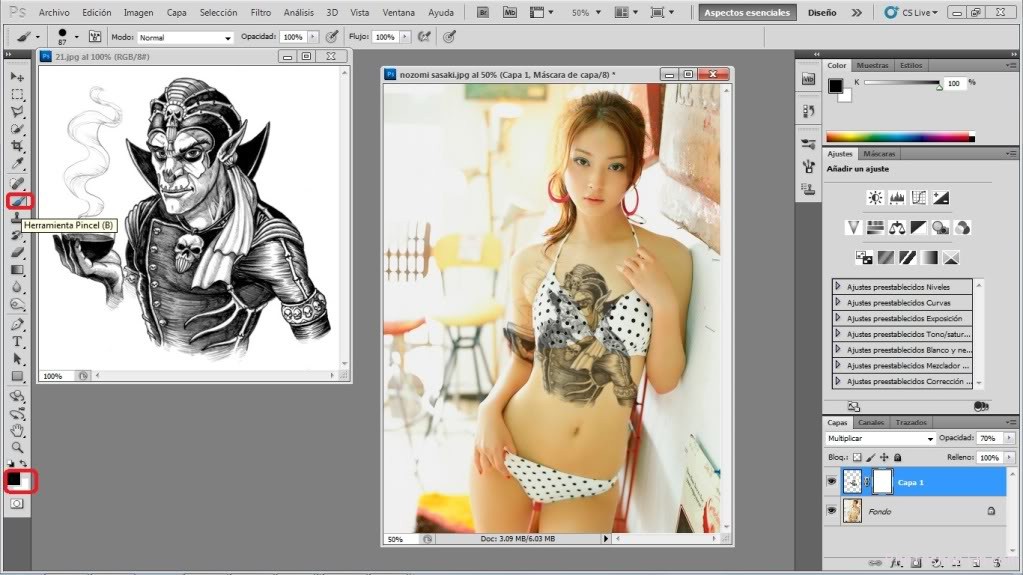
Brush tool photoshop
Step 15: Deleting with the brush.
Step 16 : following Deleting
Step 17 : Deleting, almost..
Step 18 :The last, Merge down and ready, is the image lsita
Thanks for your reading !
Have a good job.
In the next post, I will show how to remove a tatton on body with Photoshop

