Removing background is a common technique used commonly in Photoshop. There are quite a few ways of detaching depending on the complexity of the photo. The below post gives you guidelines on using colours scheme Channels in Photoshop to detach background out of a photo.
Preparation:
– To download and install Photoshop in computer
– A photo that needs detaching.
– Can see the last post here
Step 1: Open the photo with Photoshop

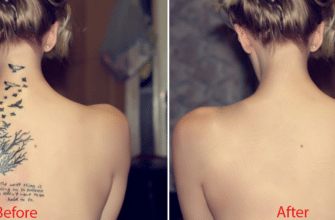
Remove Background from Image with Photoshop fast and simple
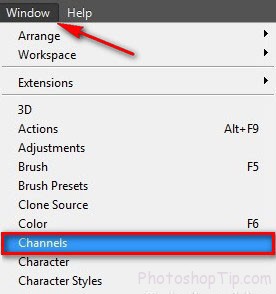
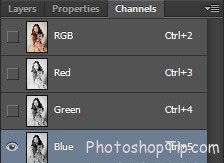
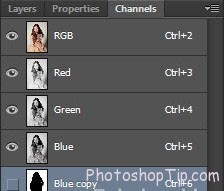
Step 2: Open colour scheme Channels (go to Window/Channels) and choose colour scheme with the highest contrast.
Here we choose Blue.
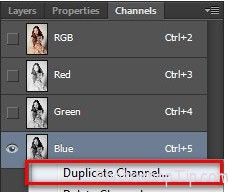
Step 3: Click right mouse in colour channel Blueand choose Duplicate Channel…to duplicate the colour.
Step 4: Increase contrast to detach background. Use Quick Selection Tool (W) to select areas that need higher contrast.
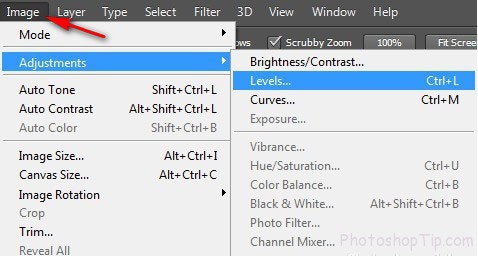
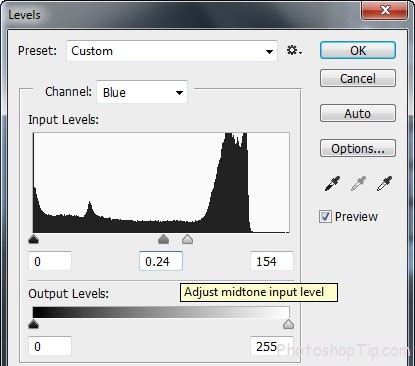
Then go to Image/Adjustments/Level…to open box Leveland adjust as in below picture.
Here’s the result:
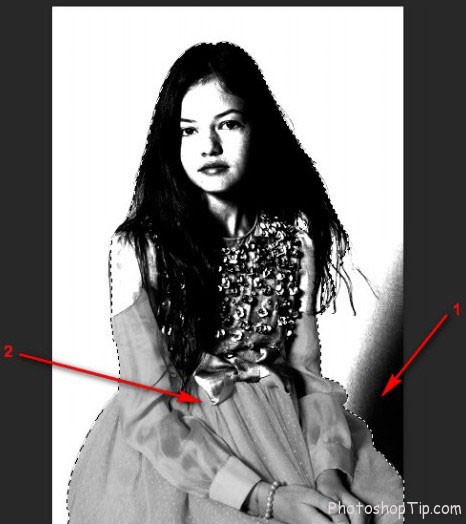
Step 5: Use Brush (B) tool to colour the background White (1) and the object Black (2).
This is what we’ve got after coloring:
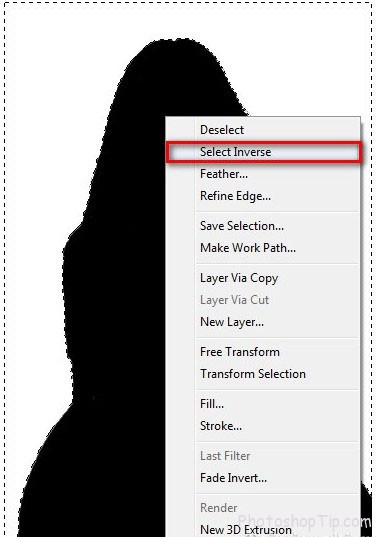
Step 6: Press Ctrl button and choose layer Blue copy, the software automatically chooses the White area. To change into the Black area (Object), right mouse click in the photo and choose Select Inverse.
Step 7: Turn off layer Blue copyand turn on layer RBG.
We get:
Step 8: Double-click in Background to adjust to layer 0. Then press Ctrl +J to duplicate layer. Finally, turn off layer 0, we’ll find the photo detached from the background.
You can also insert another Background to make the photo more lively.

Remove back ground with Photoshop
This post gives guidelines on detaching background in Photoshop. In this way, you can detach any object from the background to make your own unique and fancy photos.








Thanks, I’m very grateful for your tips here. great instructions. fully helped. thanks a lot.