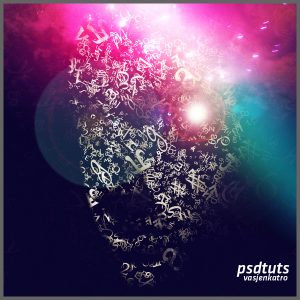
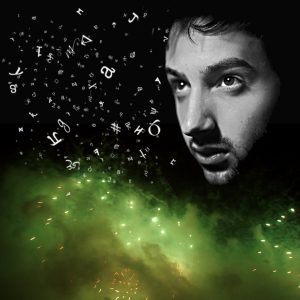
Today we will learn how to create a typographic face with some simple techniques. Here is the final result we will make:
Step 1: You need to go to these links to download , fireworks and . You also can choose another photo such as a body, a hand, a dog,… as long as it has black background. This will make you do following steps more easily.
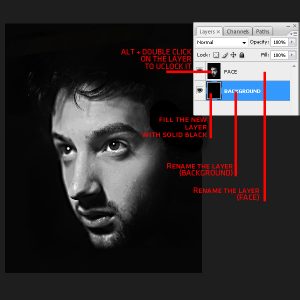
Bước 2: Have you finished downloading these materials? Now it’s time to start. Firstly, open face image in Photoshop. Hold on Alt and double click on the layer to unlock it. Rename the layer to “Face”. Now we will create a new layer by pressing Ctrl + Shift + N and fill it with black color then rename it to “Background”.
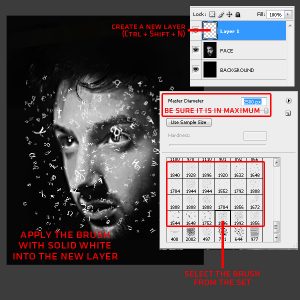
Step 3: Create a new layer (Press Ctrl + Shift + N), then use Brush Tool (shortcut key is B) and load the brush you downloaded in step 1. We must make sure that the Master Diameter is in maximum. And then we can apply the brush with solid white into the new layer.
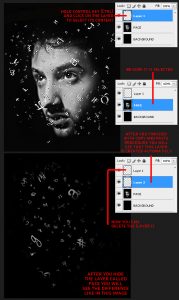
Step 4: Hold on Ctrl and click on Layer 1 to select its content, press Ctrl + C. Then click on layer Face, make sure that the letters are still selected, and paste them to this layer. You can see a layer is automatically created below Layer 1 and layer Face. I call it “Cameleon”. Now we can delete Layer 1 to see the change in this image. Then hide the layer Face and you will the difference like in this image below:
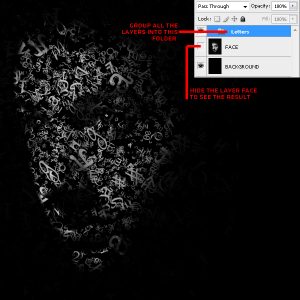
Step 5: You can see the typographic face in step 4 still very scattered. So that, in this step we must repeat step 3 and 4 to make the face looks more clearly. I repeated 8 times and have the result below. Don’t forget to group all the typographic layer into a group by choosing Layer -> New -> Group or press Ctrl + G. And then rename the group to “Letters”.
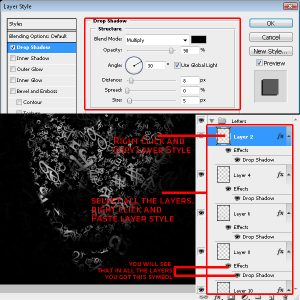
Step 6: To make the typographic layers combine more sensible, you need to apply shadow effect on them: Choose a layer in group Letters, right-click and choose Blending Options, then set the Drop Shadow with these value:
Blend Mode: Multiply
Opacity: 90%
Distance: 8 px
Size: 5 px
Now you can copy the effect of this layer (right-click and choose Copy Layer Style) and paste to other layers in group Letters (right-click and choose Paste Layer Style). Then you will see that all the layers in group Letters have the eye symbol:
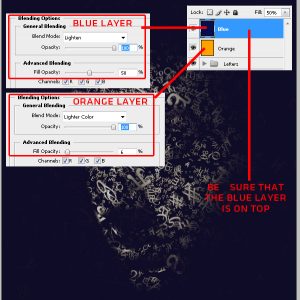
Step 7: In this step we will add some light effect to make the image more sparkling. Create 2 new layers (Press Ctrl + Shift + N) and name it “Blue” and “Orange” then fill the layer Blue with color code #080d4c and the layer Orange with color code #ffc600. Decrease Opacity level of layer Orange to 6% and use Lighter Color Blend Mode. Make sure that the layer Blue is above the layer Orange.
Step 8: Choose Brush Tool (or press B key) and select a brush with Master Diameter 150 px and 2 colors which code #00fffc and #00ff4e. Create a new layer and use the brush to draw like in the image below:
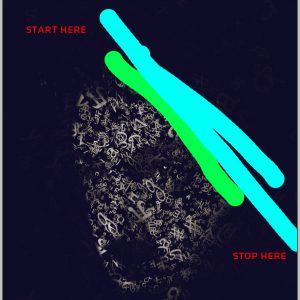
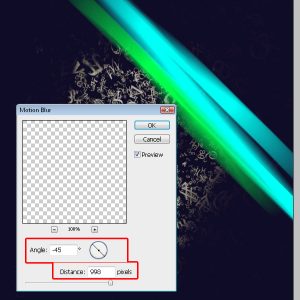
Step 9: Choose the layer you created in step 8, go to Filter > Blur > Motion Blur and change the Angle to -450 and Distance is 998 pixels.
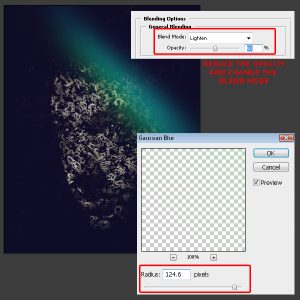
Step 10: Go to Filter > Blur > Gaussian Blur and set the Radius in 124 pixels. After that, we change Blending Mode of this layer from Normal to Lighten and decrease Opacity to 50%.
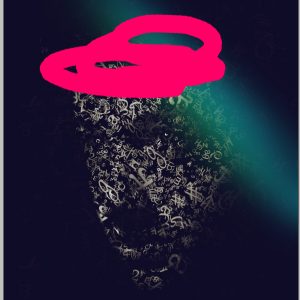
Step 11: Creat a new layer. Select Brush Tool with color #ff0066 and draw some circles like in this image:
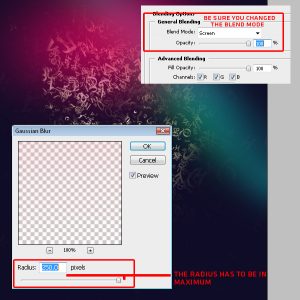
Step 12: Choose the layer you drawed circles in step 11 and go to Filter > Blur > Gaussian Blur. We need to set Radius in 250 pixels then go to Blending Mode and change it from Normal to Screen.
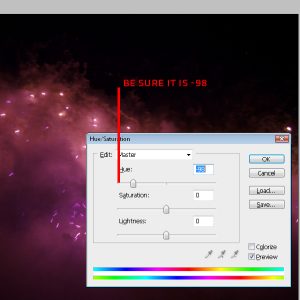
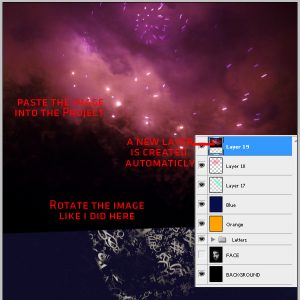
Step 13: Open the image of Fireworks you downloaded. Go to Saturations (or press Ctrl + U) and change Hue value to -98. Now we press Ctrl + A to choose all pixels of the image then press Ctrl + C to copy it. We return to our project and paste it there. A new layer will be created automatically.
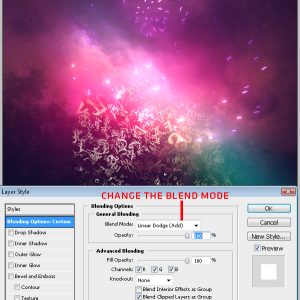
Bước 14: Change Blending Mode of the layer from Normal to Linear Dodge:
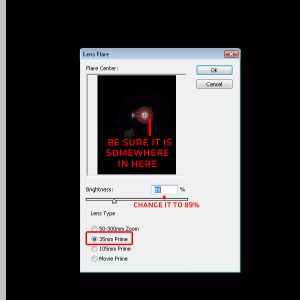
Step 15: Create a new layer and fill it with solid black color. We go to Filter > Render > Lens Flare and set the Brightness t0 89% and Lens Type is 35mm Prime
Now we have the project completed. You can also adjust Brightness or Contrast until you satisfied with your work.

