Paint tool SAI (also known as SAI) is a specialized drawing software that is widely loved and used today.
If you are an active member on DeviantArt, it is not difficult to realize that most Deviant artists use SAI as their primary tool for coloring or even painting and coloring. It creates many images very nice, no less than Photoshop or Corel. I only use SAI about 3 months, I feel very excited about this software. Why is that?
- Why SAI is more popular?
– Light weight, compact (just about 40 MB, about 1 / 50 more than photoshop) easy to install, store in USB for use anywhere.
– Because software is specialized in drawing tools and manipulation is quite simple (it is very simple because it used to draw, without nothing else: neither text, in general all things are not drawn with hand). It is very easy to use for newbies.
– Compatible with many operating systems, any windows are also used.
– Draw with a mouse or tablet are good.
And some other miscellaneous reasons like:
– Because it is trendy…
– And now everyone uses…
- So how to get SAI?
You can download Paint tool SAI here (I share SAI version 1.1.0, although it is not the latest but very stable use):
After unpacking, you choose the installation file:
After installation, the screen will appear green icon like this:
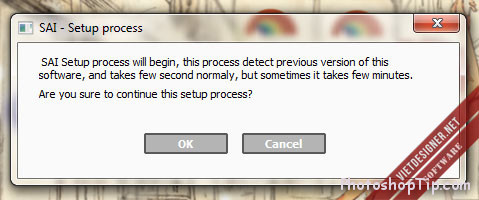
Double click to open SAI, will appear message:
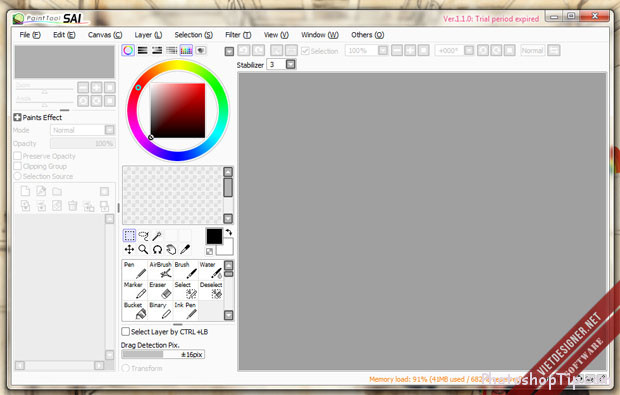
Select OK and wait for the scan engine (quick, it only takes a few seconds). SAI screen appears, you have successfully installed.
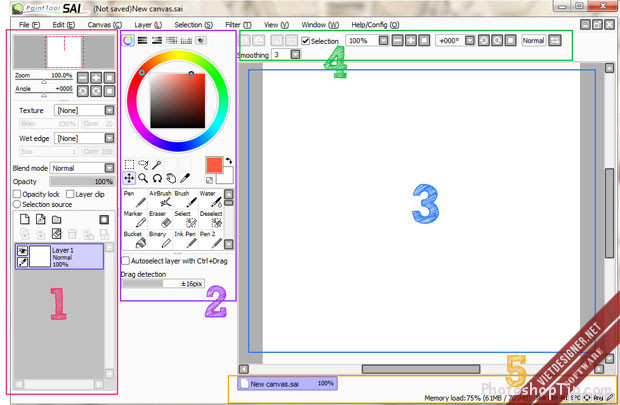
- Interface and tools:
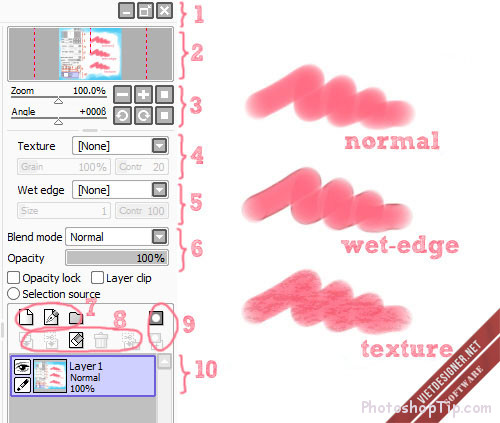
- Layer Panel :
1. From the left: hide, collapse, close the file is working.
2. Preview window.
3. Zoom in, zoom out and rotate the image.
4. Texture – insert texture for the image.
5. Wet edge – creates a bold outline of the outline, creating a water – like effect.
6. The blend mode and adjust the opacity is similar to photoshop.
7. From left : create new layer, create new vector layer, create new group.
8. From left:
+ Move the image from top to bottom layer.
+ Put the layer above the layer below it.
+ Remove all drawings on the layer.
+ Delete the layer.
+ Put the layer above the layer below it but keep the layer mask layer.
9. Create a mask.
10. Layers.
- Color and Tool panel:
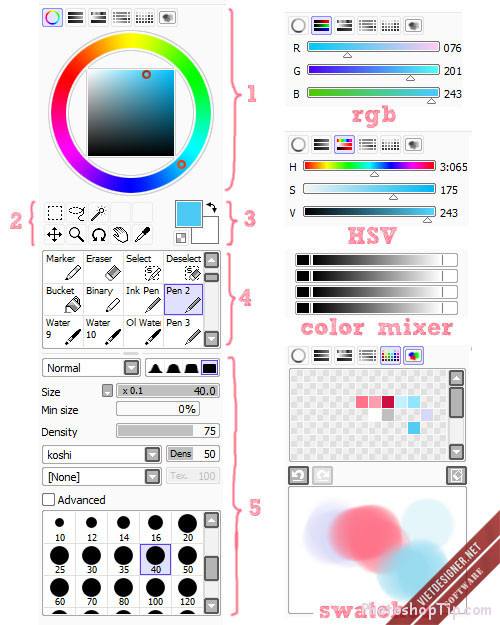
2 – Selection, magic wand, move, zoom,…
3 – Background and foreground color (press X to change).
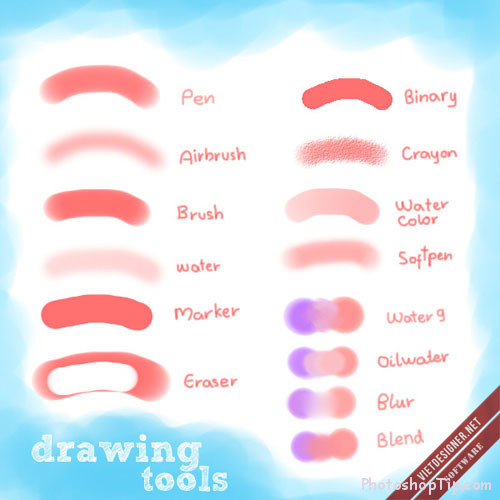
4 – Tools of SAI.
5 – Tool adjustment parameters (size, density, texture,…).
- Main working region :
1 – Undo, redo.
2 – Select, deselect.
3 – Zoom (zoom in, zoom out the picture).
4 – Rotate image.
5 – Smoothing level.
- Layer vector:
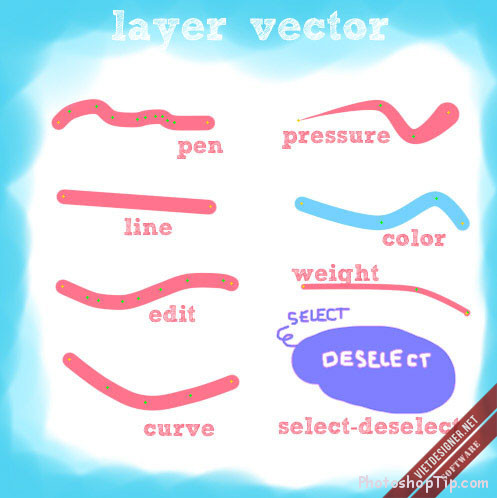
This is the most attractive for those who do not have a tablet or lazy ink painting and scan (like me). The vector layer allows you to easily stroke and sharpen the stroke, simply and easily.
Edit: allows editing, creating curves for the stroke (can be used as pressing Ctrl drag the mouse).
Pressure: create a lightness like hand-drawing, press and drag to the right to create a small stroke, drag to the left to create a bold.
Color: Click on the line to change the line color to the foreground color.
Weight: change the width of the line.
I recently introduced the features and interface of the Paint tool SAI, you can experience more about it! After writing an introduction to SAI, I will continue to introduce tutorial on how to use SAI, you remember welcome and enthusiastic support offline!!


