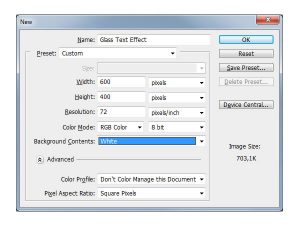
Step 1: Firstly, we create a new file in Photoshop with resolution 600 x 400 pixel in RGB mode, 720 pdi and white background color.
Step 2: After creating white background, go to Menu > Layer > Layer Style > Blending Option and set as shown below. In this tutorial, I use the pattern numbered 31. However you can apply any other pattern to make a wonderful background in your style.
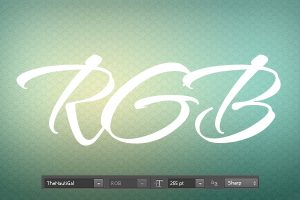
Step 3: Next, create a text “RGB” with size about 255 pt and set it in Sharp Mode.
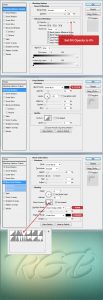
Step 4: This text layer would be at the bottom of all. Go to Menu > Layer > Layer Style > Blending Option and follow the setting looks like the instruction below.
Step 5: Make second text layer by going to Menu > Layer > Duplicate layer and name it “RGB 2”. Next, go to Menu > Layer > Layer style > Clear Layer Style to remove the settings of “RGB 2” and do almost similar to Step 4 to make a different style for your layer.
Step 6: Follow the same instruction like step 5 and use settings as shown below.
And here is the finally result:

